
適合誰使用
使用 WooCommerce 的網站管理員與店家客服,需要手動處理或編輯訂單者
開始前準備
- 訂單須為「pending」(等待付款)或「on hold」(保留)狀態,才能編輯商品、費用、優惠券、運費等細節
- 套用優惠券前需先知道優惠券代碼
教學內容
訂單詳情頁面總覽
單一訂單頁面可讓你檢視、編輯與更新訂單資料,包含變更訂單狀態、編輯商品項目、套用優惠券與新增費用等
新增費用時可輸入金額或百分比,負數費用會在其他項目間分攤稅金,但不會讓購物車總額低於零
一旦訂單進入 processing 或之後的狀態,就無法再編輯訂單細節
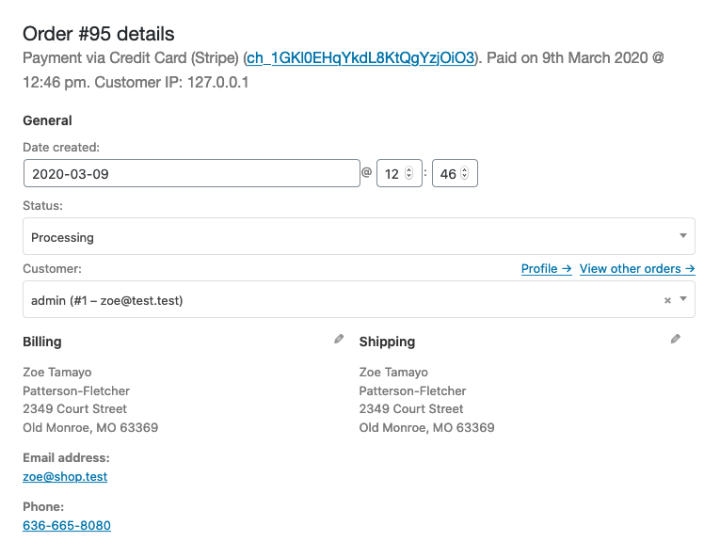
Order Details 面板:編輯客戶與帳單資訊
Order Details 面板包含訂單編號、付款詳情、日期時間、訂單狀態及客戶帳單與運送資料
Billing 欄位可編輯帳單地址、Email、電話與付款方式,也可選擇 Load billing address 從客戶檔案載入

- 點選各標題旁的鉛筆圖示(pencil icon)以編輯帳單或運送資訊
- 使用下拉式日期選單與時間數量選擇器變更訂單日期與時間
- 從下拉選單中選擇適當狀態以變更訂單狀態
- 完成修改後,點擊 Order actions 區塊中的 Update 按鈕儲存訂單
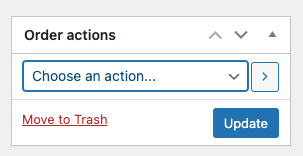
官方文件介面截圖:Order actions metabox with the Update button.
Order Items 面板:商品、運送與費用總覽
每個商品項目列會顯示商品圖片、名稱、單價、數量、總額(已計入折扣)與稅金
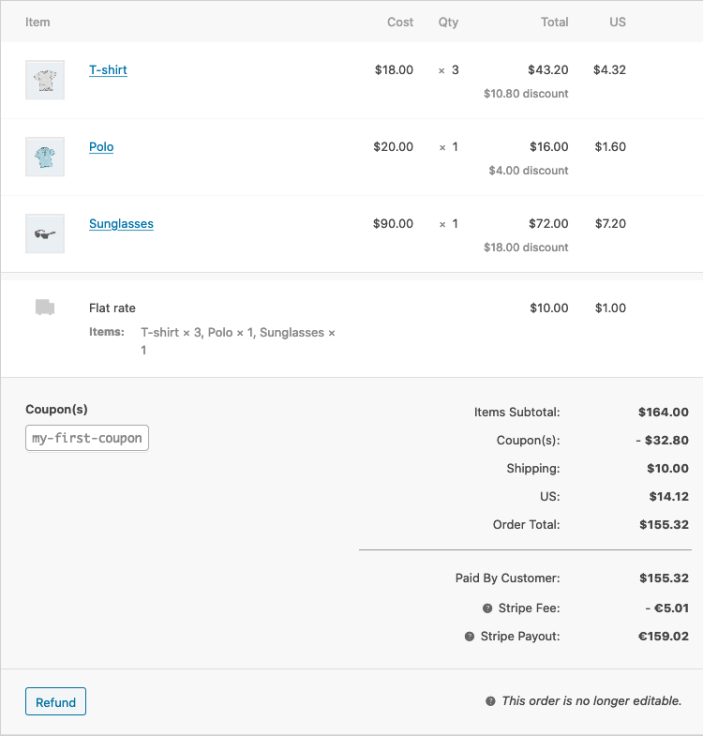
每筆訂單只能接受一次付款,若客戶已付款後需追加商品,應建立新訂單而非修改原訂單
除退款外,只有在訂單狀態為 Pending payment 或 On hold 時才能編輯商品項目
- 點選商品項目旁的鉛筆圖示以進入編輯模式
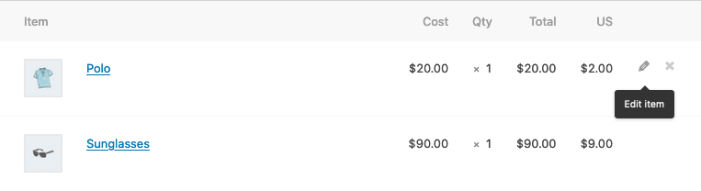
官方文件介面截圖:Pencil icon next to a product line item used to enter edit mode. 
官方文件介面截圖:Action buttons at the bottom of the order items panel: Add item(s), Apply coupon, Refund, and Recalculate. - 點選 Add item(s) 展開新增選項,包含 Add product(s)、Add fee、Add shipping、Add tax 等
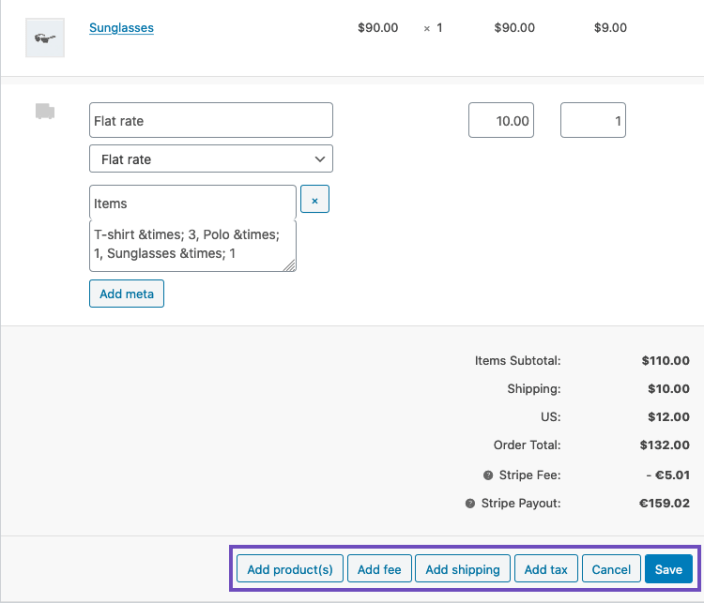
官方文件介面截圖:Expanded Add item(s) options showing Add product(s), Add fee, Add shipping, Add tax, Cancel, and Save buttons. - 若客戶忘記輸入優惠券代碼,可點選 Apply coupon 開啟視窗套用優惠券
- 修改商品、優惠券或運送方式後,點選 Recalculate 依店家稅務設定重新計算稅額
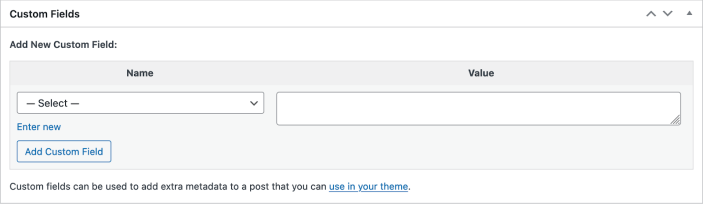
官方文件介面截圖:Custom Fields metabox on the order page.
訂單備註(Order Notes)的三種類型
System notes(紫色)由 WooCommerce 或外掛自動新增,例如付款成功或失敗,客戶看不到這類備註
General notes(灰色)由店家管理員或外掛新增作為內部參考,客戶看不到但可能收到狀態變更通知信
Customer notes(藍色)是特別寫給客戶的備註,客戶會透過 Email 收到並可在 My account 中查看
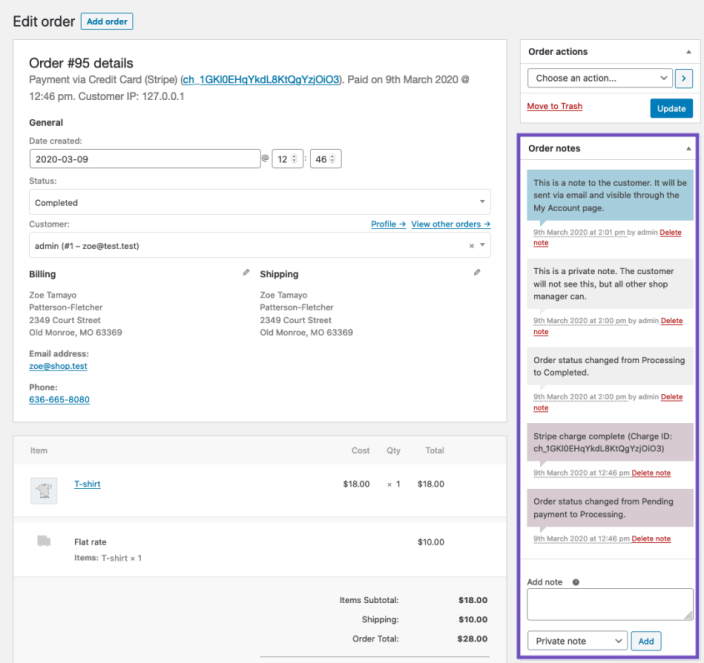
- 在文字區塊輸入備註內容,部分 HTML 標籤(如 a 標籤超連結)可使用
- 從下拉選單選擇 Private note 或 Note to customer
- 點擊 Add 按鈕新增備註
手動新增訂單
手動新增訂單適用於電話訂購、代客戶下單或測試用途
- 前往後台 WooCommerce > Orders
- 點選頁面上方的 Add order,會出現單一訂單頁面
- 輸入客戶資料、新增商品項目、套用優惠券與費用,並計算總額
- 設定新訂單狀態,若客戶需要付款,選擇 Pending payment
- 點擊 Save 儲存訂單
- 開啟 Order actions 下拉選單,選擇 Email invoice / order details to the customer 傳送付款連結
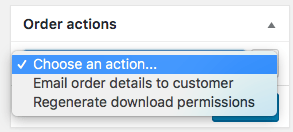
官方文件介面截圖:Order actions dropdown showing the option to email invoice and order details to the customer.
客戶付款連結的運作方式
若訂單指派給已註冊的客戶帳號,只有該客戶登入後才能付款
若非指派客戶(包含管理員)開啟付款連結,系統會顯示「This order cannot be paid for」訊息,此為正常行為
若訂單未指派客戶帳號(設為 Guest),付款連結不需登入,但系統可能會要求驗證帳單 Email 以確認身分
介面名稱對照
Order actions:訂單頁面中用來儲存訂單或寄送發票通知等操作的區塊Add item(s):新增商品、費用、運送或稅金項目的按鈕,點選後展開六個選項Recalculate:依店家稅務設定與客戶地址重新計算訂單稅金的按鈕Pending payment:表示訂單等待客戶付款的狀態On hold:訂單保留中的狀態,此狀態下仍可編輯訂單細節Load billing address:從客戶檔案載入帳單地址至訂單的功能Custom Fields:WordPress 核心功能,可在訂單中新增自訂欄位資料Guest:訂單未指派給任何已註冊客戶帳號時的設定