
適合誰使用
使用 WordPress 並想以 Gmail 或 Google Workspace 信箱穩定寄送網站郵件的網站管理員
開始前準備
- 需擁有可存取 Google Cloud Console 的 Google 帳號(Gmail 或 Google Workspace)
- 已在 WordPress 後台安裝並啟用 FluentSMTP 外掛
教學內容
在 FluentSMTP 選擇 Gmail/Google Workspace 連線
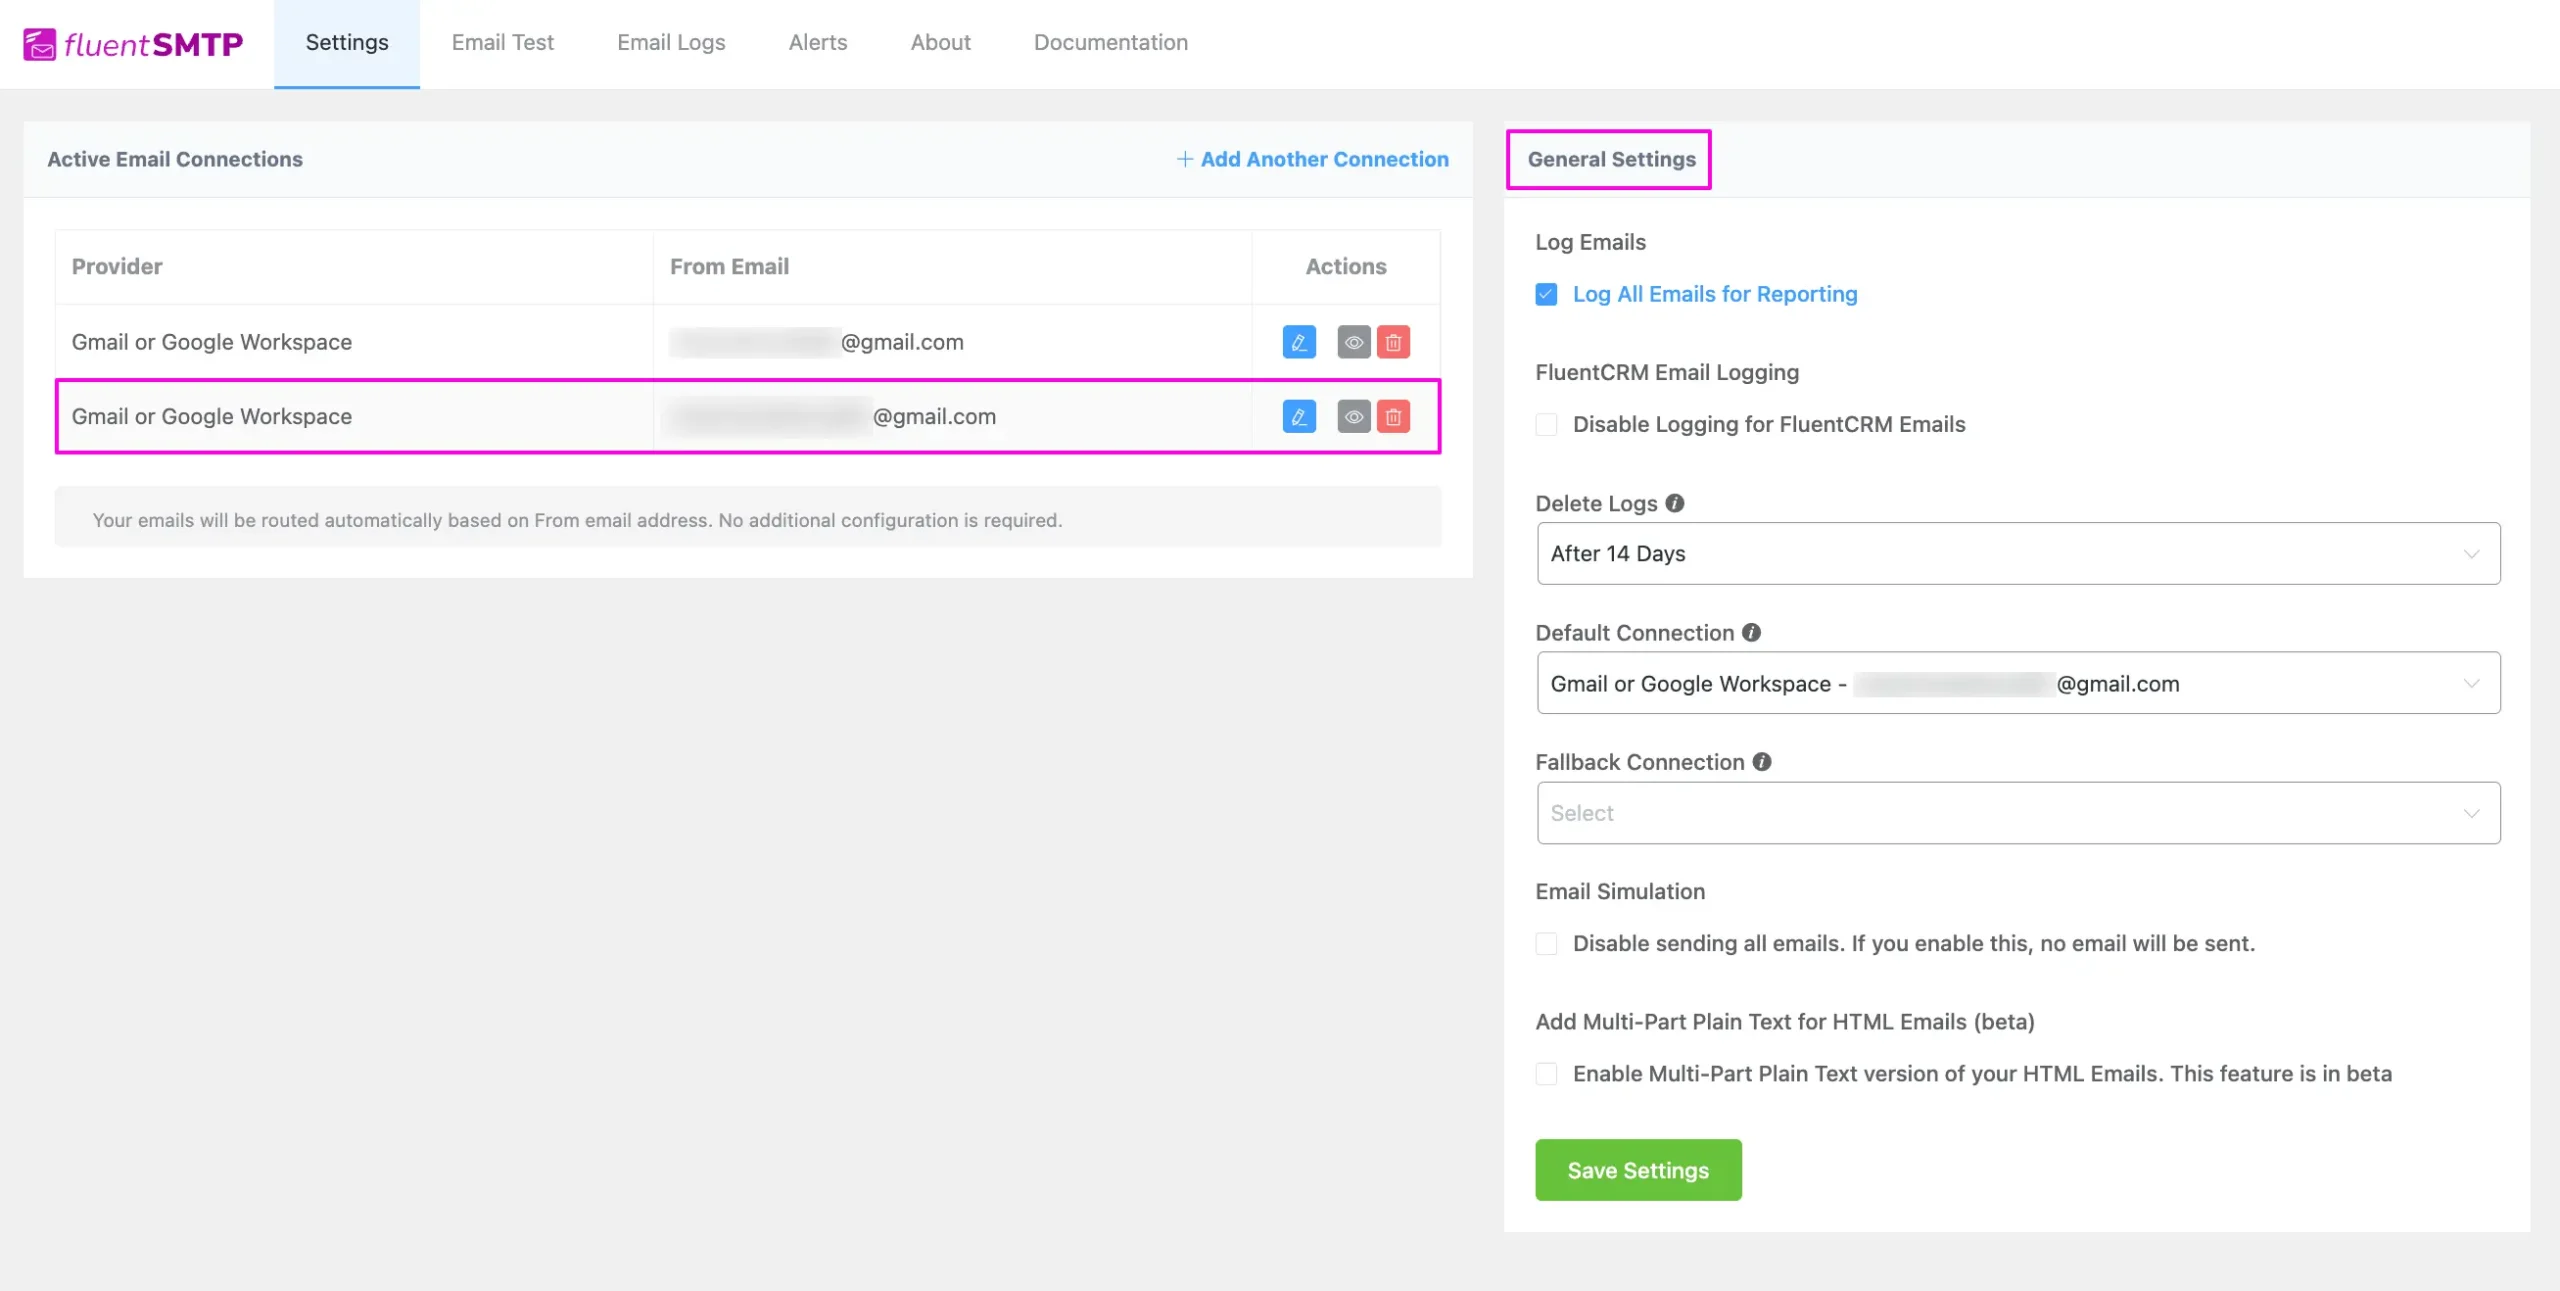
FluentSMTP 可設定多種郵件傳送方式(連線),日後可透過 Mail From 位址切換使用
- 從 WordPress 後台左側選單前往
Settings中的FluentSMTP,在Connection Providers選擇服務供應商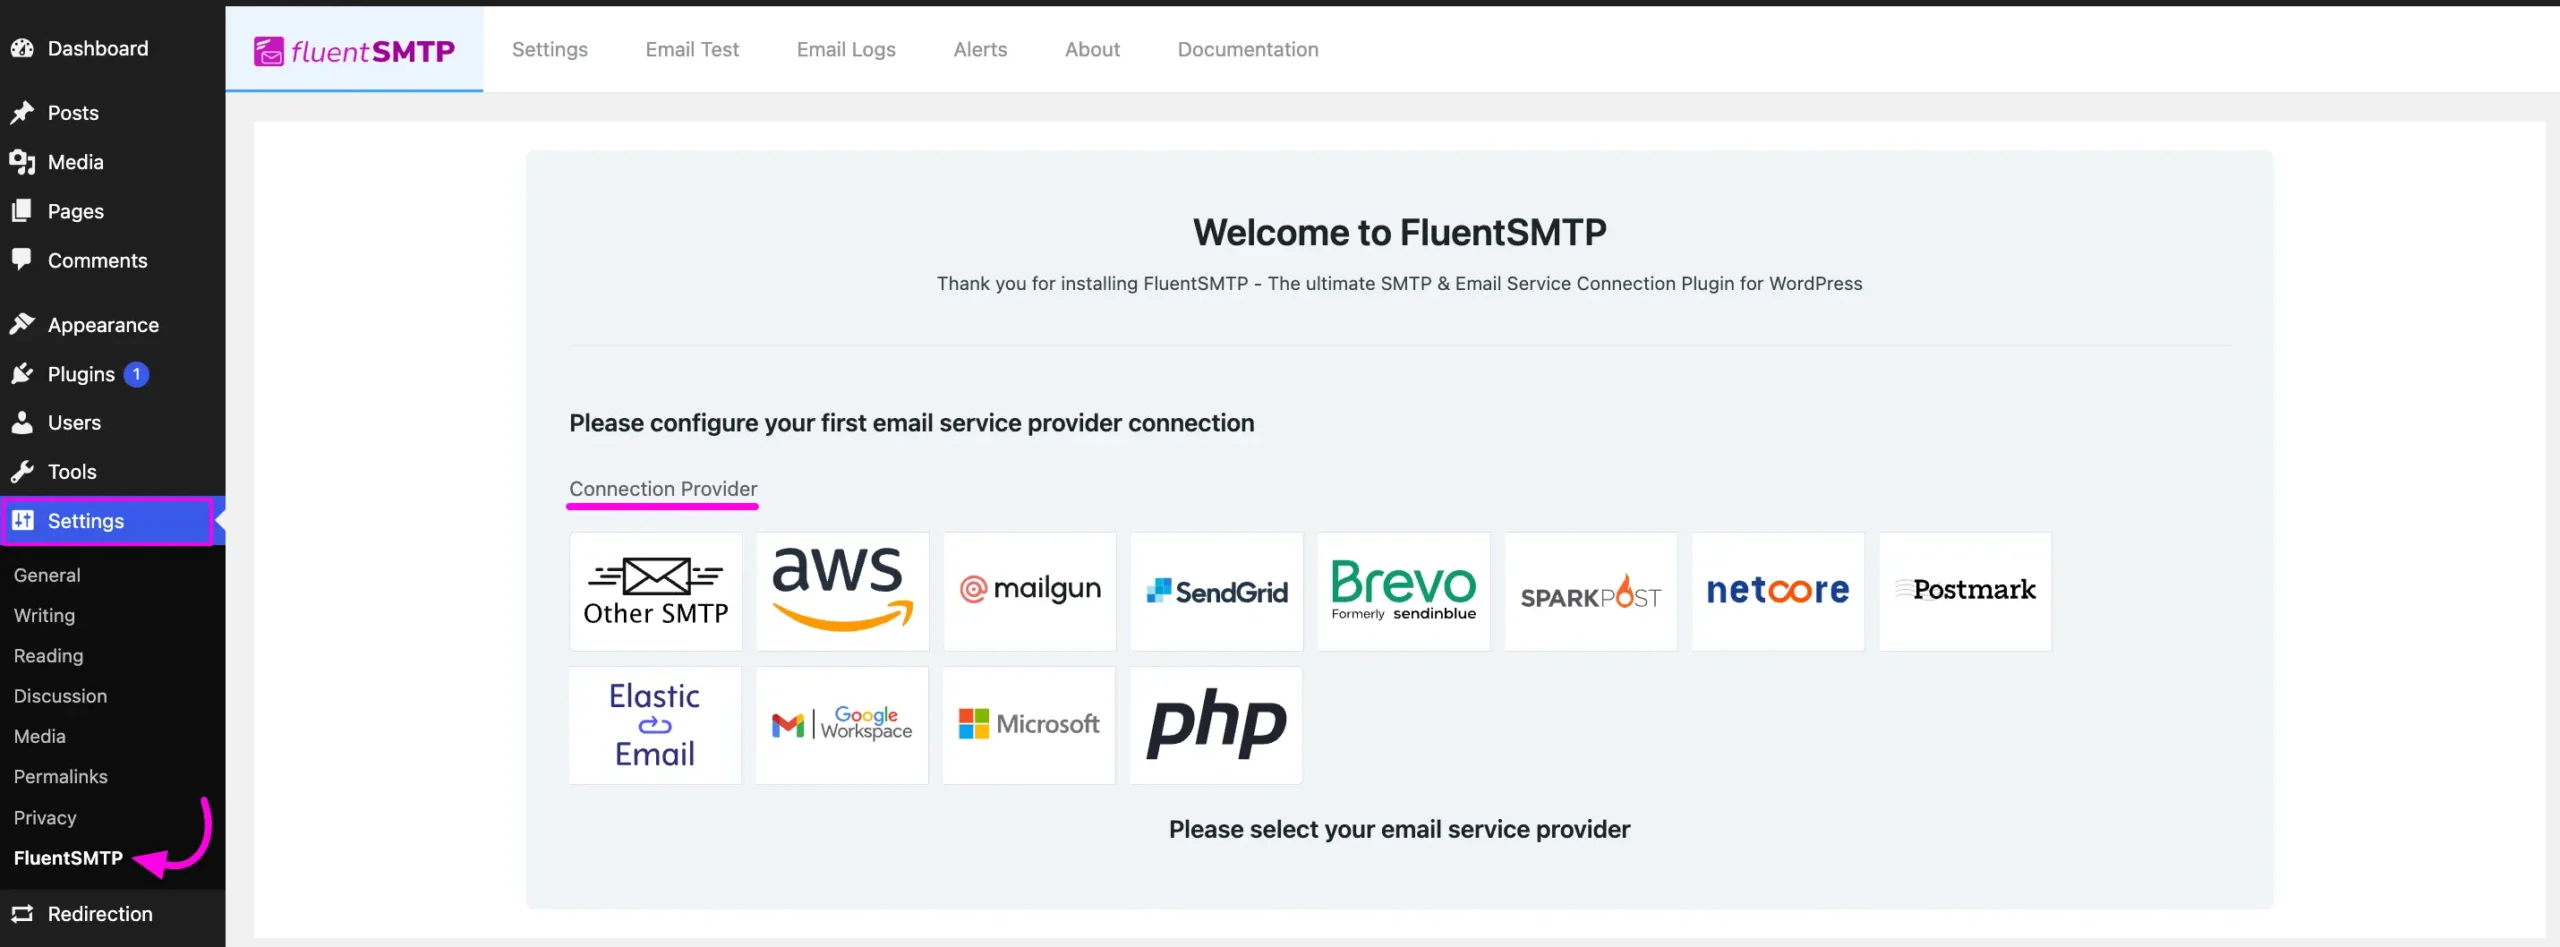
官方文件介面截圖:Fluent SMTP dashboard - 若已設定過其他連線,可在
FluentSMTP Navbar的Settings區點選+ Add Another Connection按鈕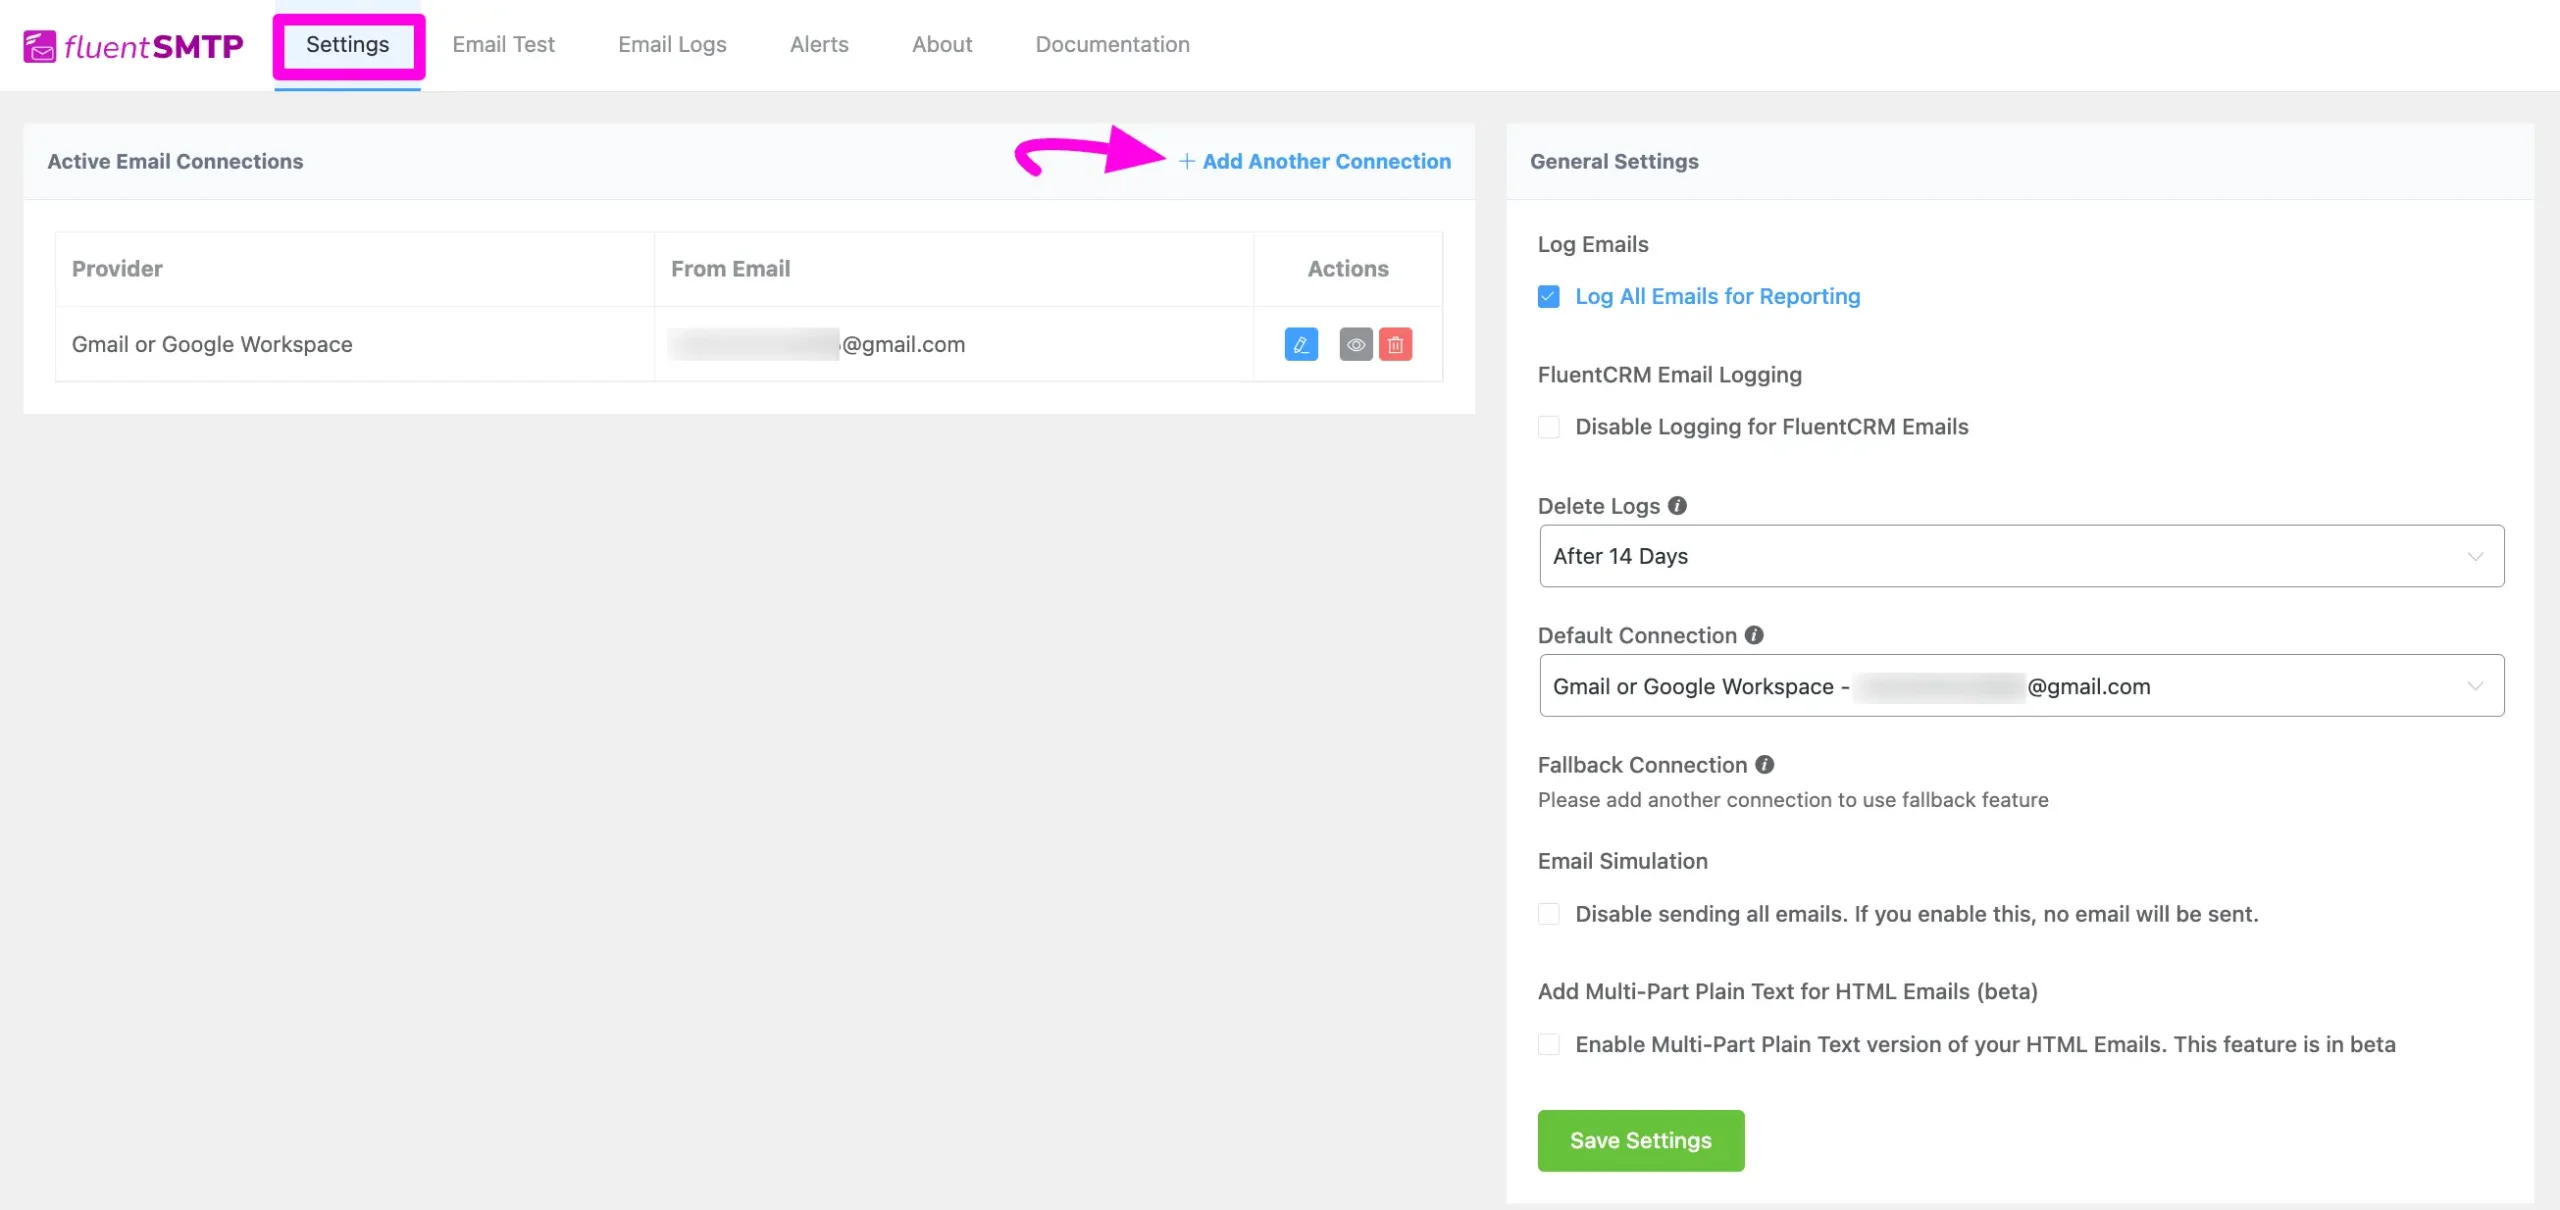
官方文件介面截圖:+Add Another Connection button - 點選
Gmail/Google Workspace分頁以連接此供應商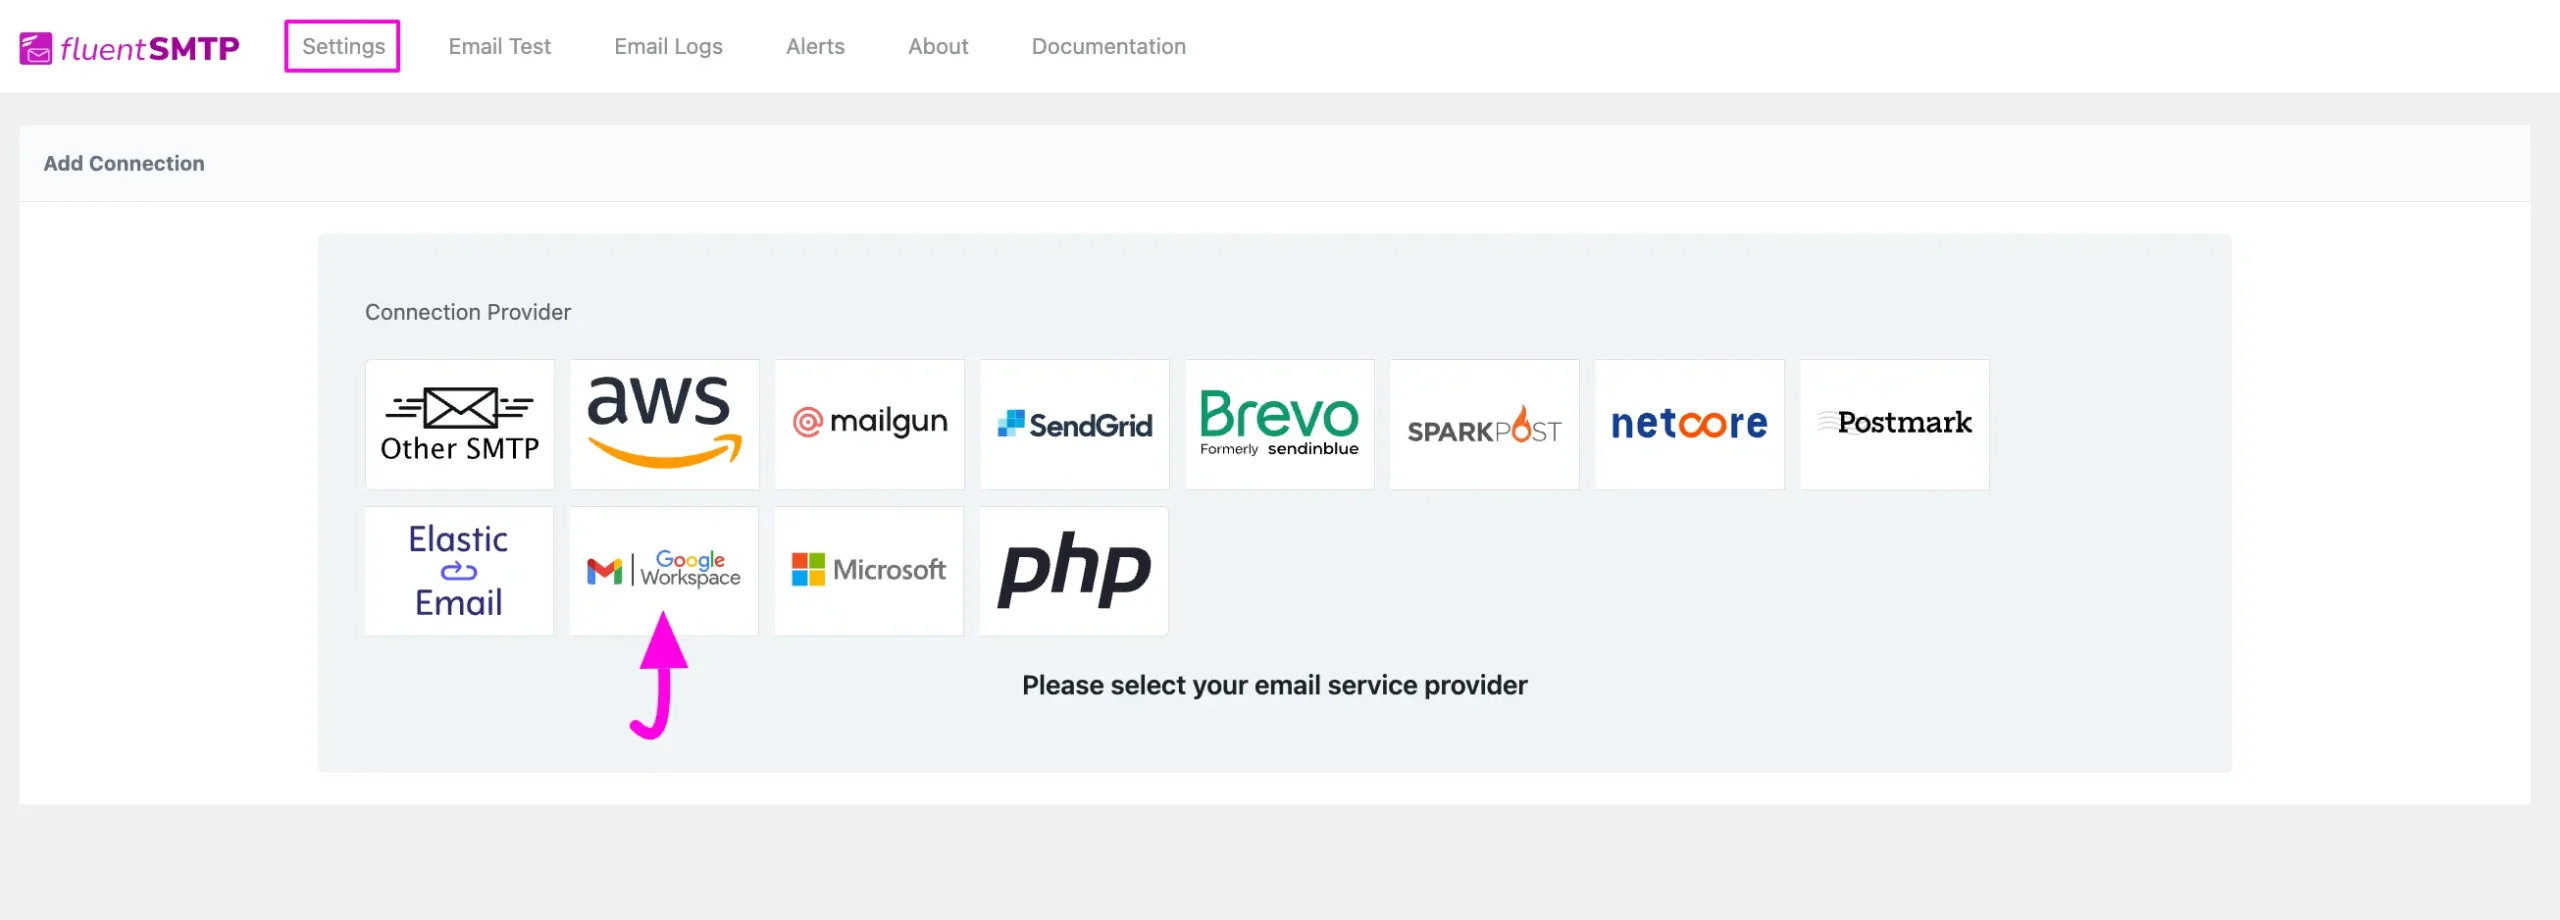
官方文件介面截圖:Google Workspace tab - 在
Add Connection頁面填寫From Email、From Name等欄位
填寫連線設定欄位說明
啟用「Set the return-path to match the From Email」後,若郵件因收件人問題退信,會寄到 From Email;未啟用則退信訊息可能遺失
Application Client ID 與 Client Secret 須從 Google Cloud Platform 取得,並對應用於此連線的 From Email
- 複製頁面上的
Authorized Redirect URL,稍後在 Google Cloud 建立憑證時會用到 - 填妥所有必要資訊後,點選
Authentication with Google & Get Access Token按鈕取得 Access Token - 完成後點選
Save Connection Settings按鈕,Gmail 或 Google Workspace 即完成與 FluentSMTP 的連接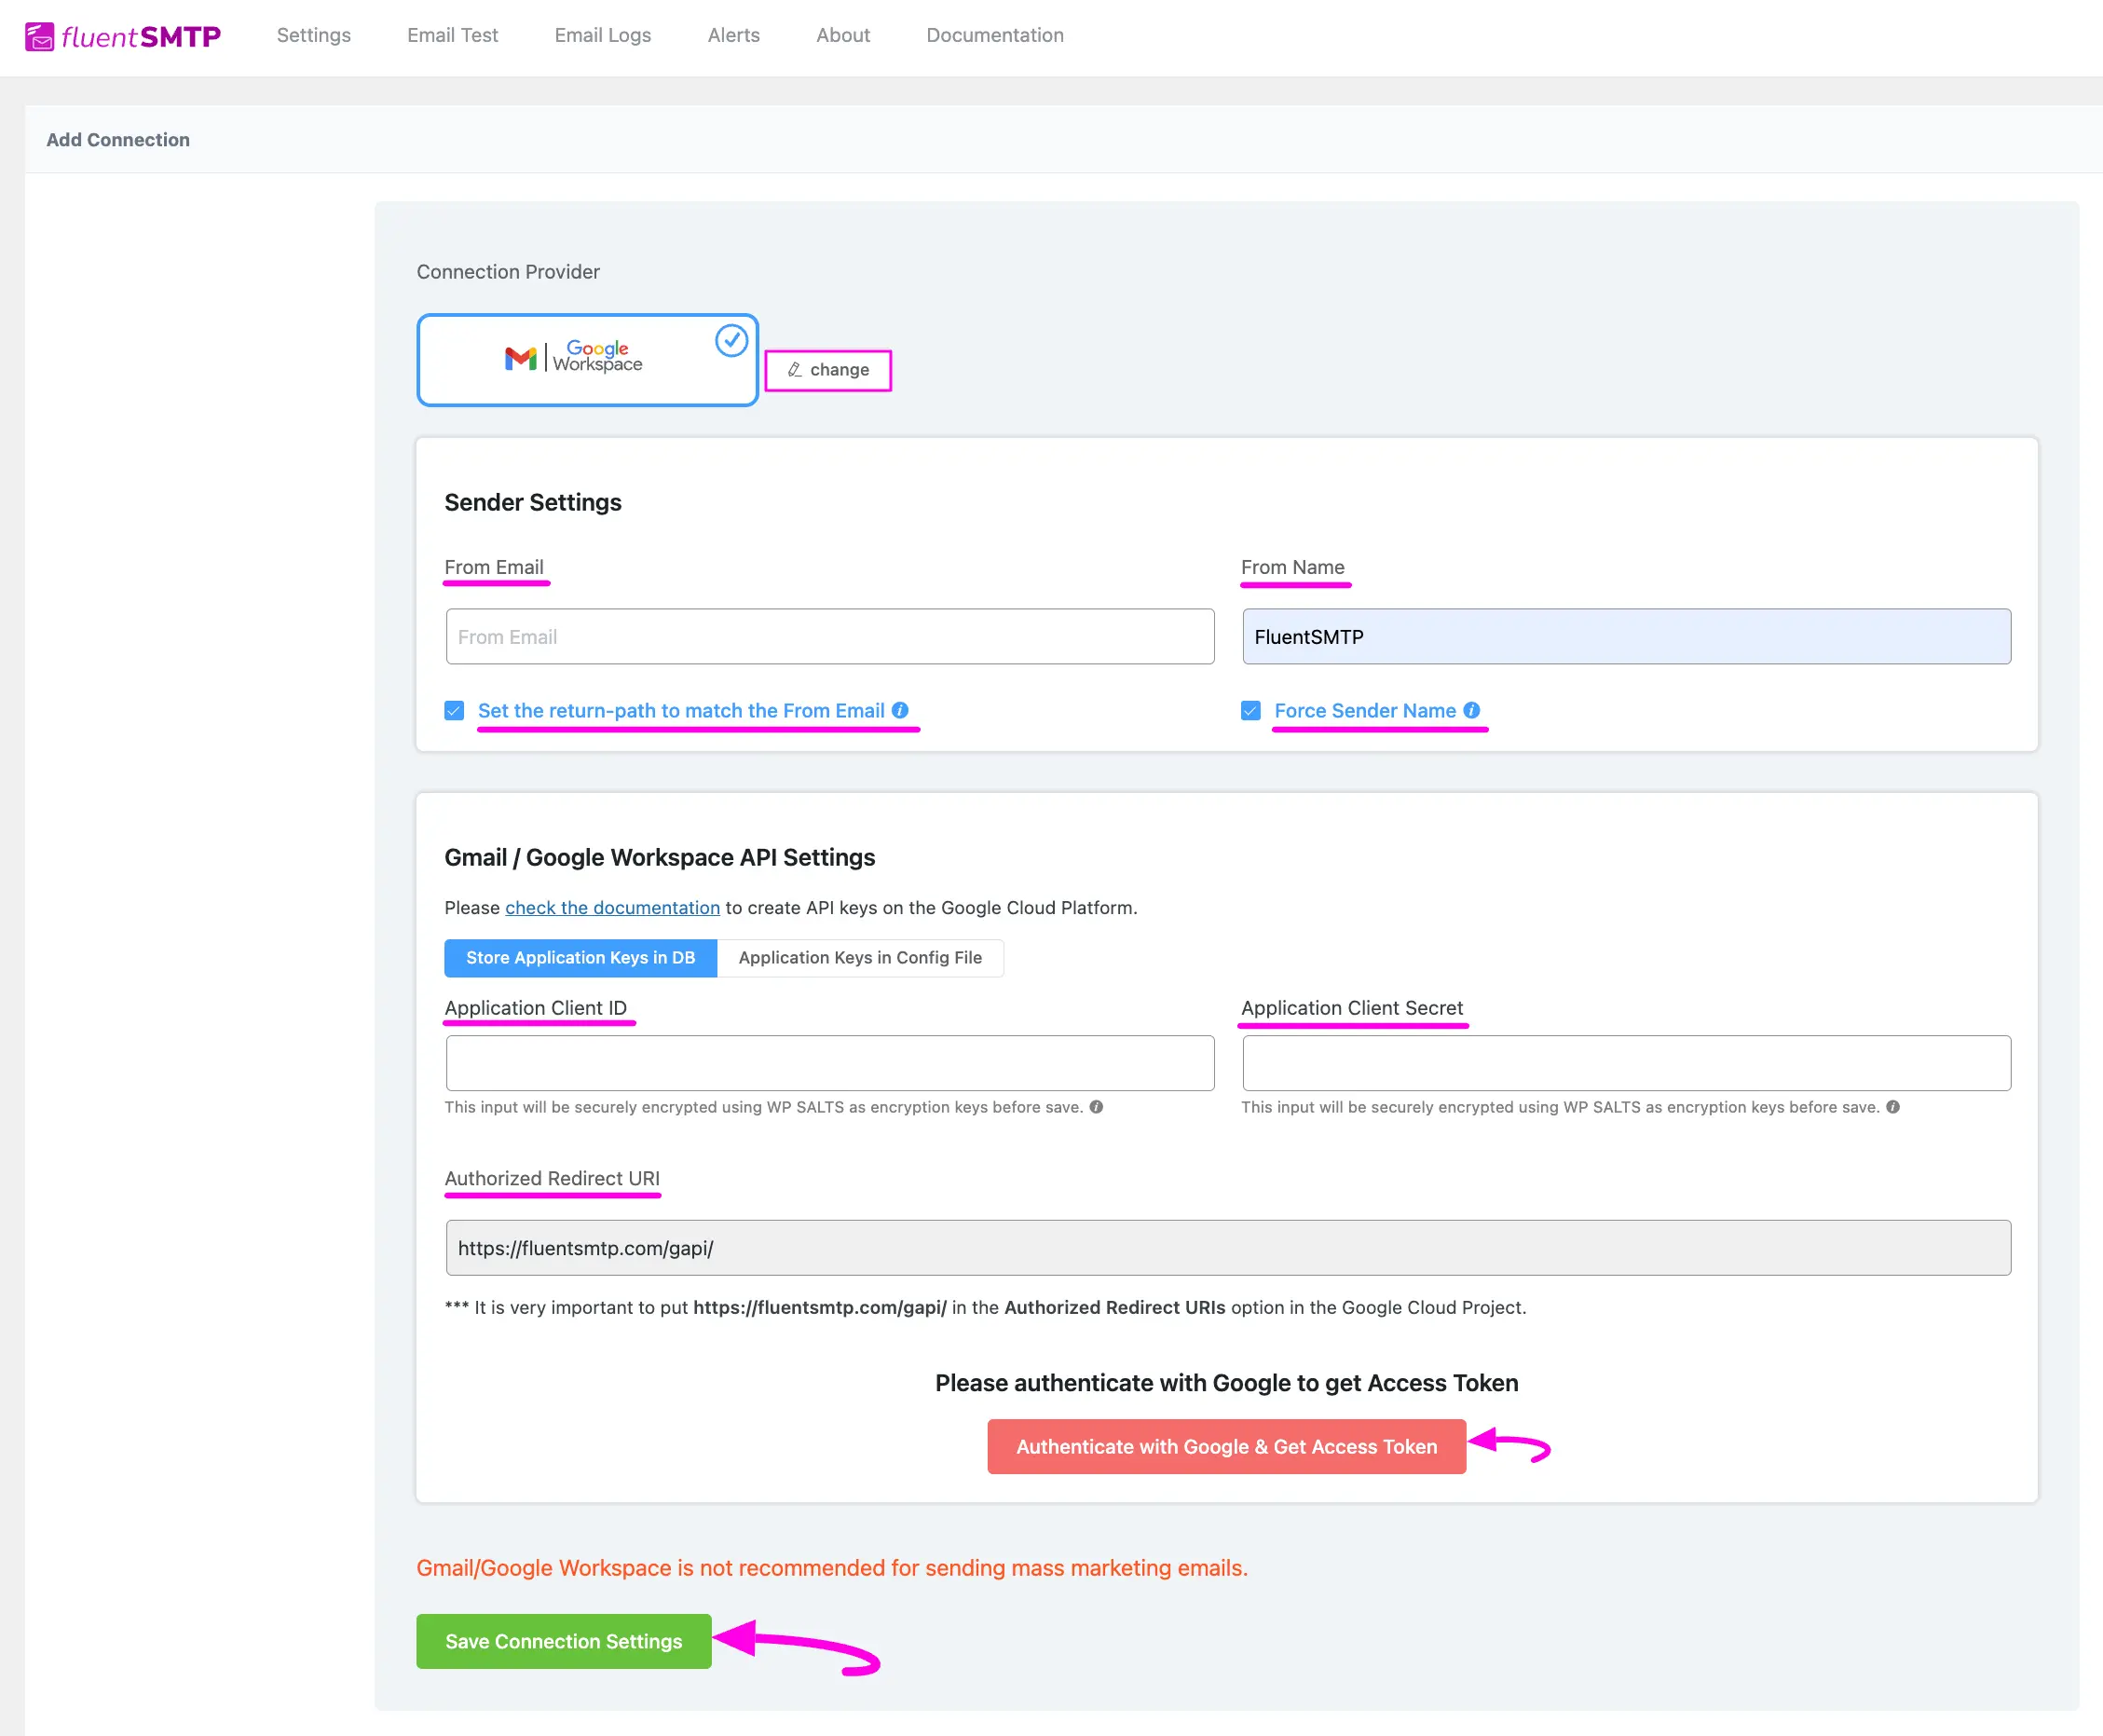
官方文件介面截圖:Add Connection Page
在 Google Cloud Console 建立新專案並啟用 Gmail API
首次使用 Google Cloud Console 可能會出現選擇國家與同意服務條款的視窗
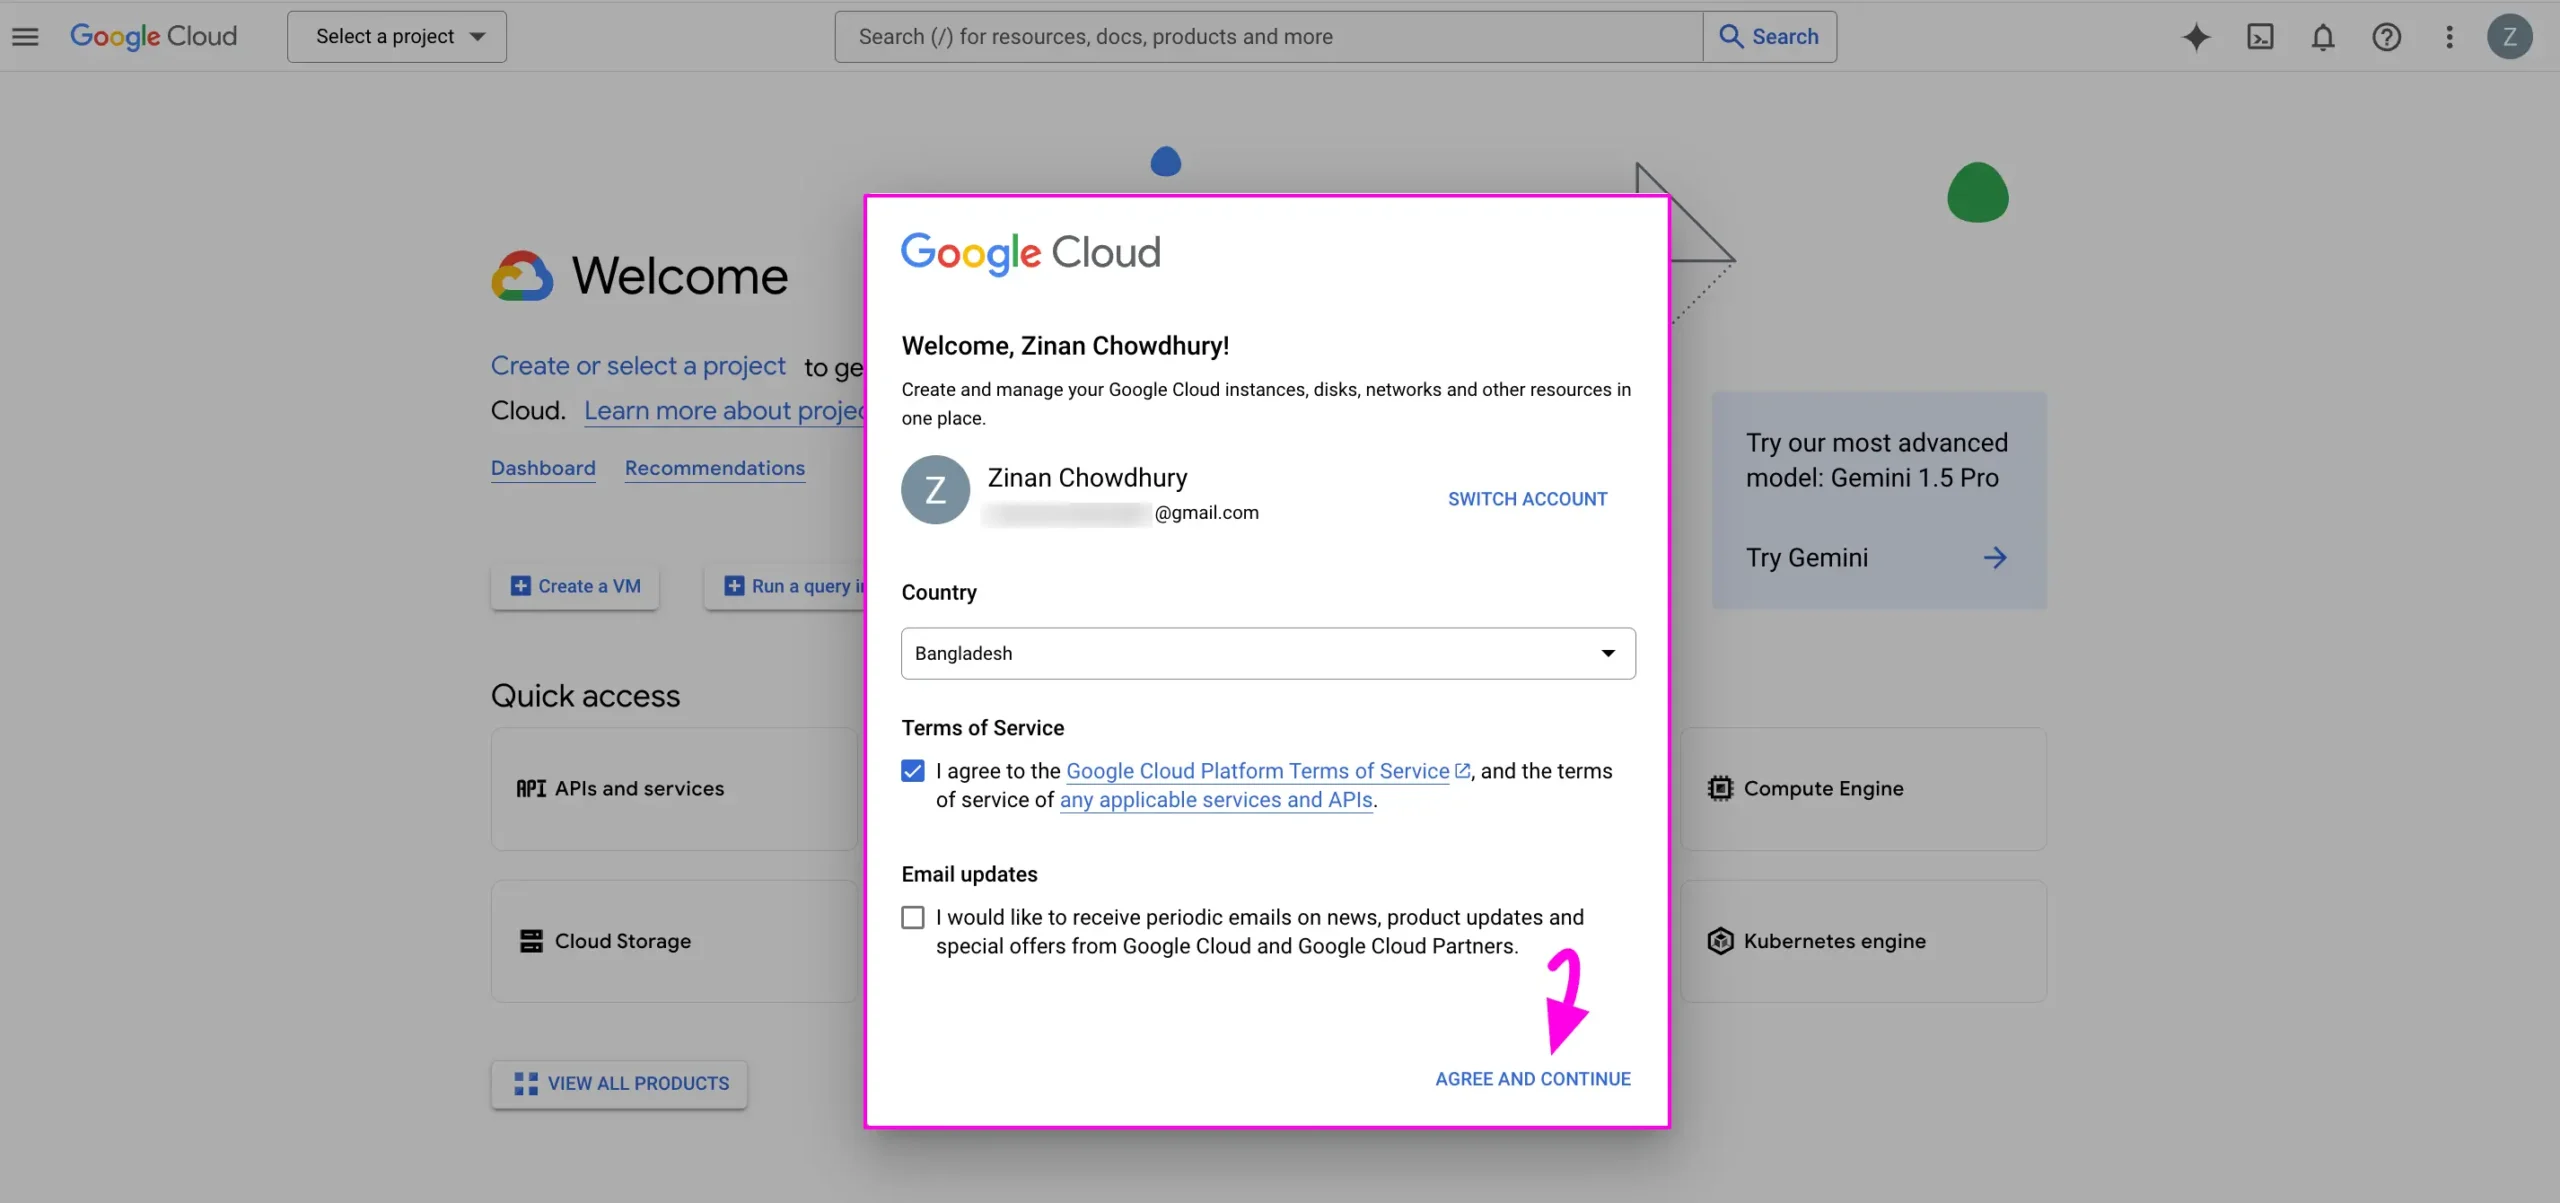
- 點選
Select a project下拉箭頭,於彈出視窗按下右上角的NEW PROJECT按鈕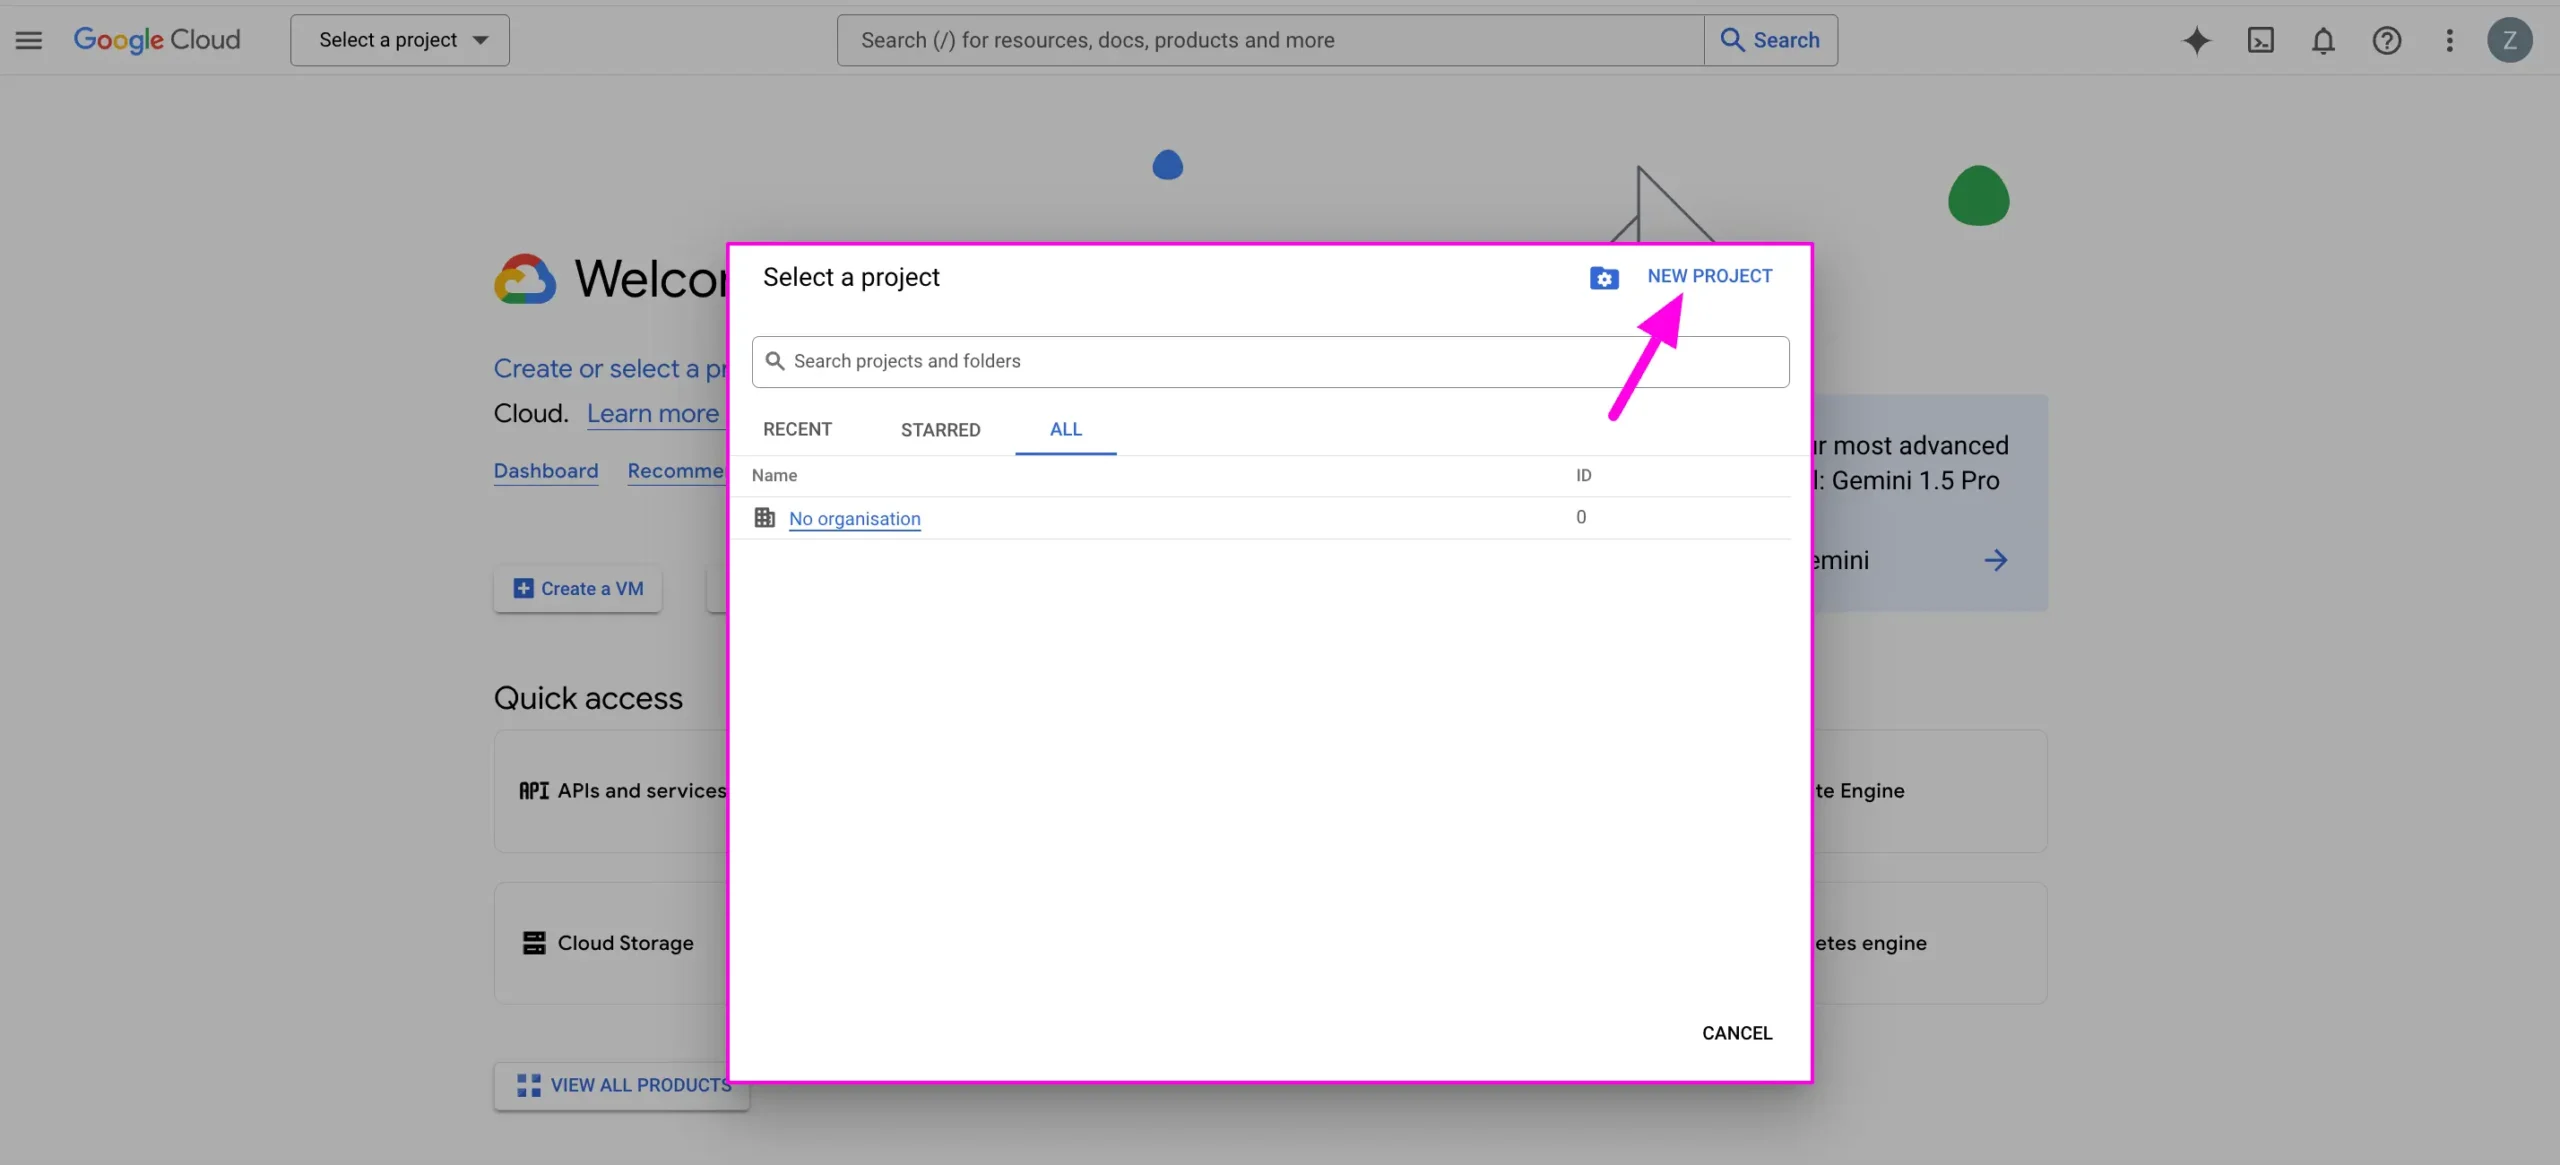
官方文件介面截圖:New project button - 輸入專案名稱(地點為選填),可點
Edit更改Project ID,再按CREATE按鈕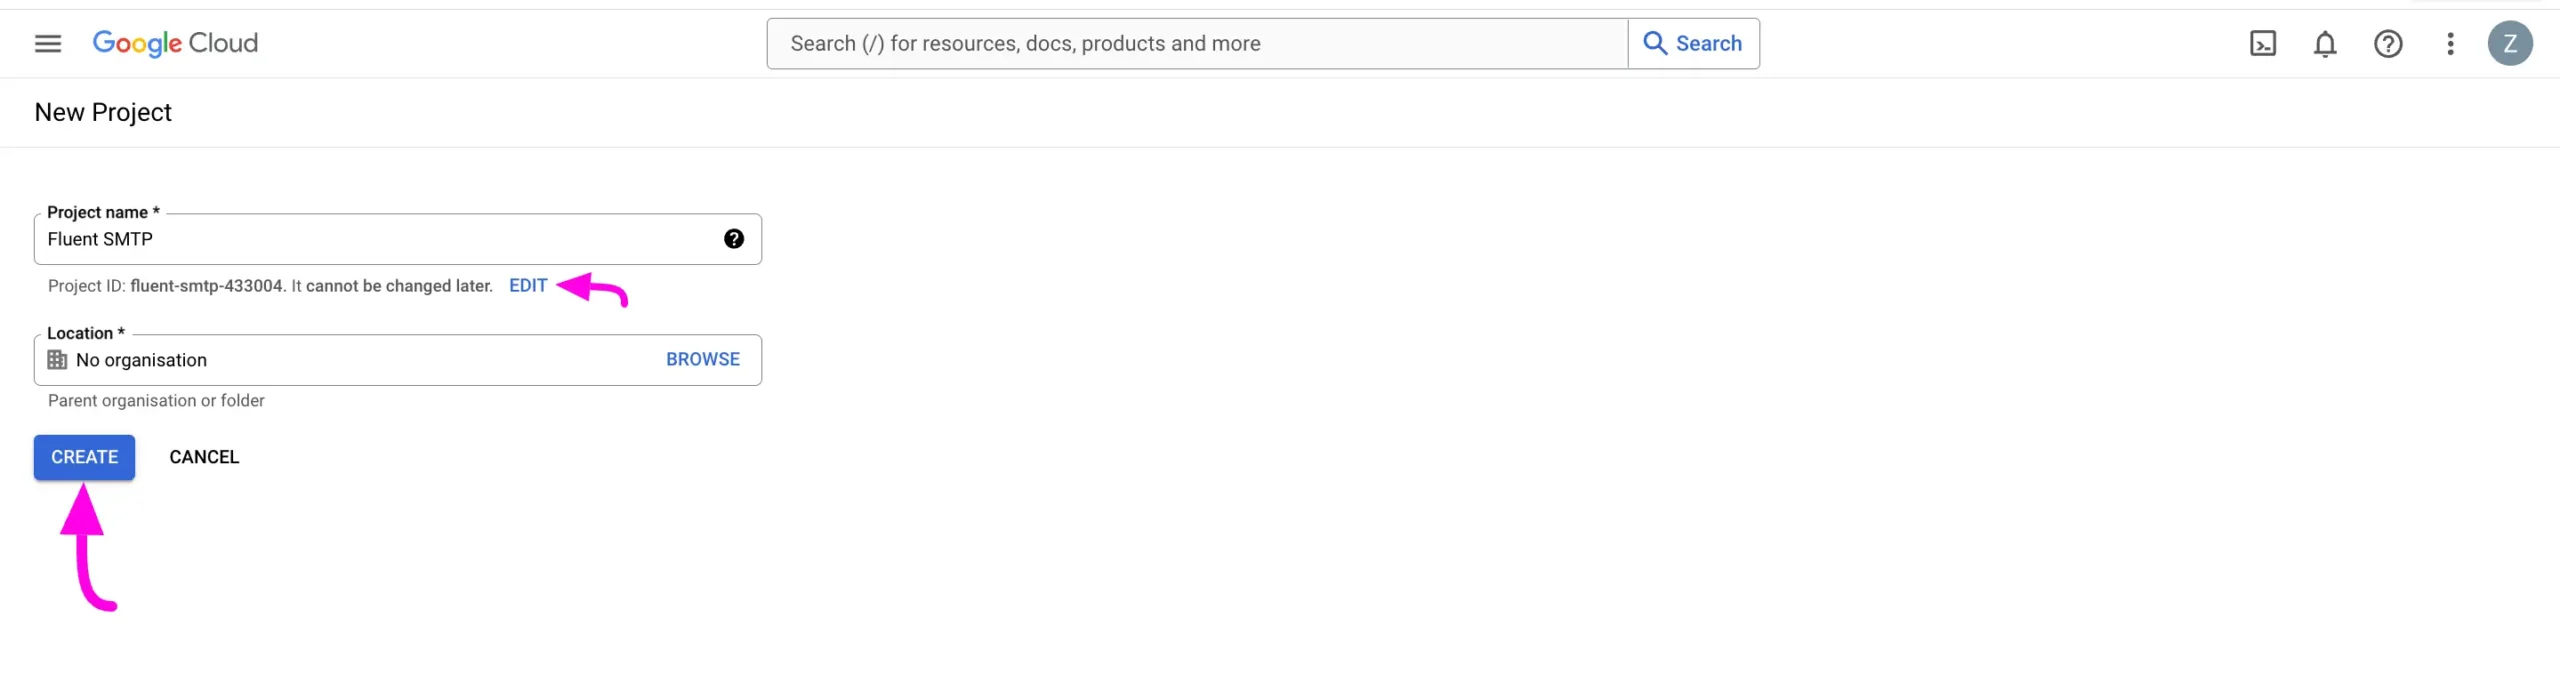
官方文件介面截圖:project name-location-Create button - 建立完成後點選
SELECT PROJECT按鈕以啟用 Gmail API 服務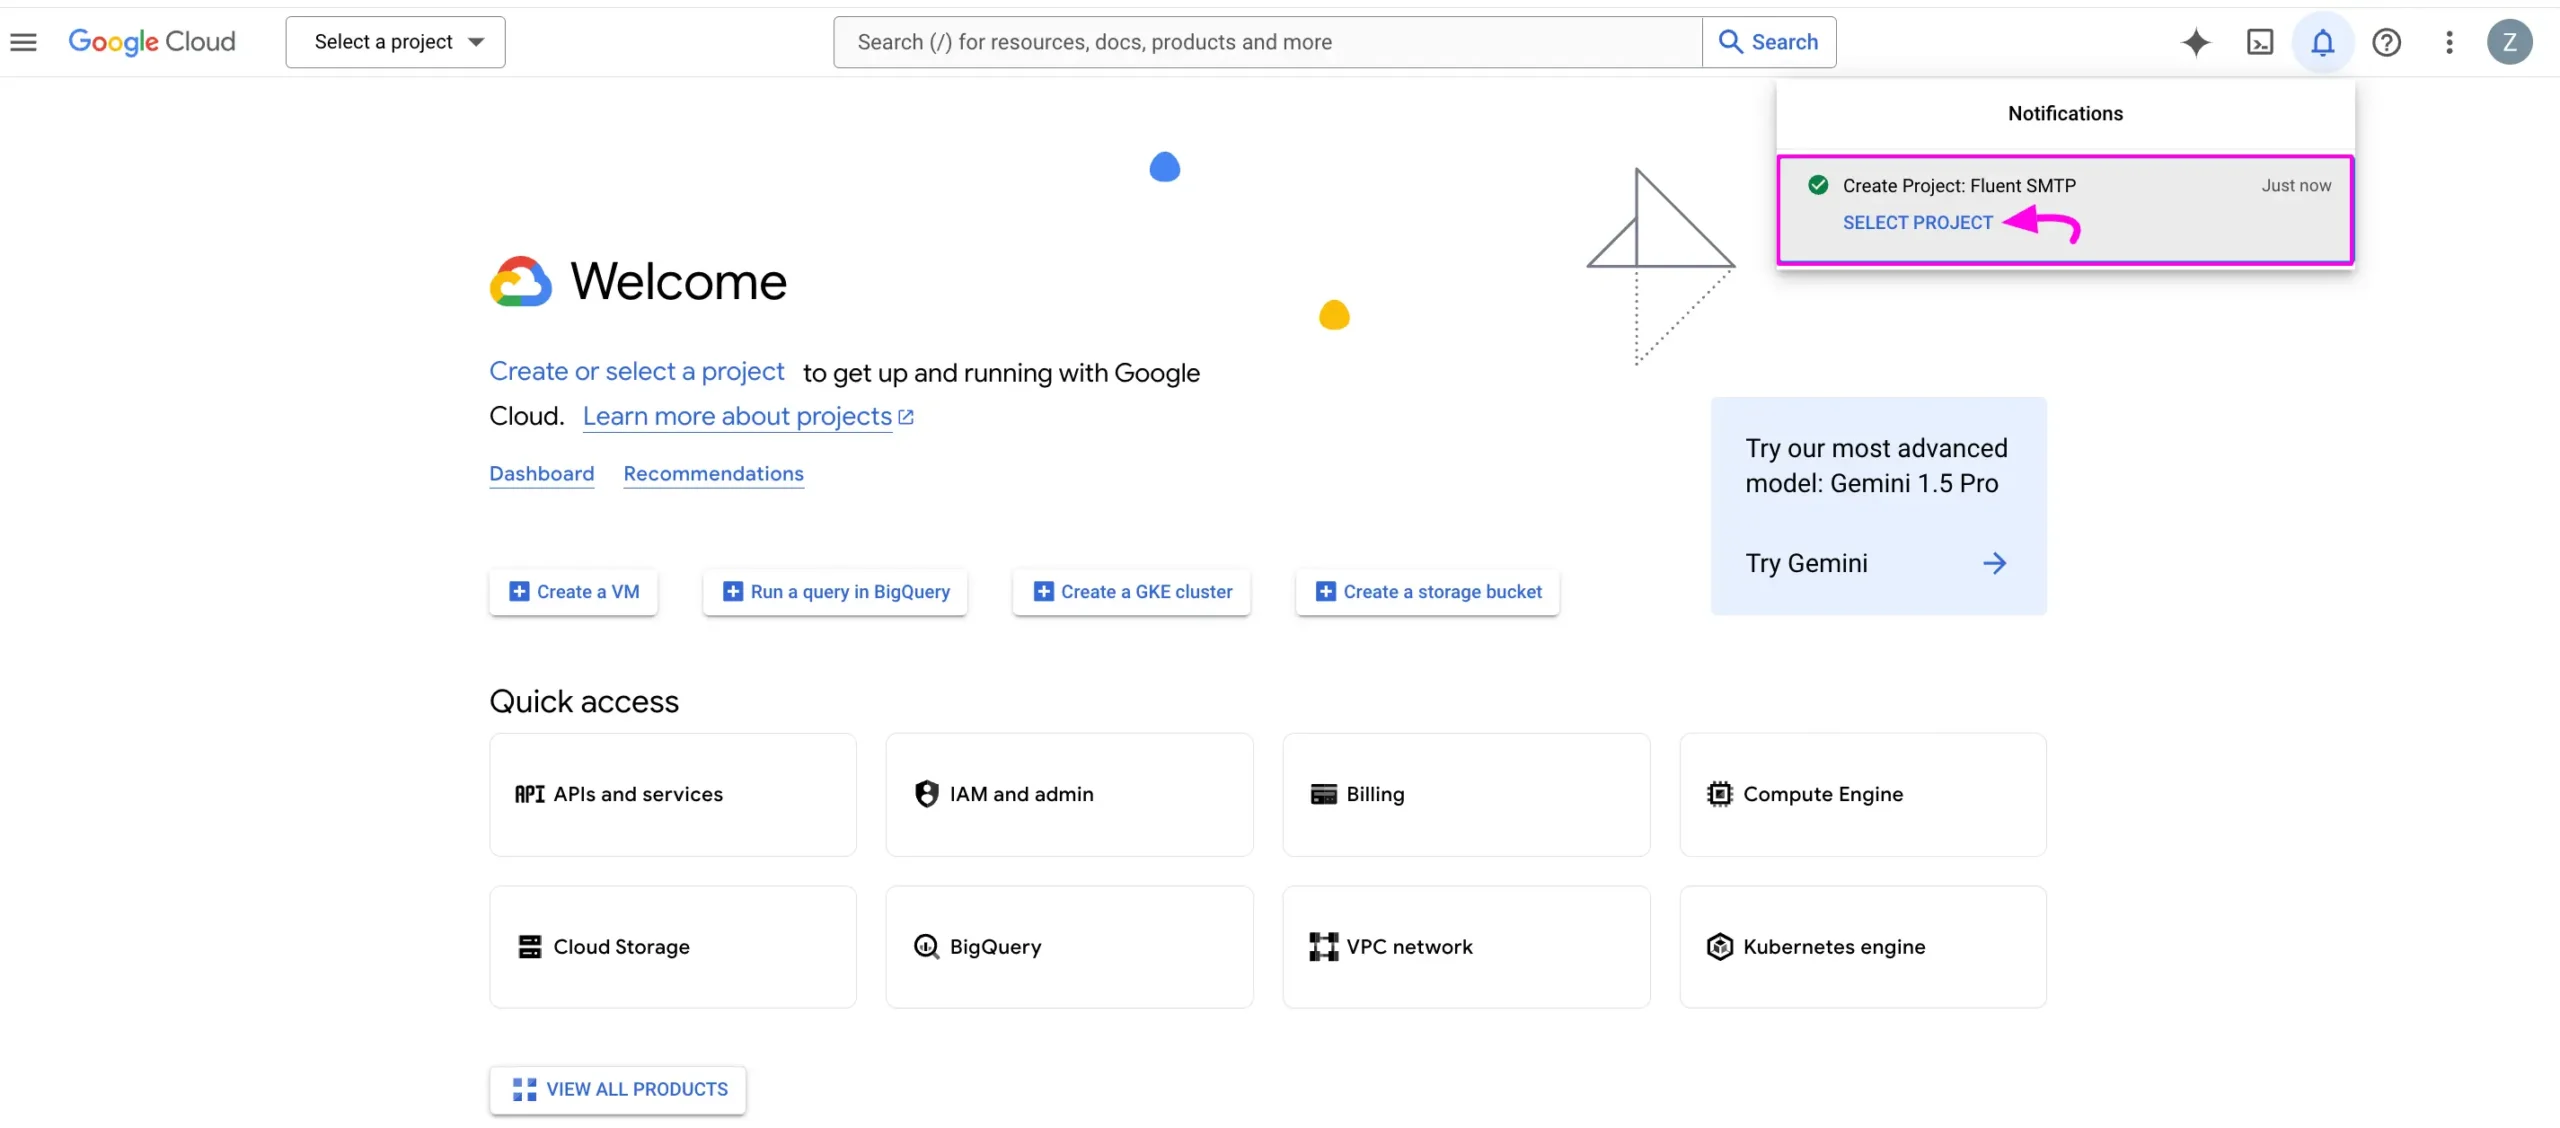
官方文件介面截圖:Select created project button - 在左側選單點選
APIs & Services箭頭圖示,再點Enable APIs & services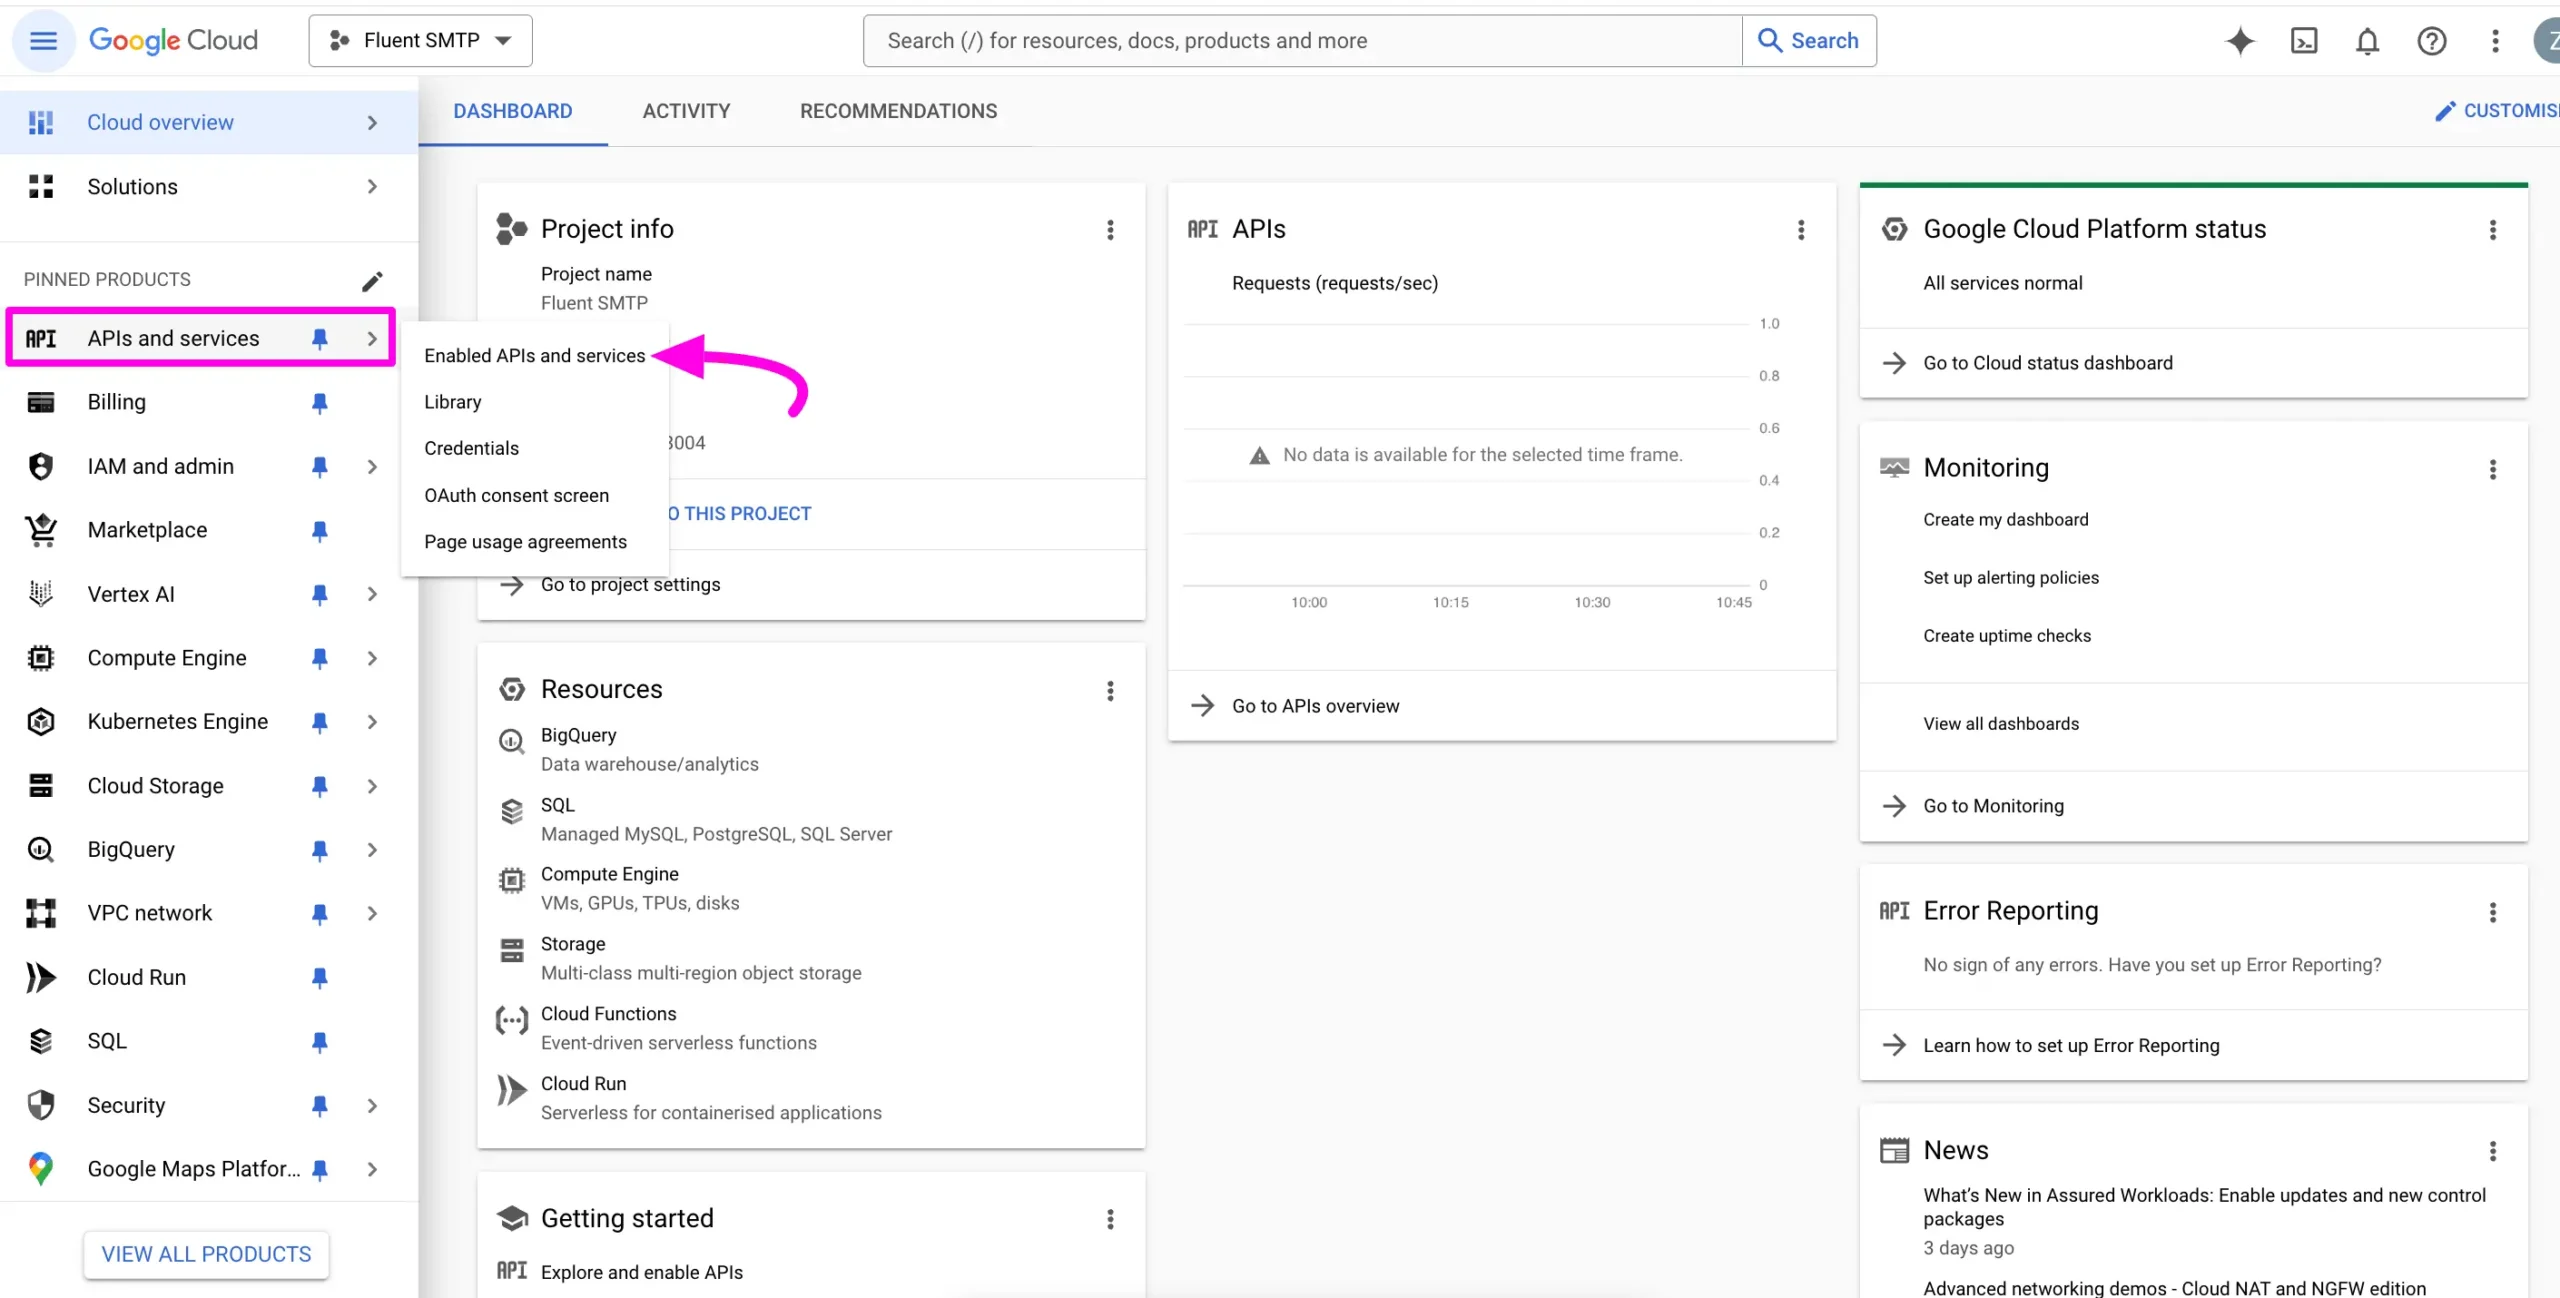
官方文件介面截圖:APIs & Services option from the left sidebar 
官方文件介面截圖:+ ENABLE APIs AND SERVICES button - 點選
+ ENABLE APIS AND SERVICES按鈕,於 Google Workspace 分類下選取Gmail API分頁 - 點選
ENABLE按鈕啟用 Gmail API,系統會在數秒後跳轉至 Gmail API 儀表板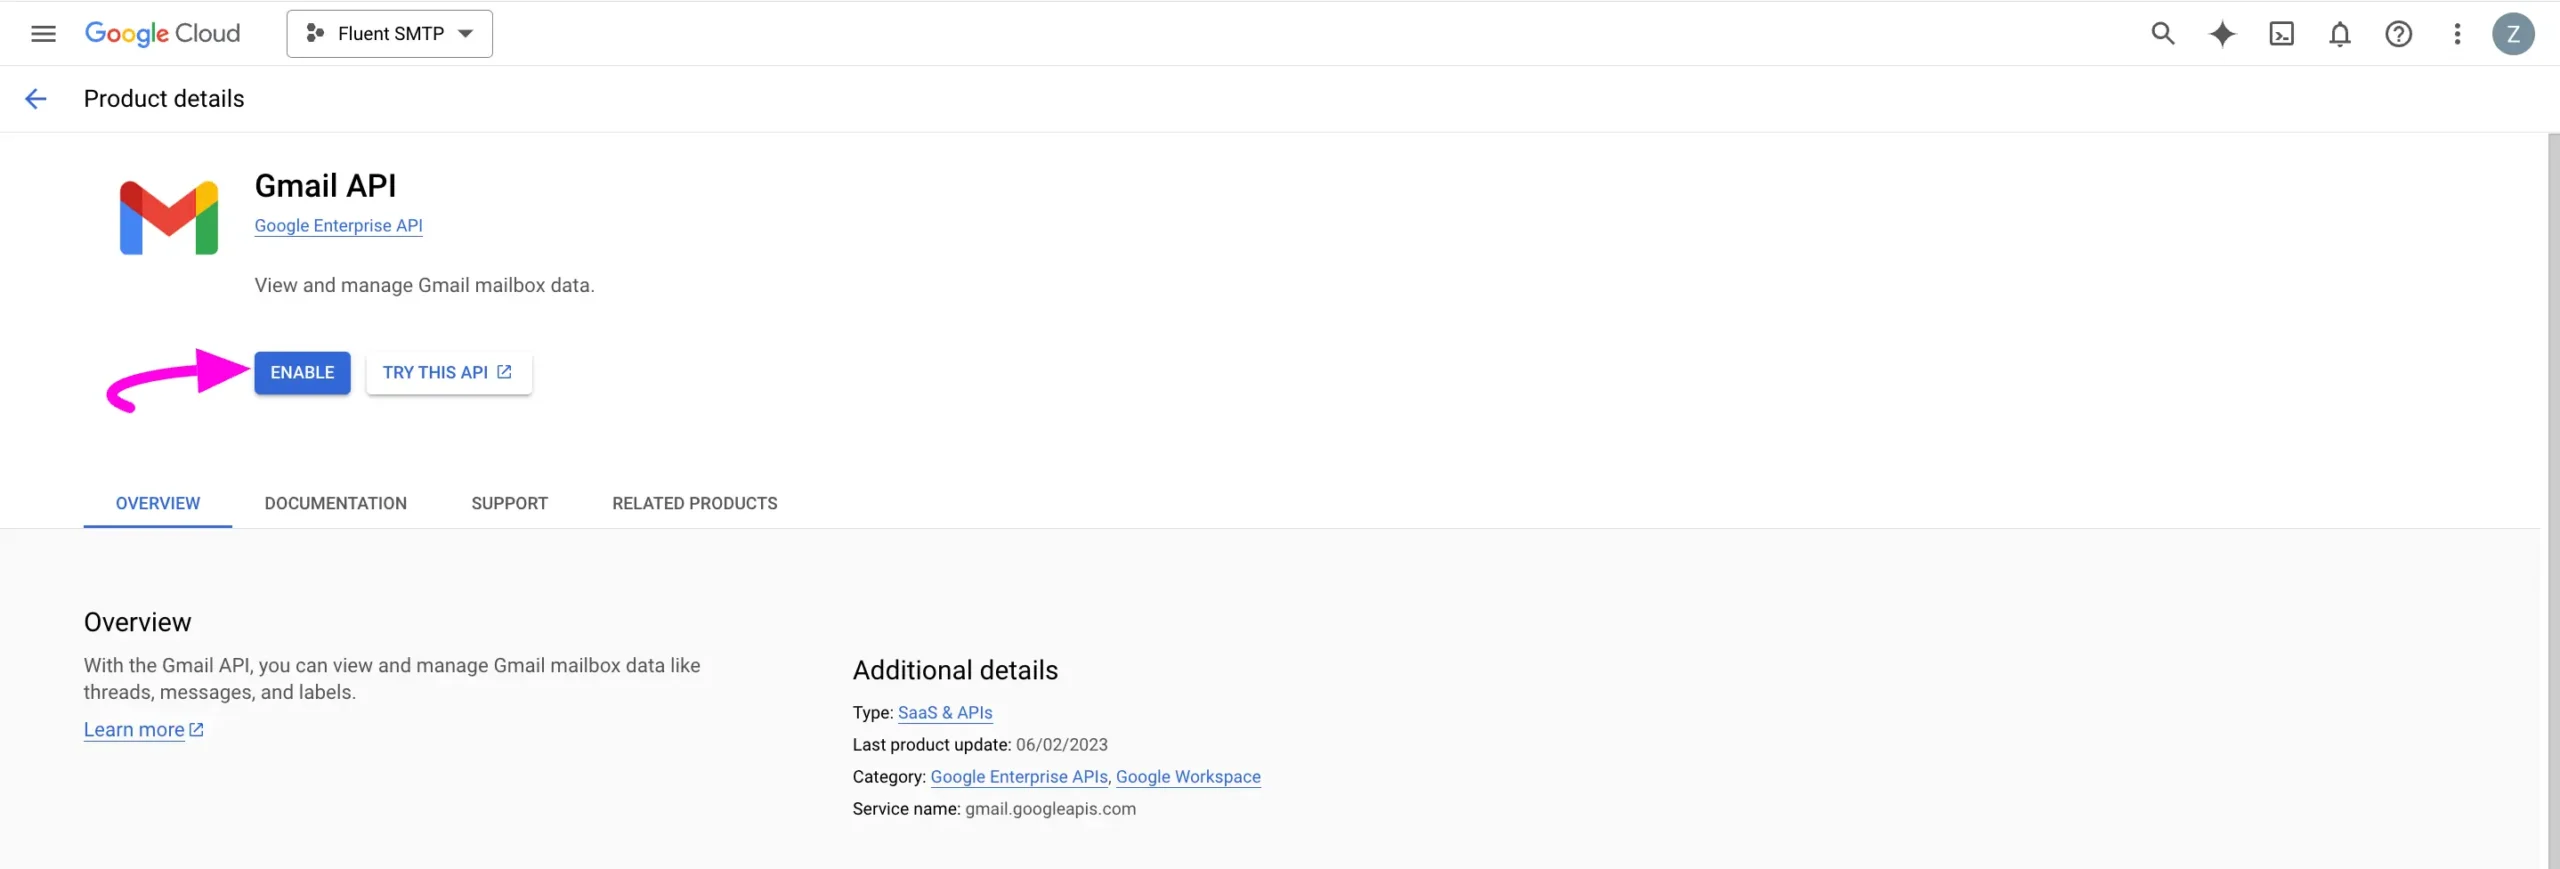
官方文件介面截圖:ENABLE button
建立憑證(Credentials)
建立憑證共有五個步驟:Credential Type、OAuth consent screen、Scopes、OAuth Client ID、Your Credentials
Scopes 步驟為選填,FluentSMTP 寄信功能不需額外設定,可直接跳過
- 點選頁面右上角的
CREATE CREDENTIALS按鈕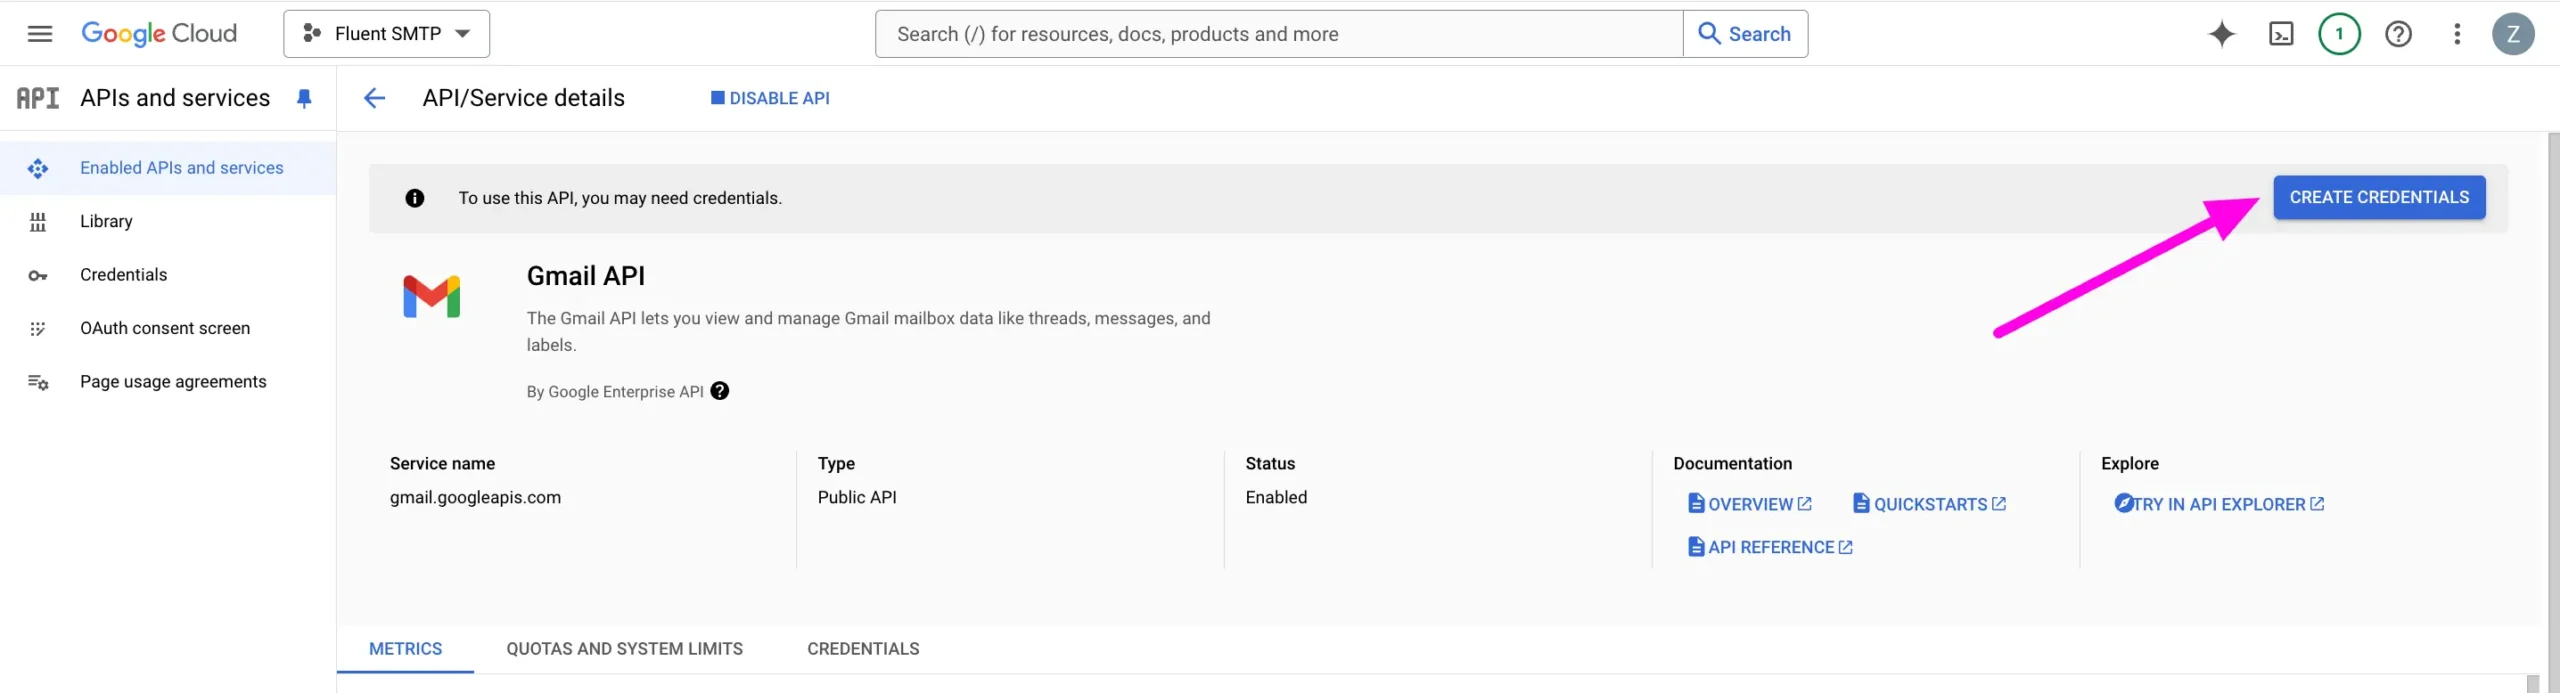
官方文件介面截圖:CREATE CREDENTIALS button - 在 Credential Type 選擇
GMAIL API,勾選User data,再按Next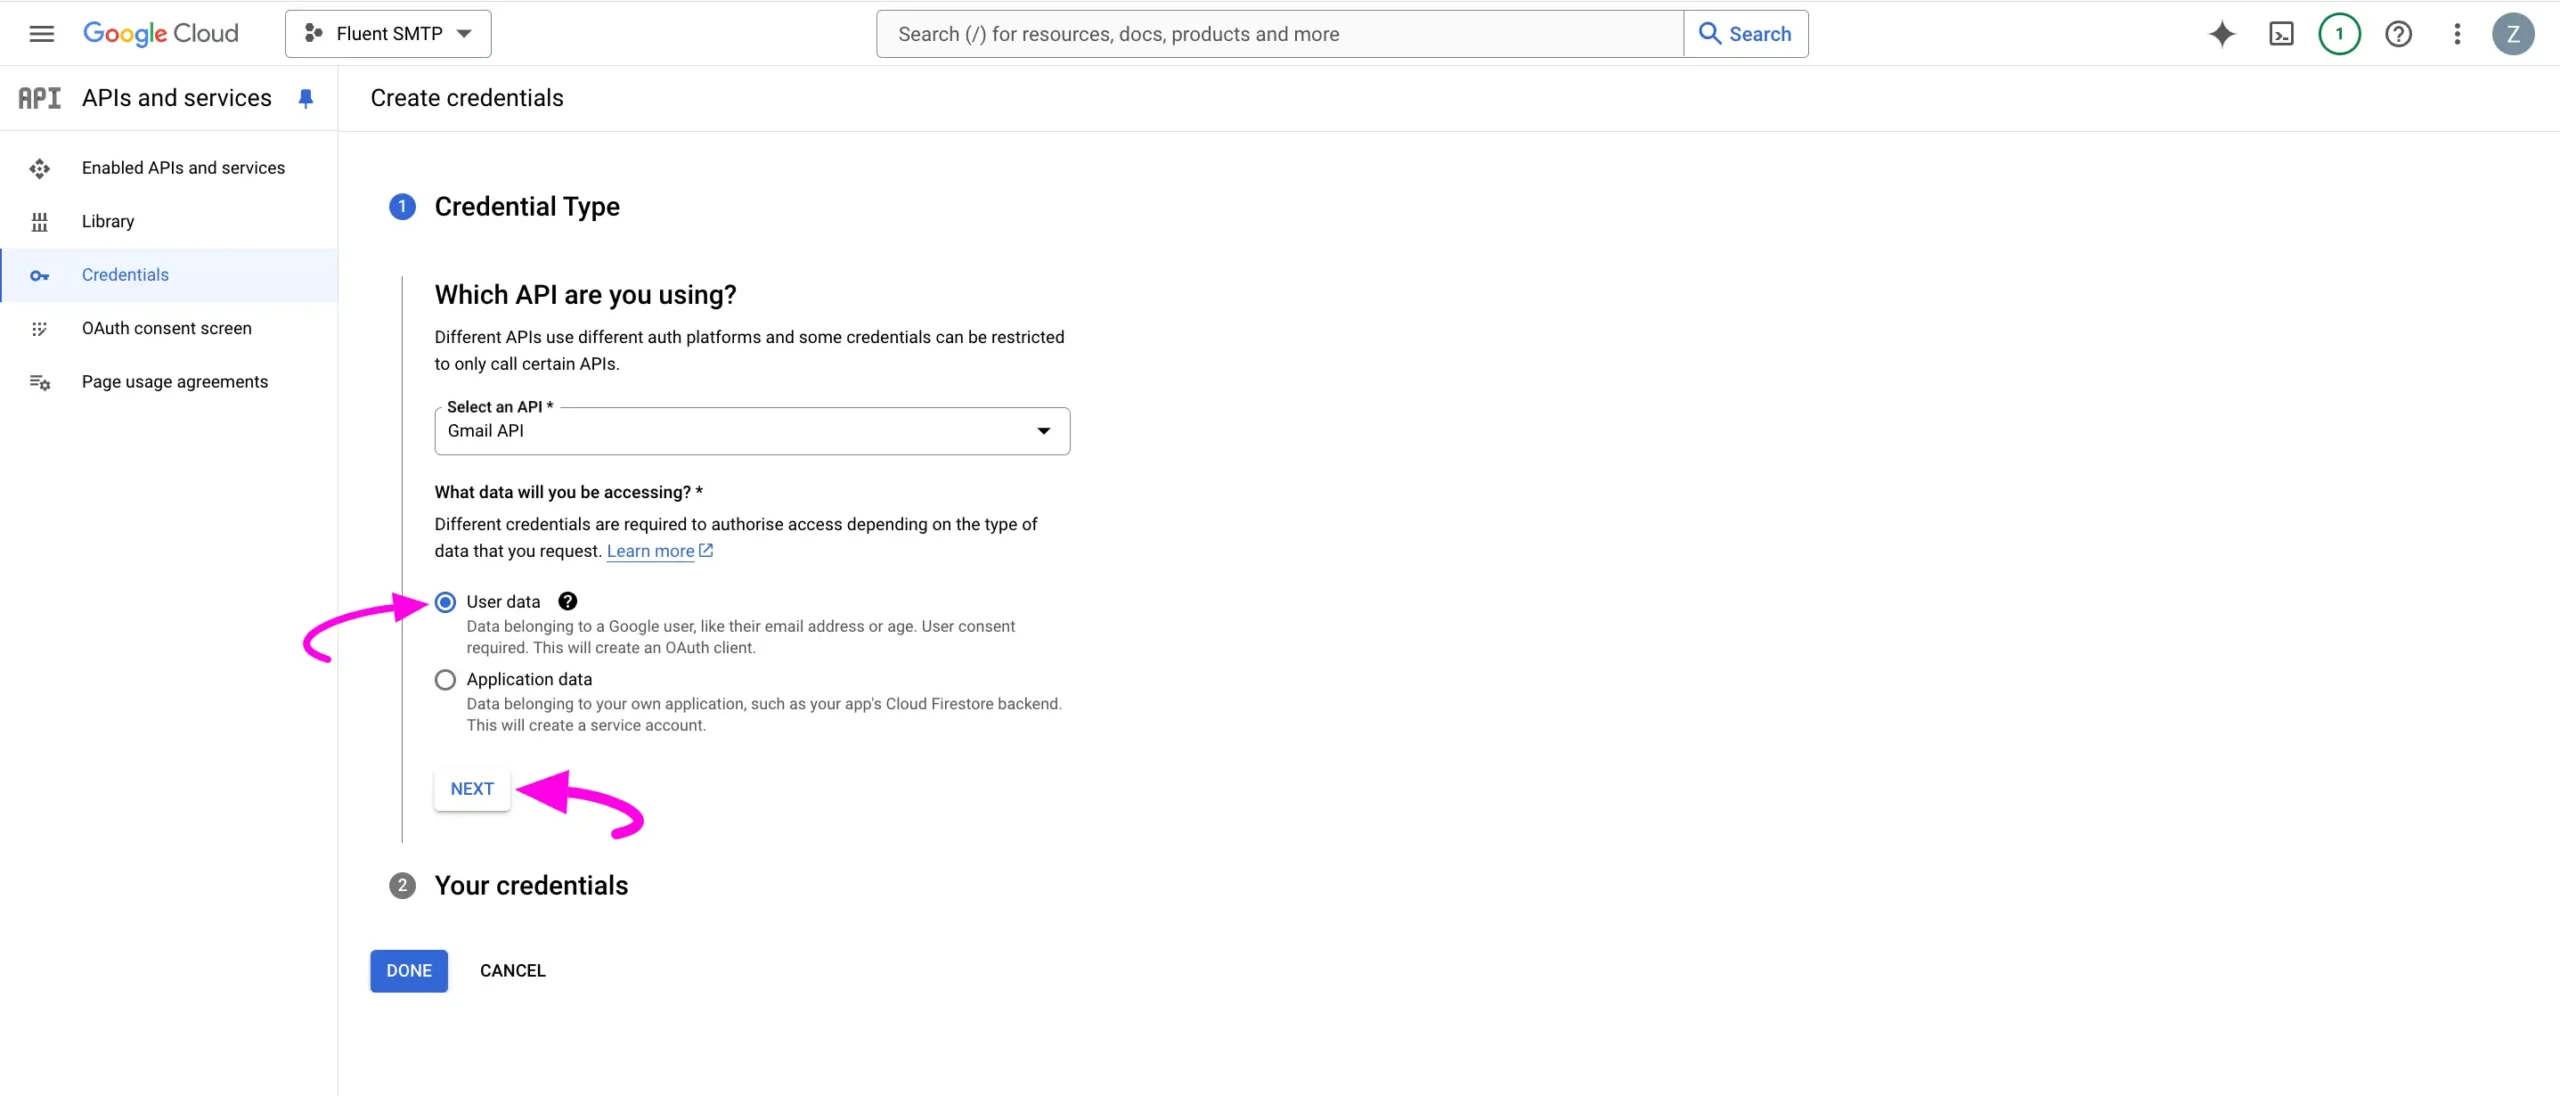
官方文件介面截圖:Credential Type - 在 OAuth consent screen 填寫 App Name、User support email 與 Developer contact information,完成後按
SAVE AND CONTINUE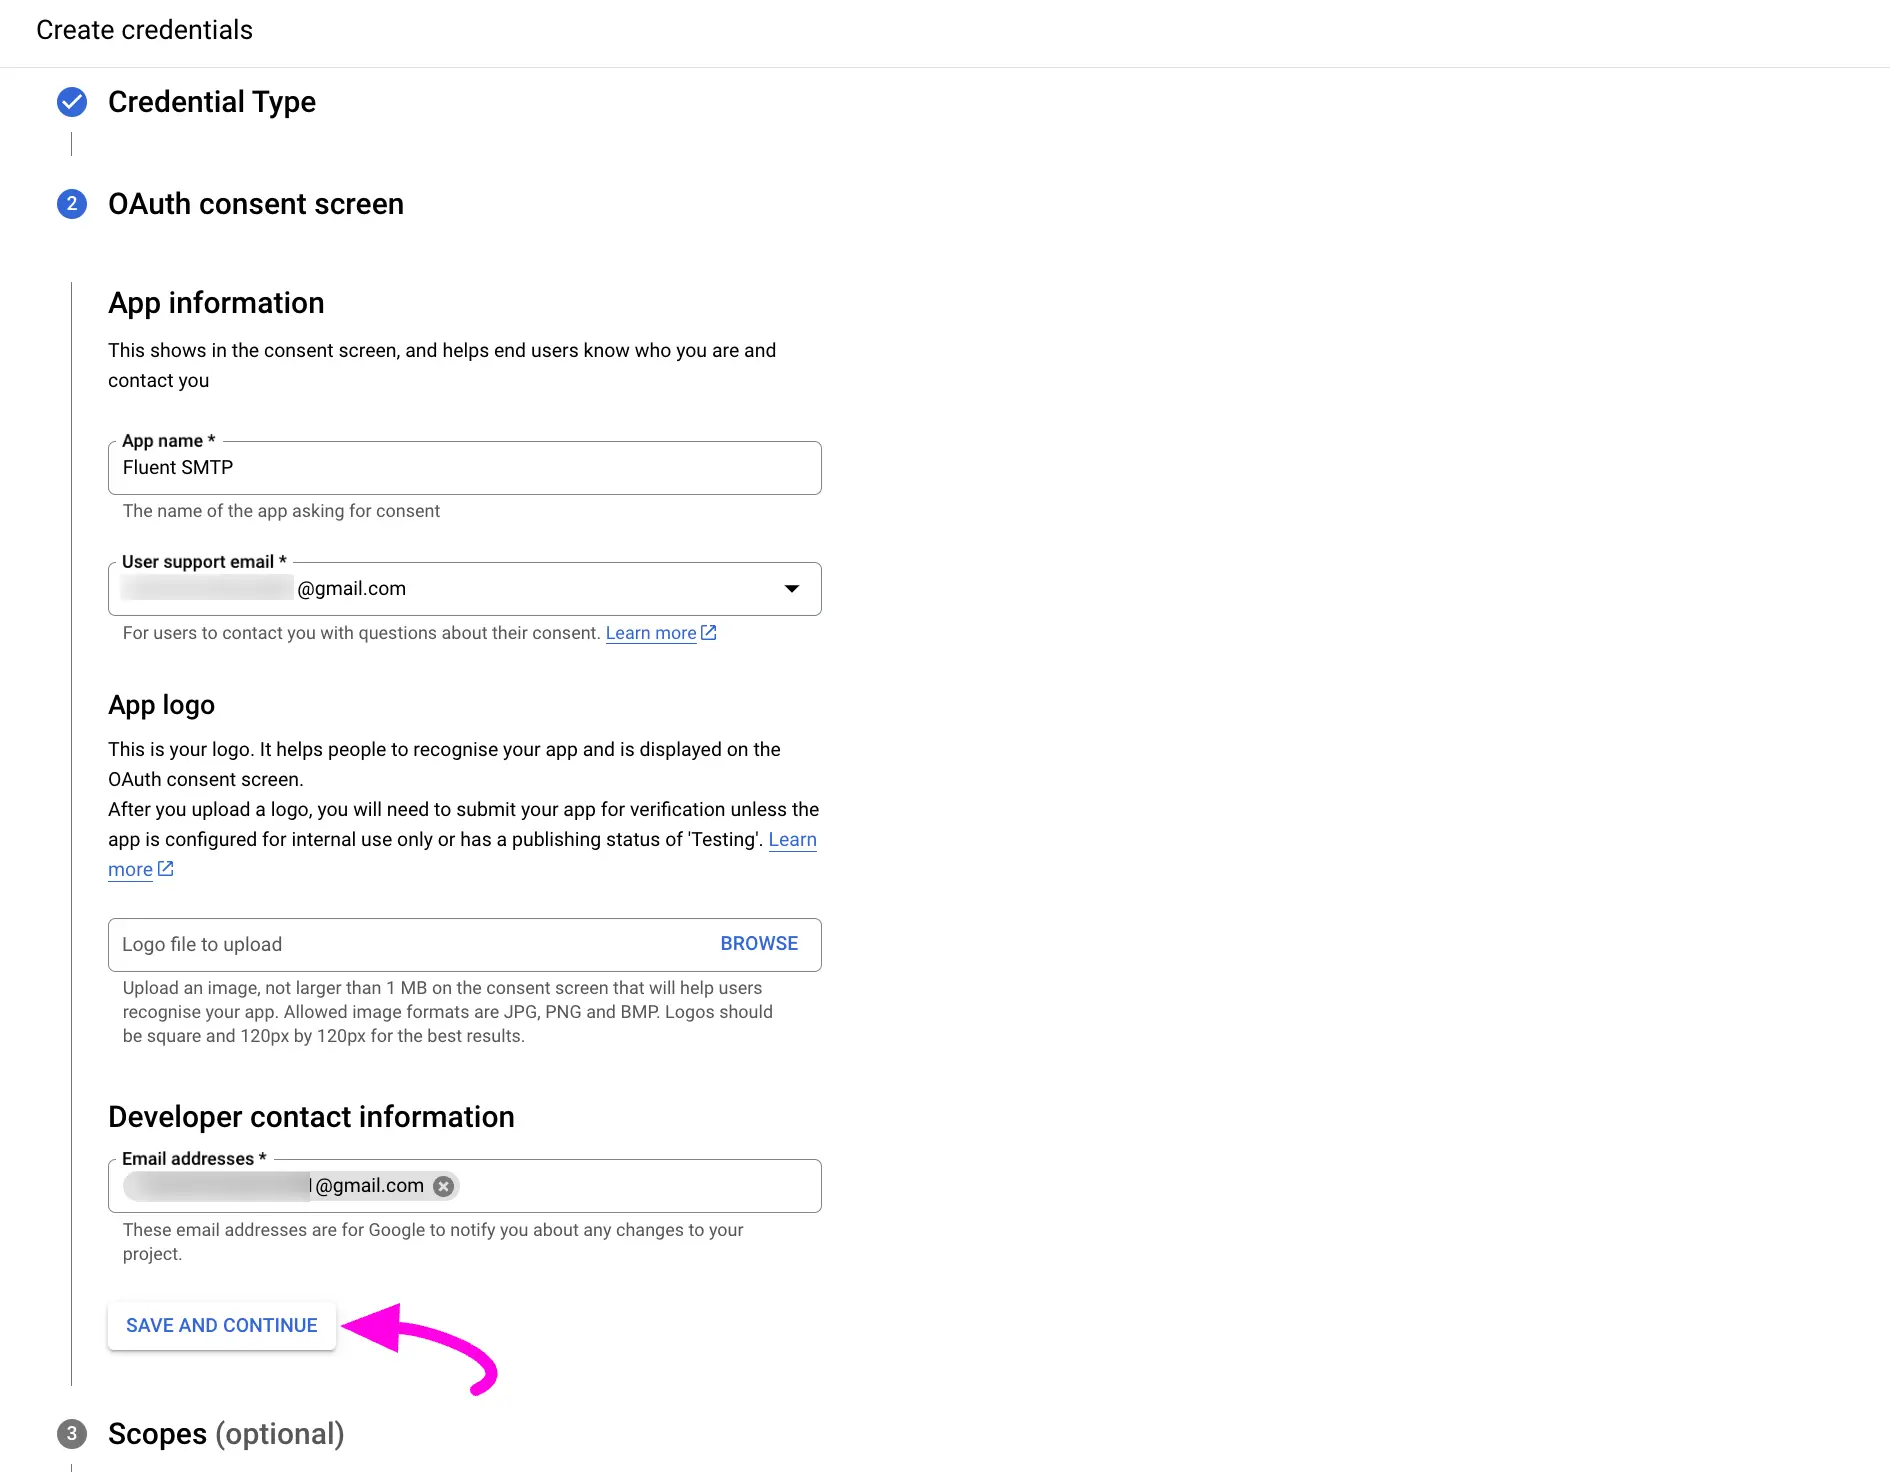
官方文件介面截圖:OAuth consent screen - 在 Scopes 步驟直接點選
SAVE AND CONTINUE跳過
官方文件介面截圖:Scopes (optional) - 在 OAuth Client ID 選擇 Application Type 為
Web Application,輸入 Application 名稱,並貼上先前複製的 Authorized Redirect URL,再按CREATE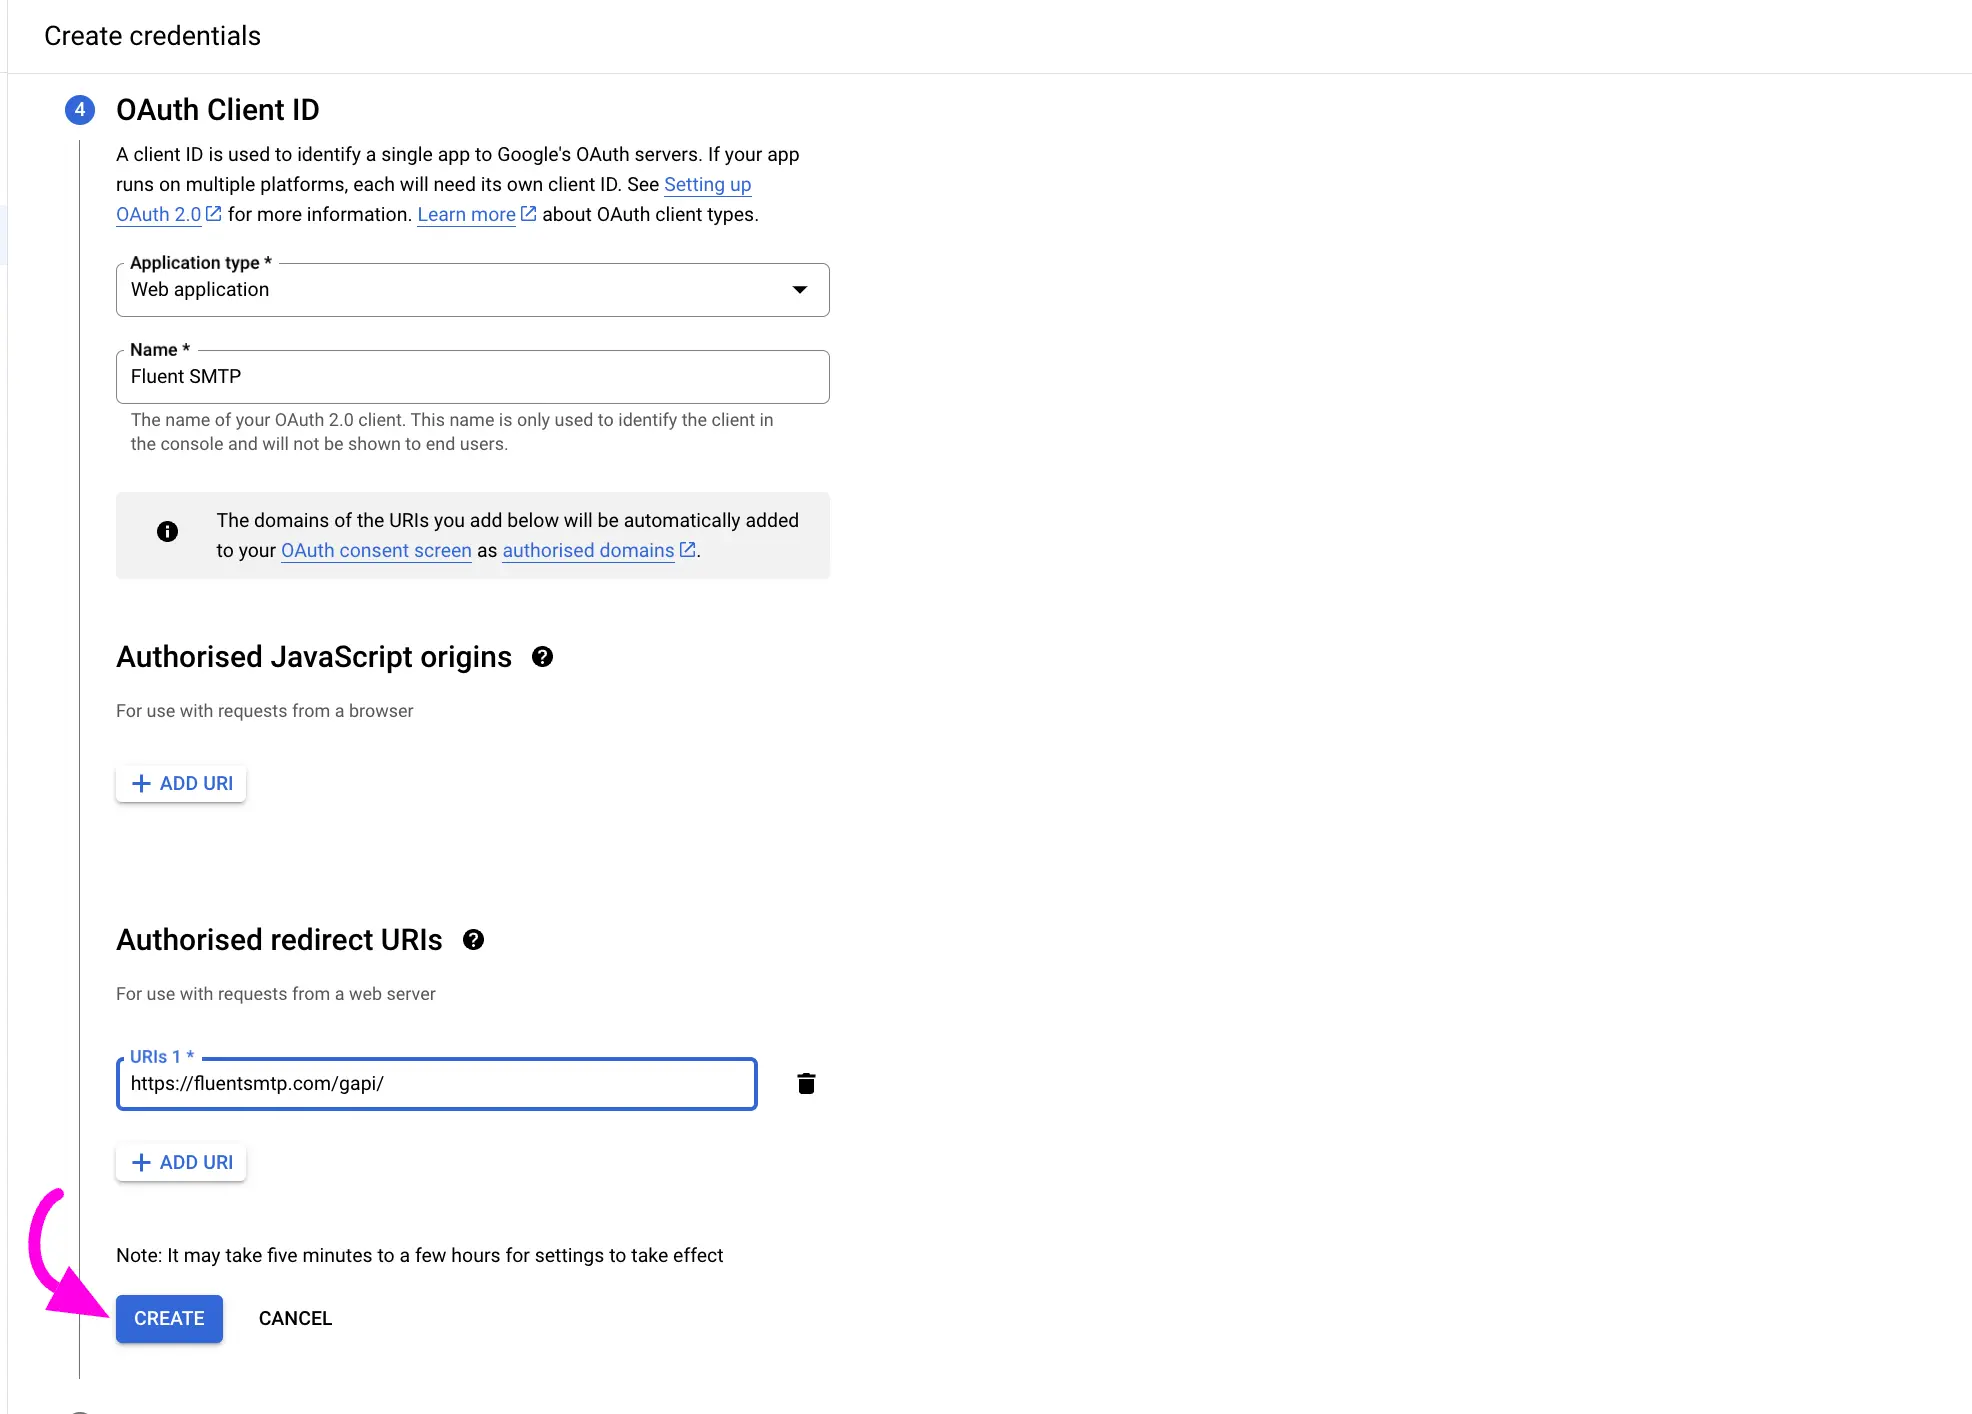
官方文件介面截圖:OAuth Client ID - 完成後點選
DONE按鈕,憑證即建立完成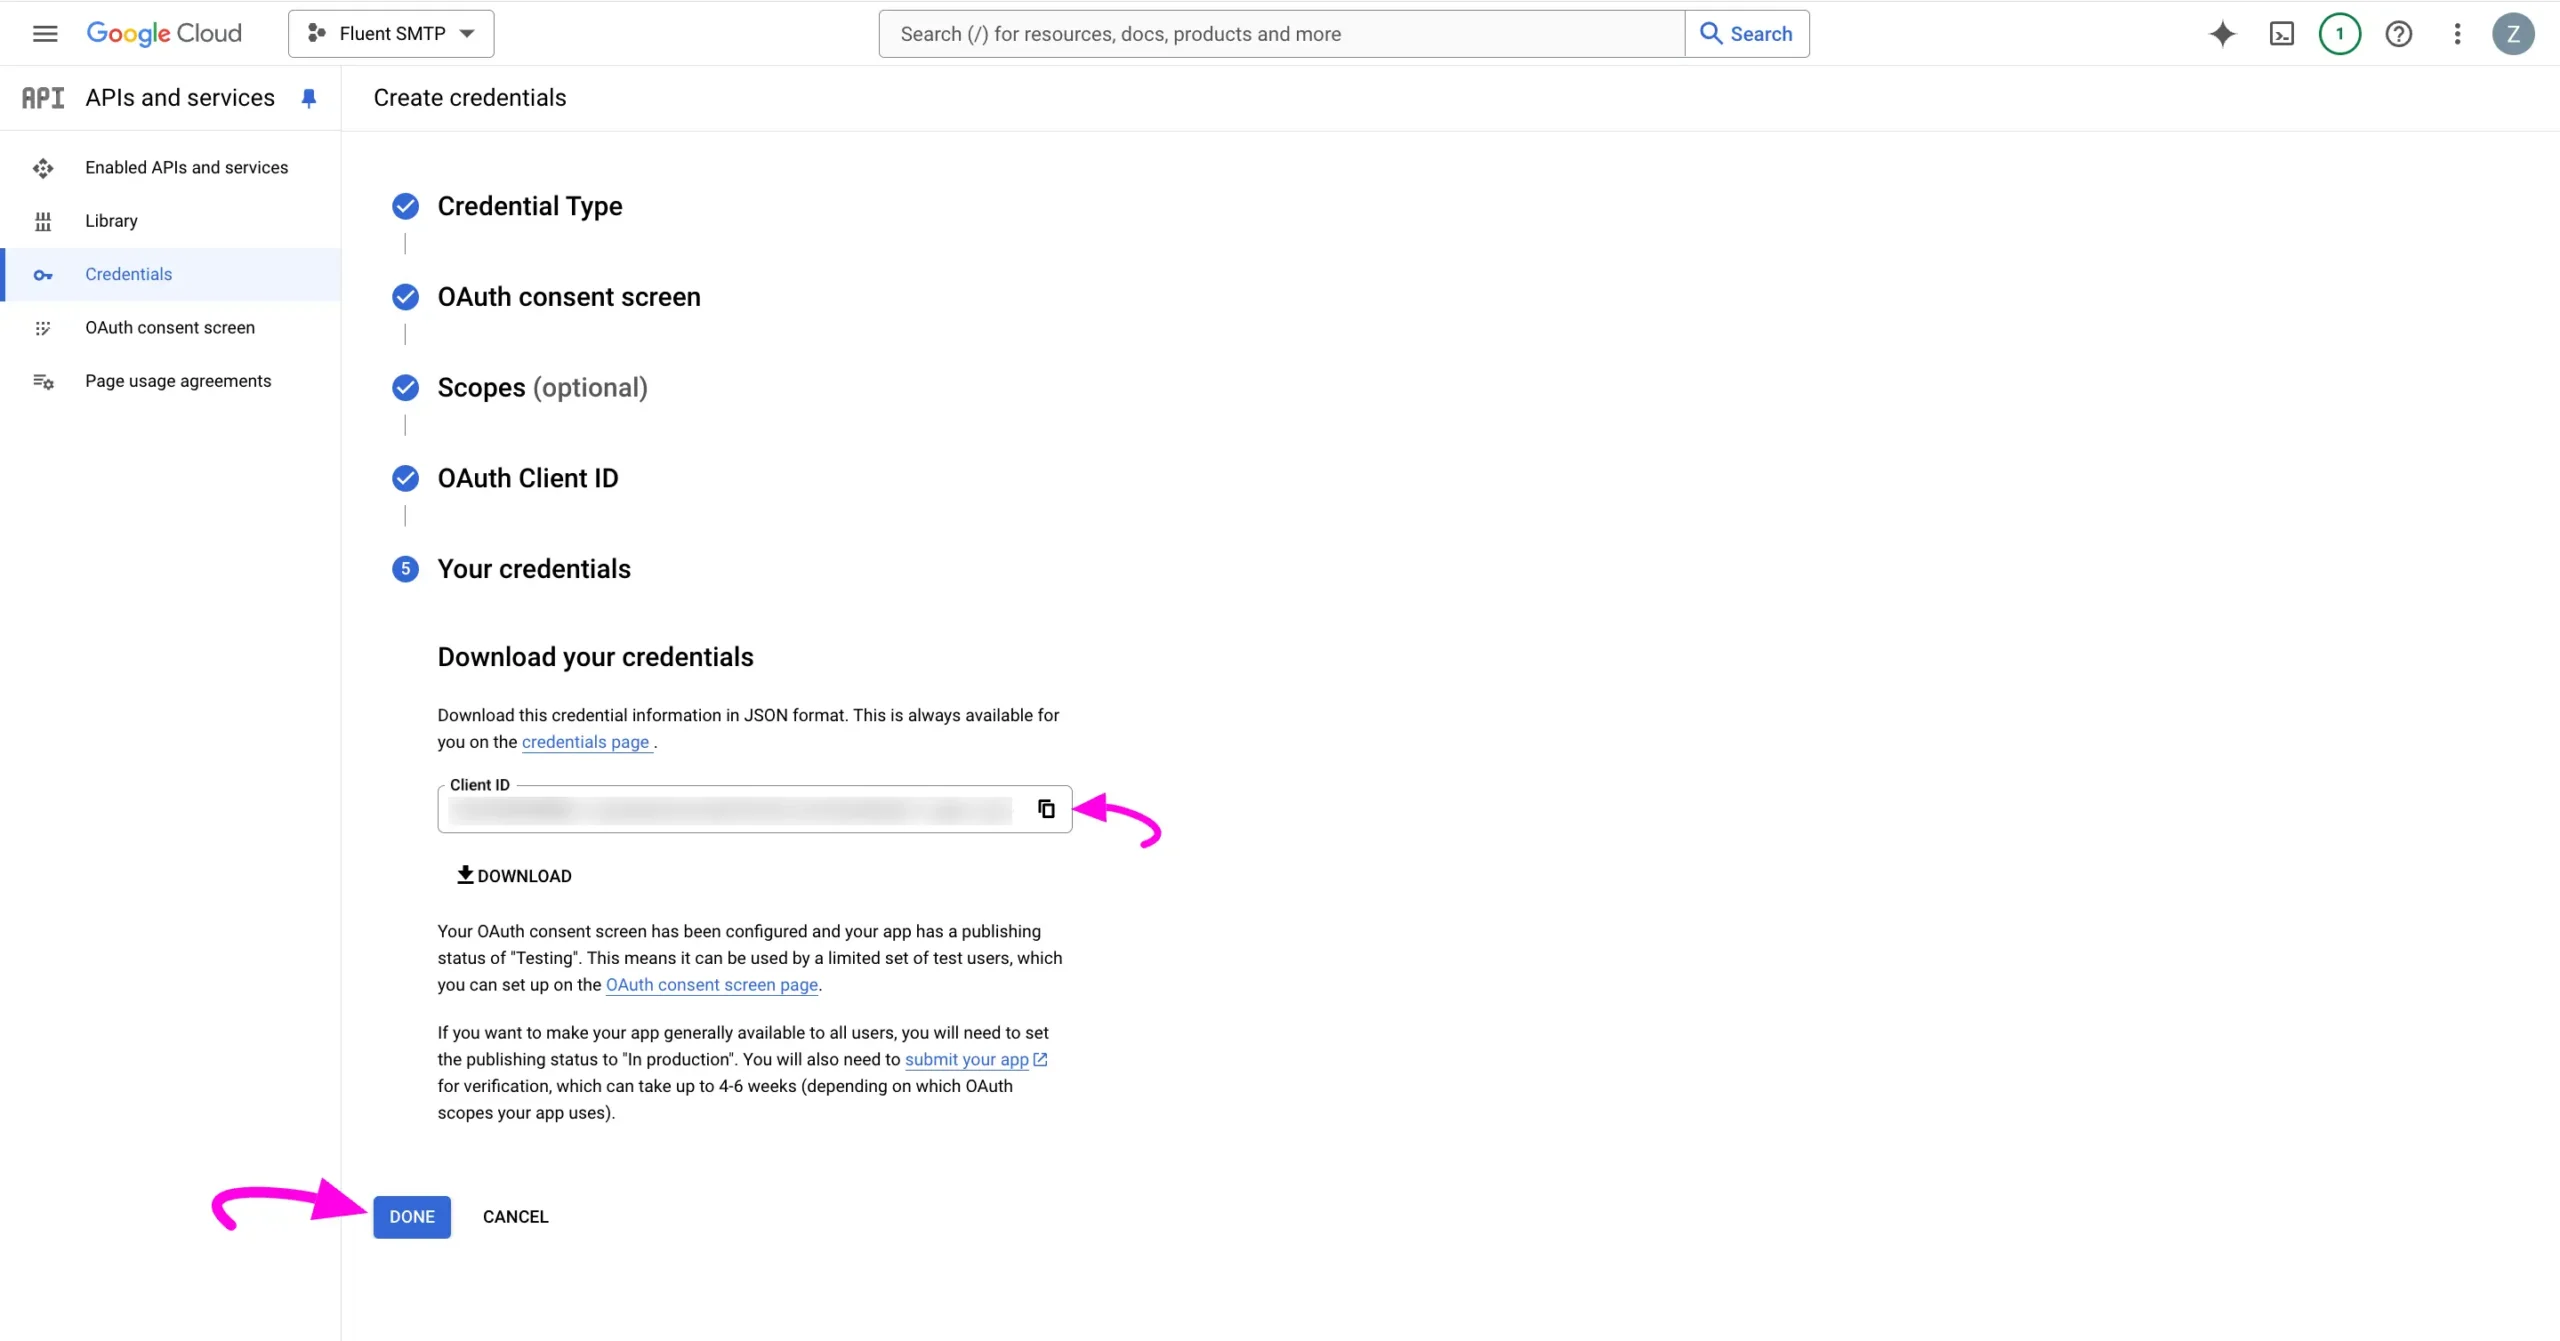
官方文件介面截圖:Your Credentials 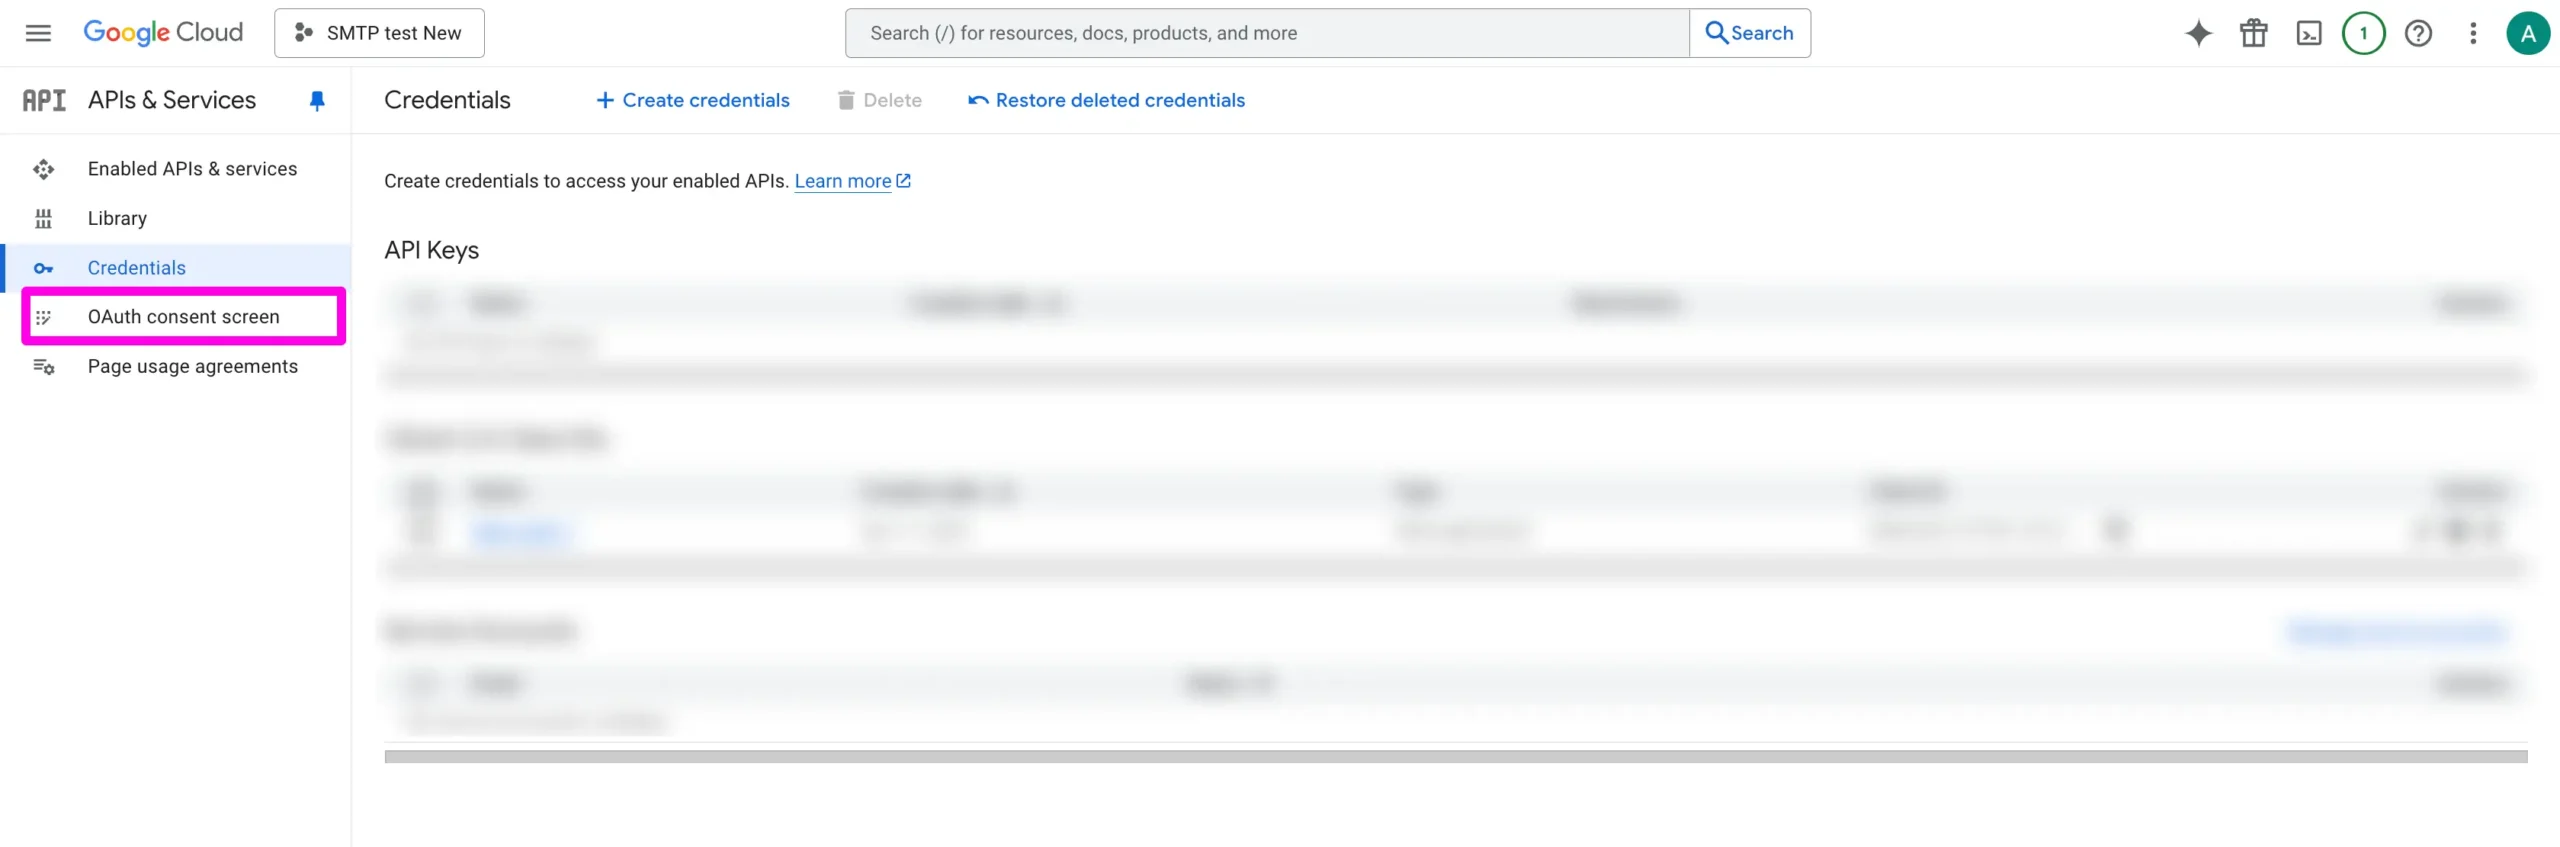
官方文件介面截圖:OAuth Publish App 官方介面截圖
發佈應用程式並收集憑證
- 從左側選單前往
OAuth Consent Screen,再點選Audience進入頁面 - 在 Publishing Status 的 Testing 區塊下點選
PUBLISH APP按鈕,若跳出確認視窗則點CONFIRM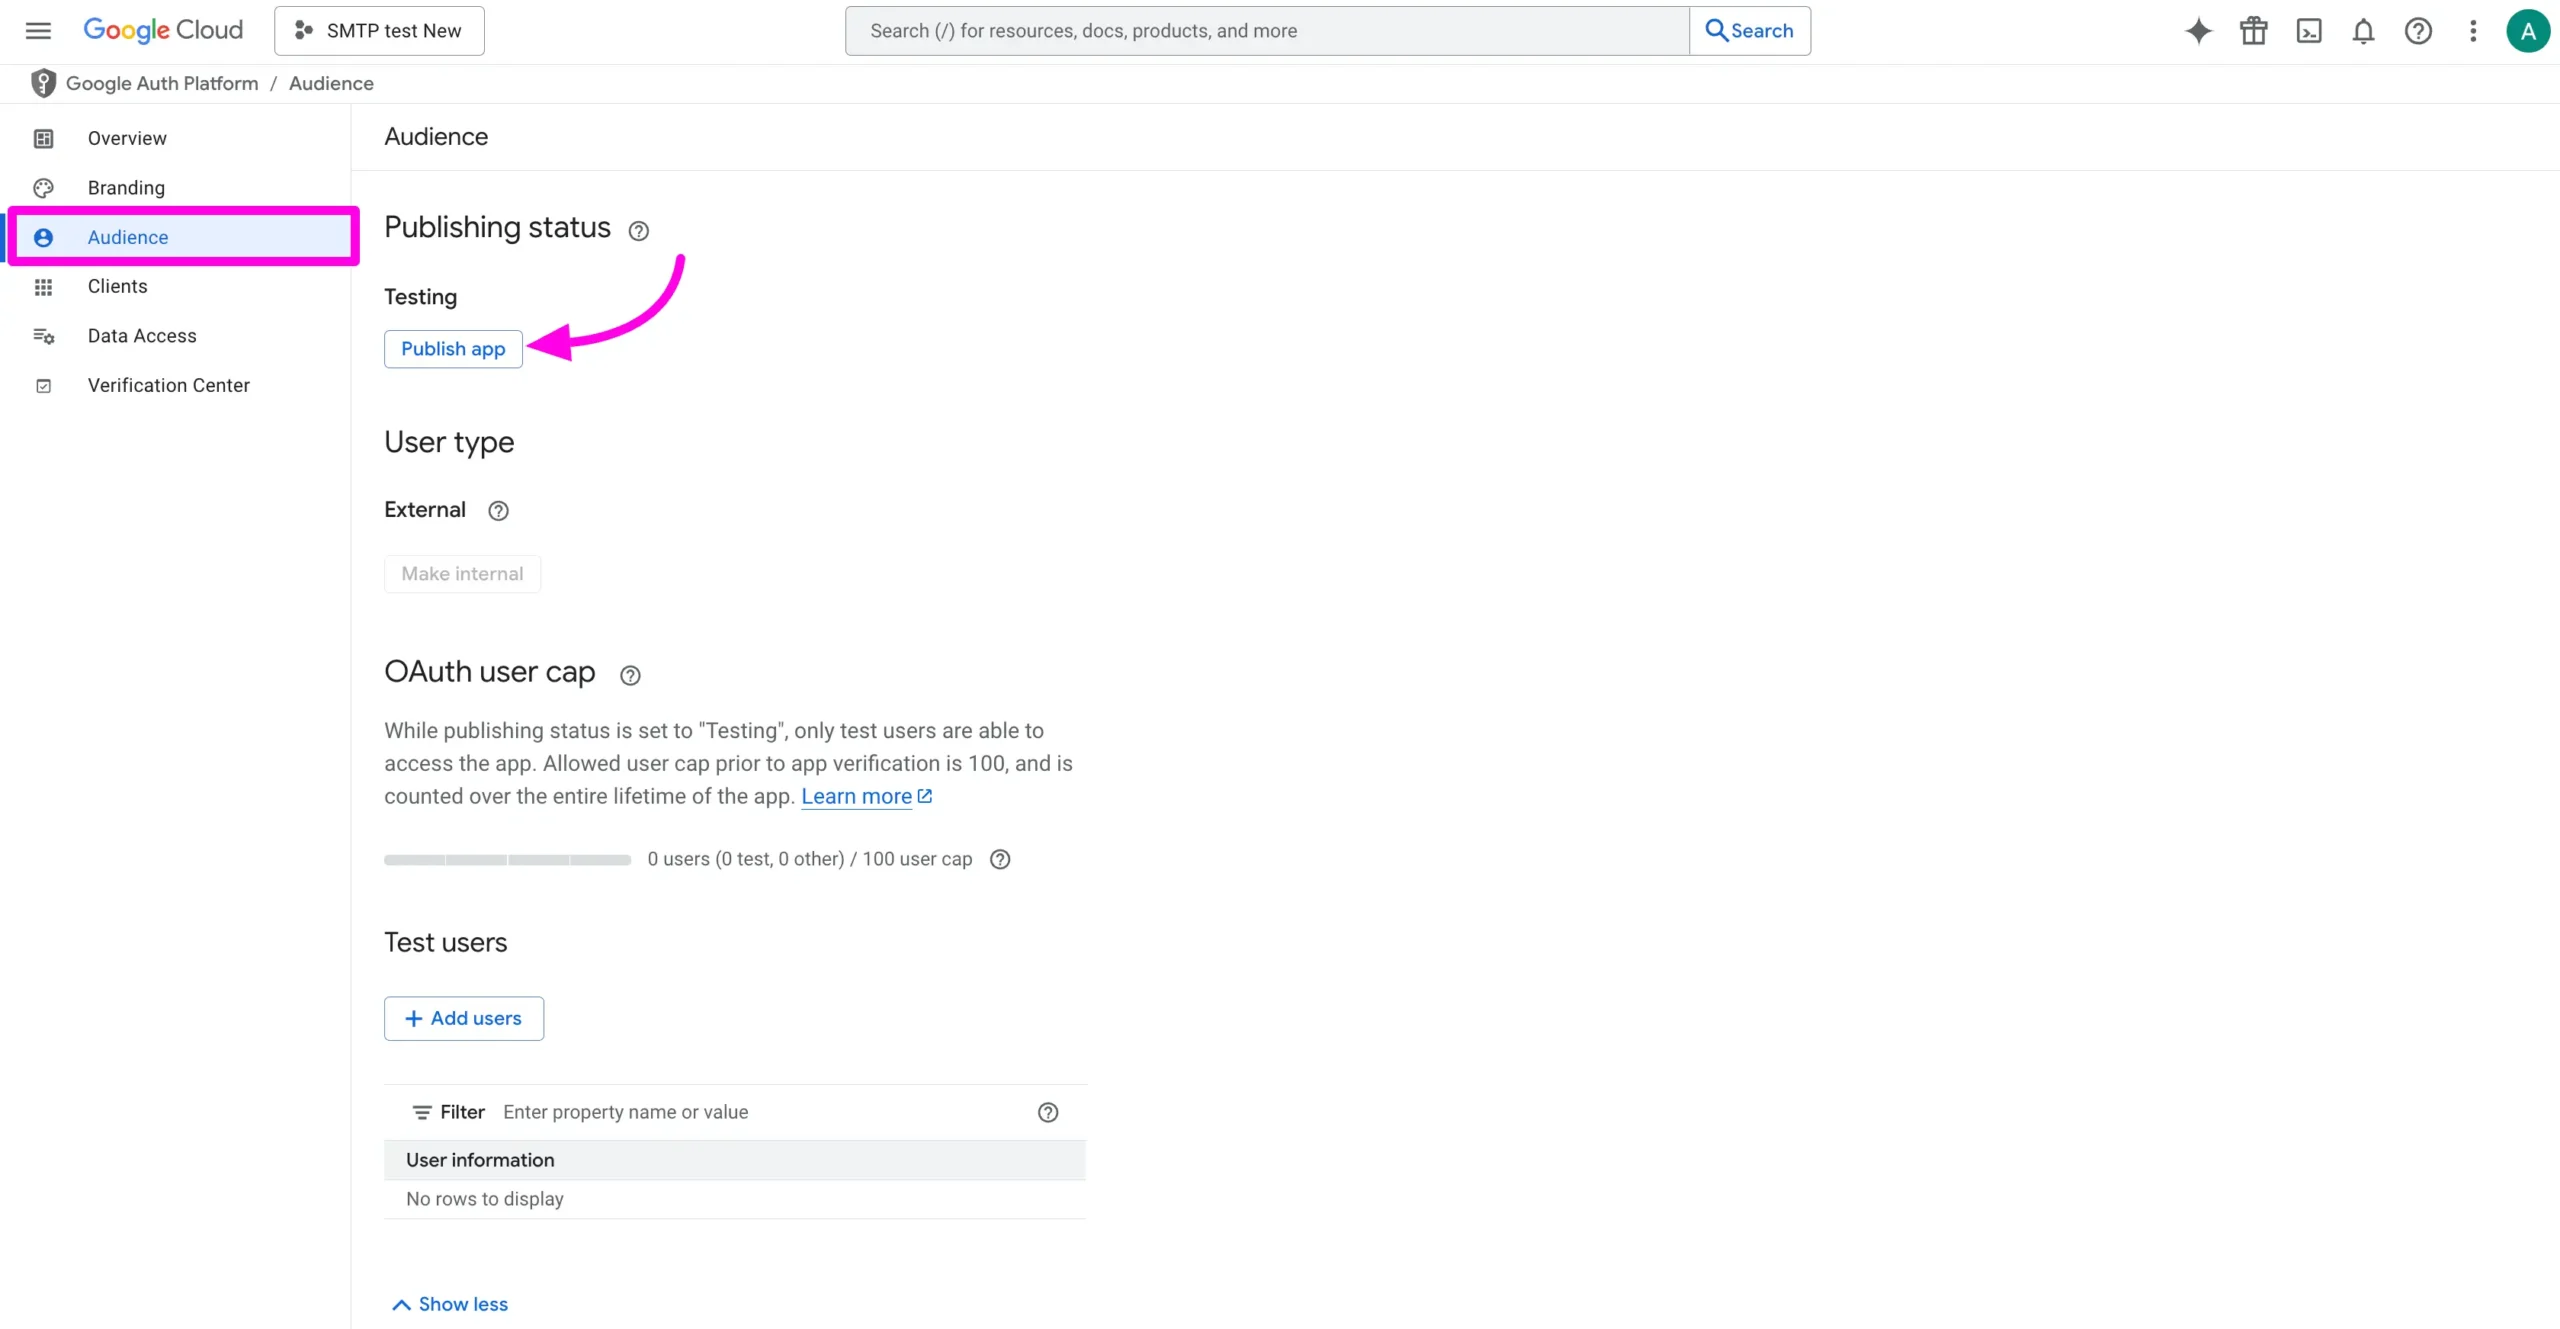
官方文件介面截圖:OAuth Publish App 官方介面截圖 - 前往左側選單的
Credentials,找到建立的專案名稱並點選進入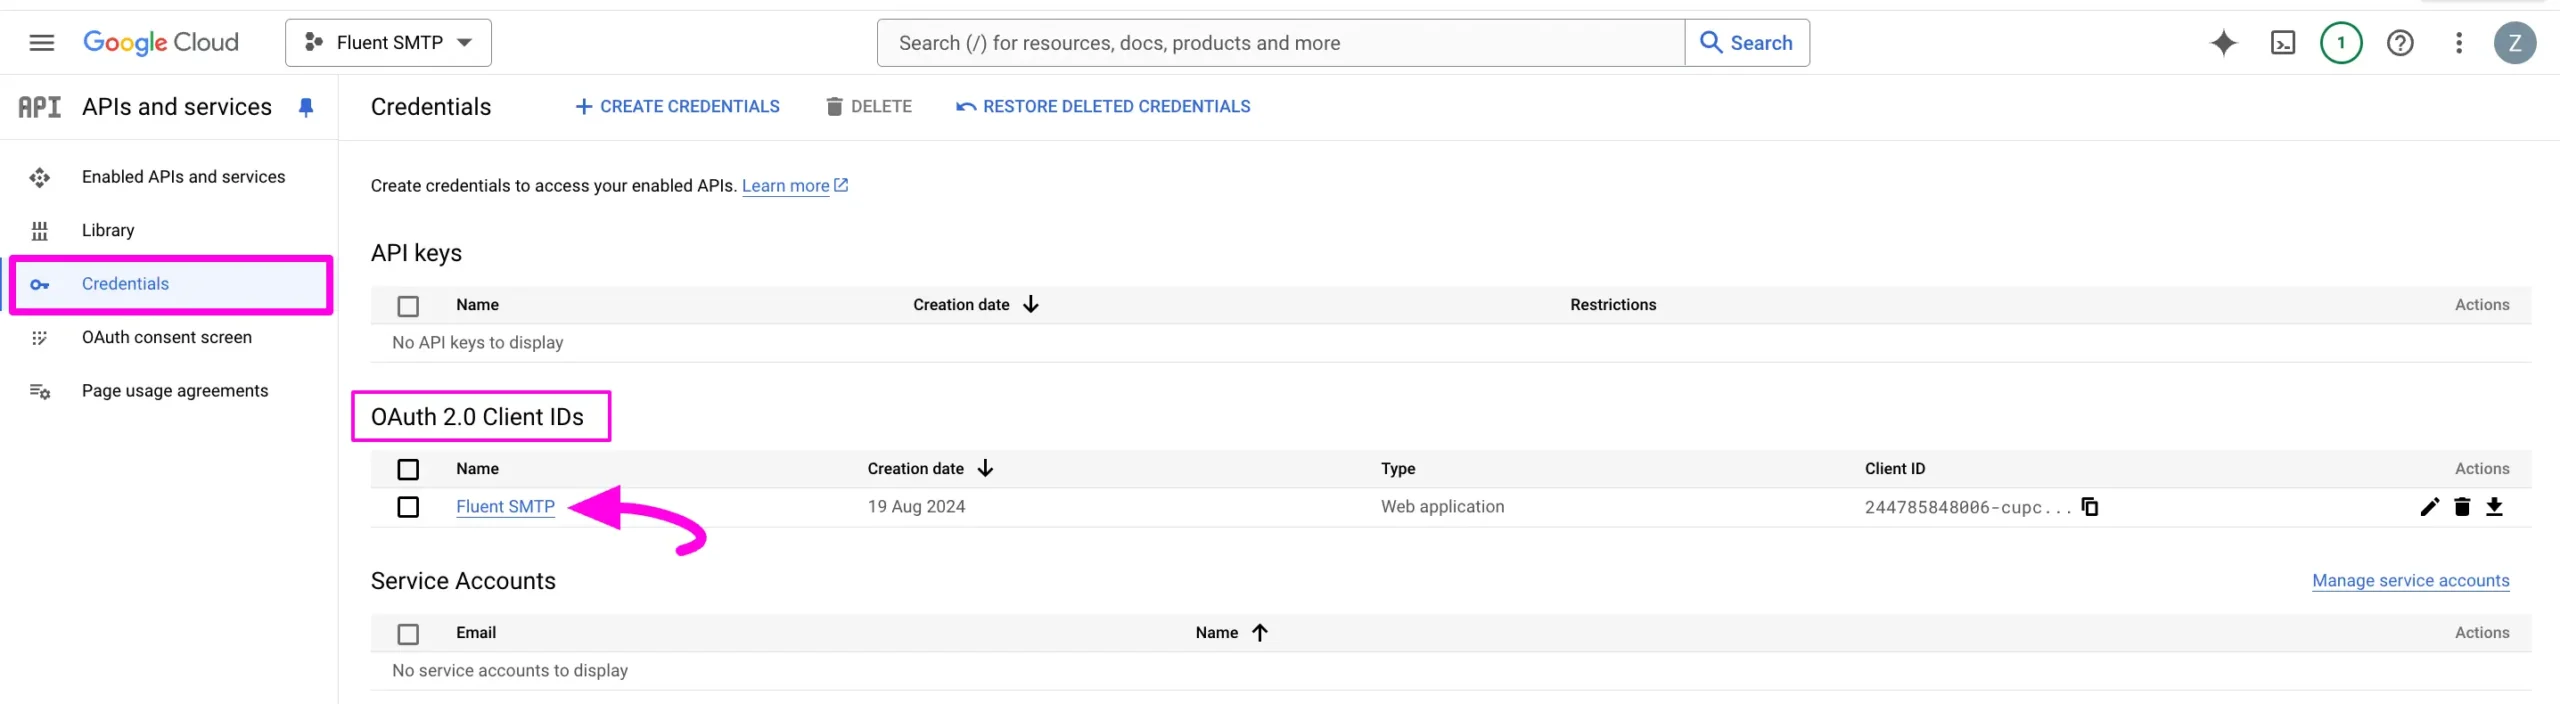
官方文件介面截圖:OAuth 2.0 Client IDS- Fluent SMTP credentials - 複製頁面右側顯示的
Client ID與Client Secret兩組數值,備用於下一步貼到 FluentSMTP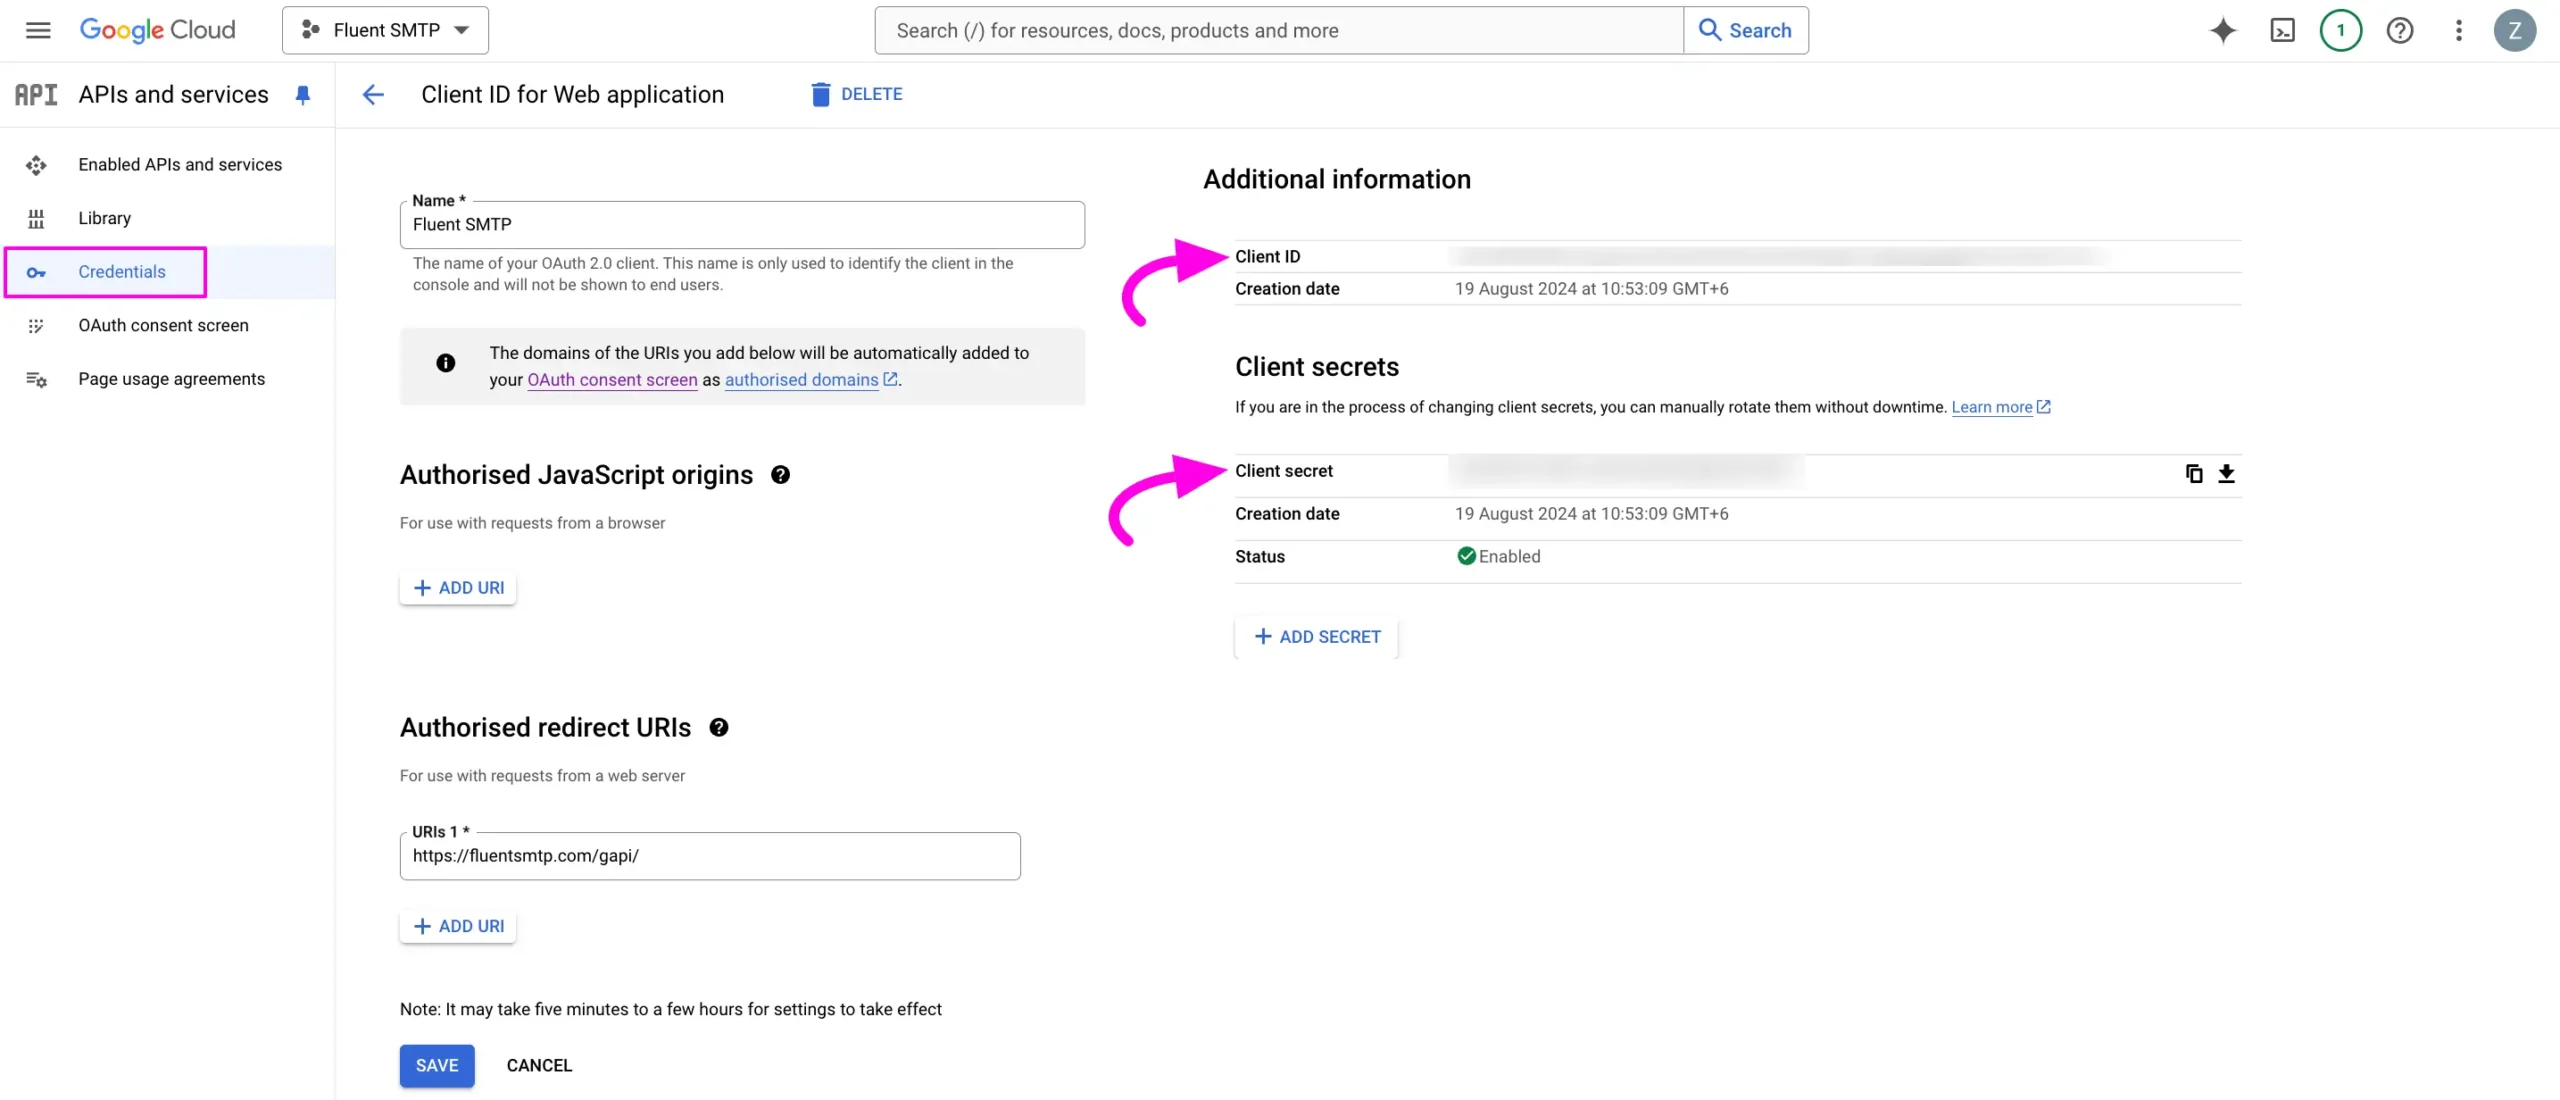
官方文件介面截圖:Get the Client ID & Client Secret
完成 FluentSMTP 授權連線
- 回到 FluentSMTP 的
Add Connection頁面,貼上先前建立的 Client ID 與 Client Secret - 點選
Authenticate with Google & Get Access Token按鈕取得驗證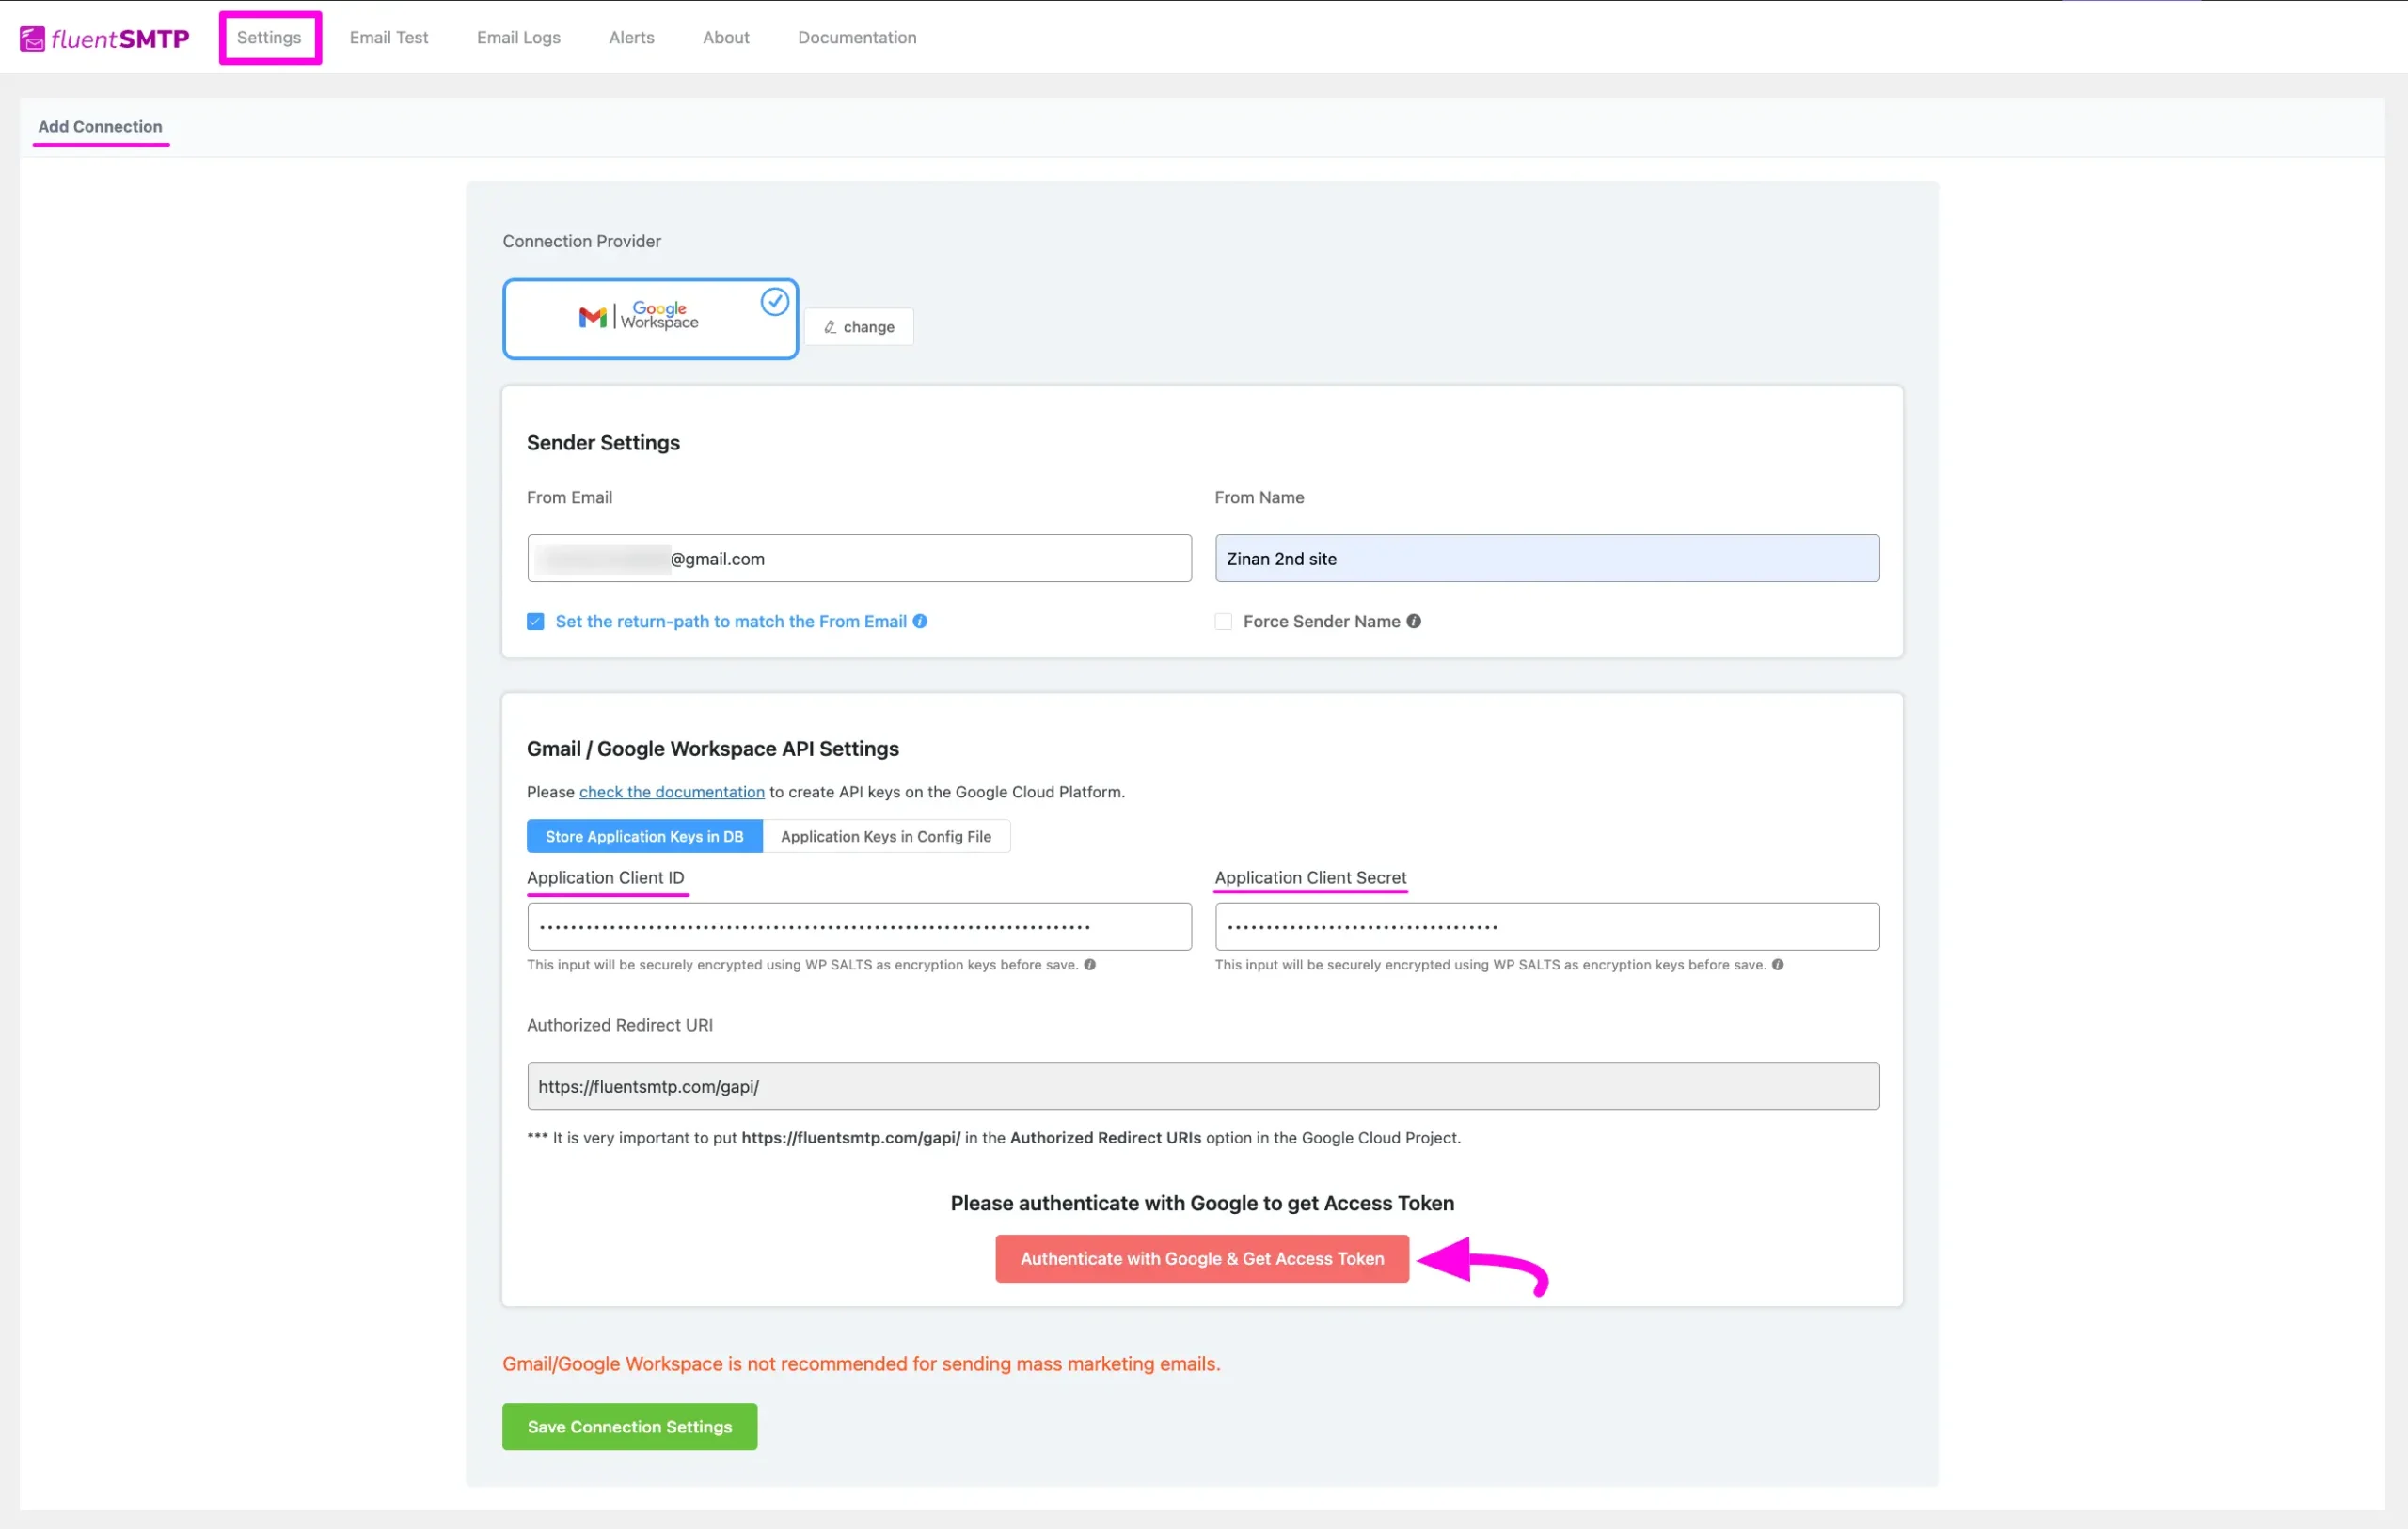
官方文件介面截圖:Pasting the Client ID & Secret under Add connection page of Fluent SMTP settings - 頁面導向 Google 帳號選擇畫面後,選擇要授權存取的 Gmail 或 Google Workspace 帳號
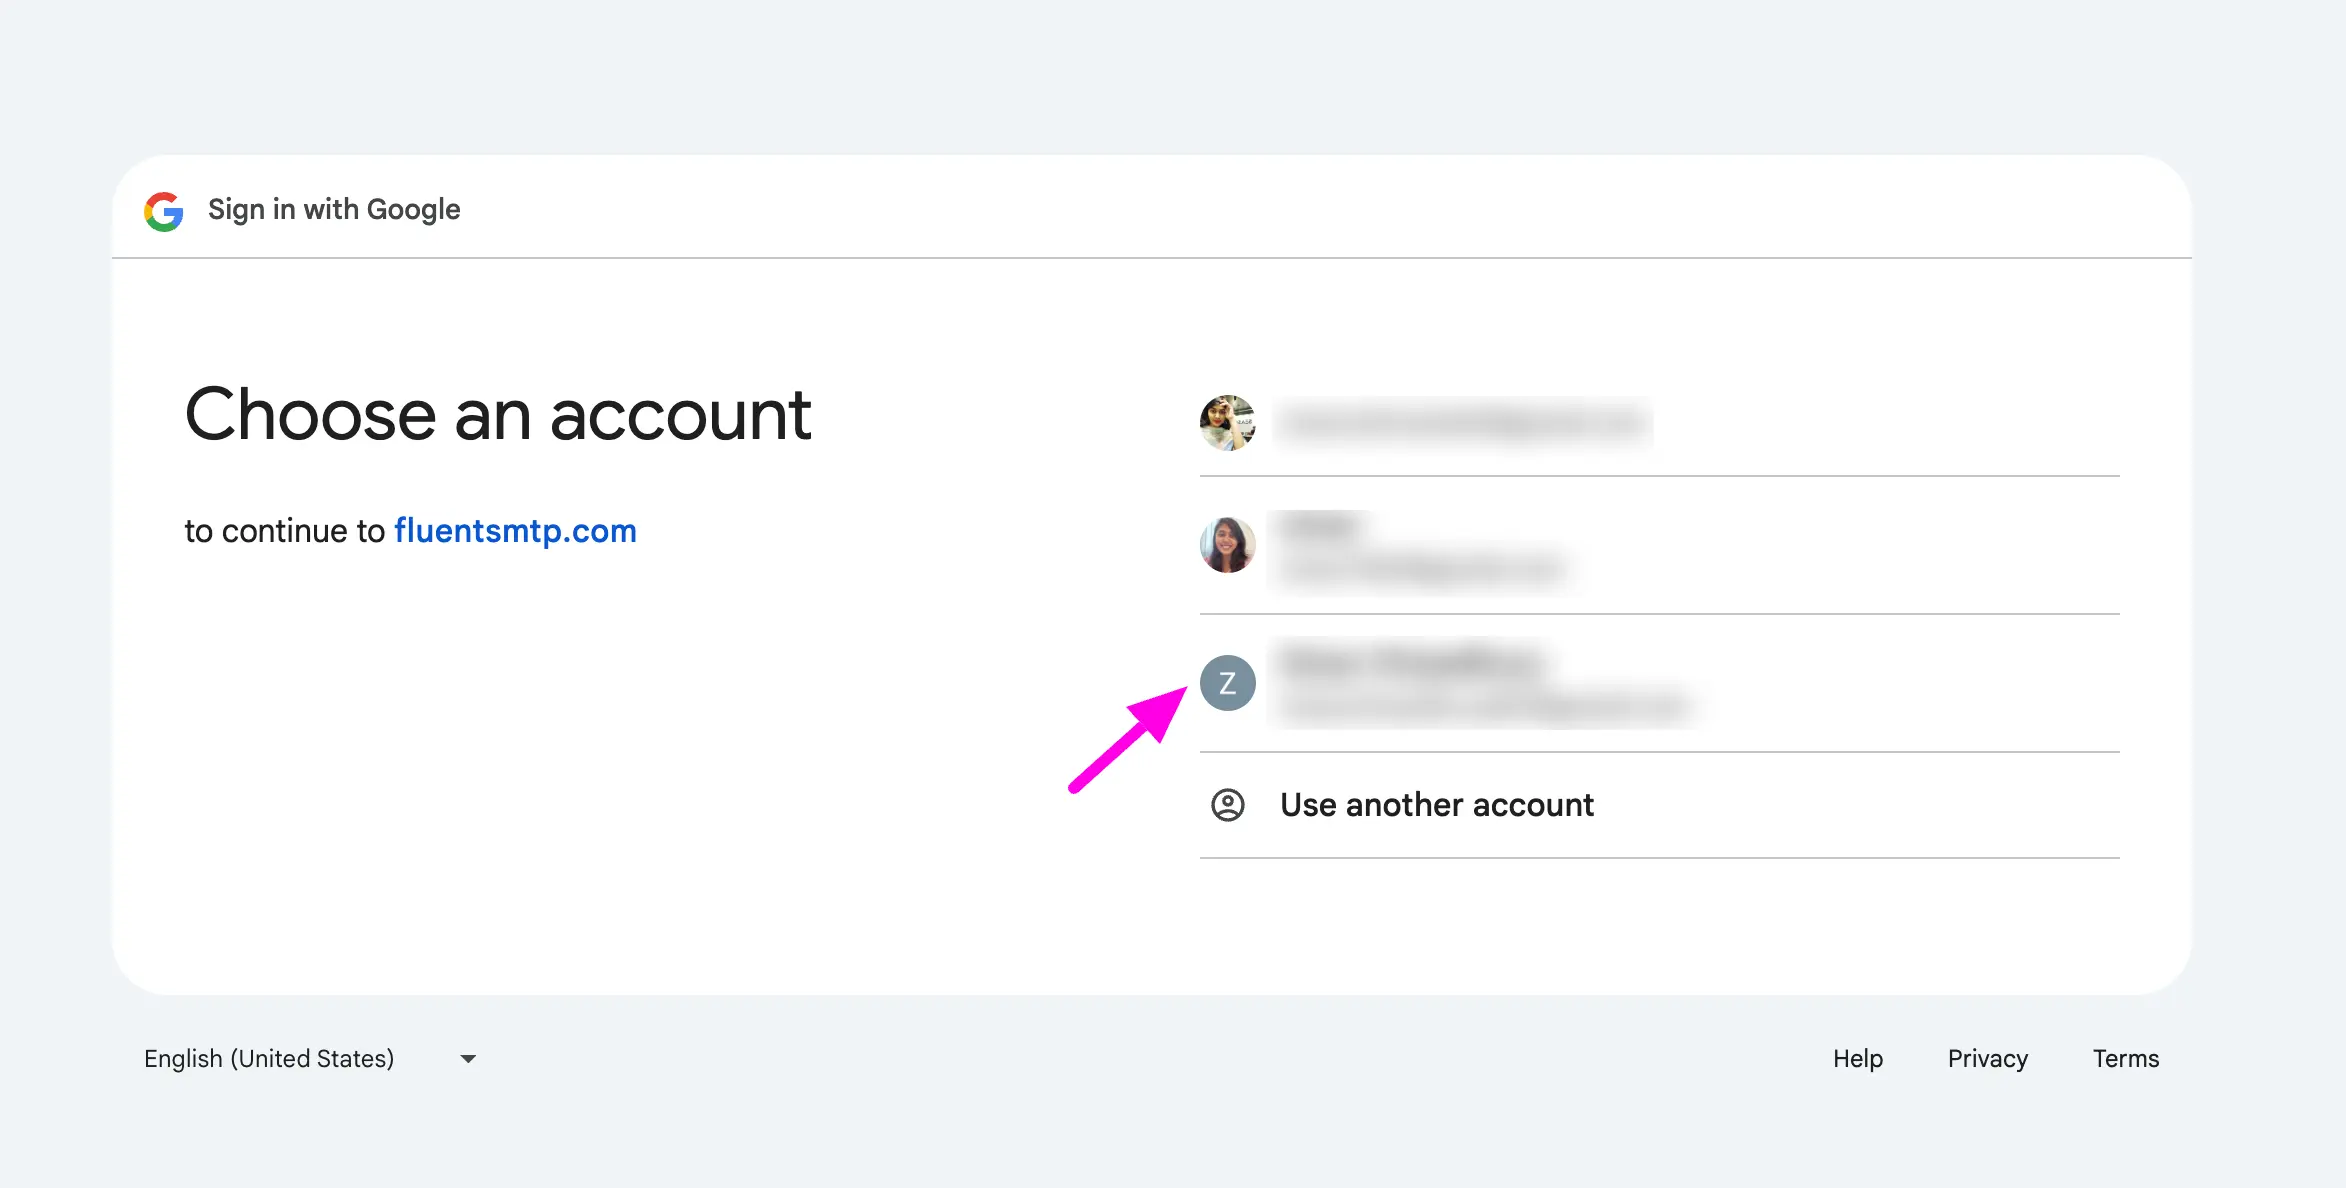
官方文件介面截圖:Choose you gmail account - 在核准視窗點選
Continue按鈕,允許專案存取使用者資訊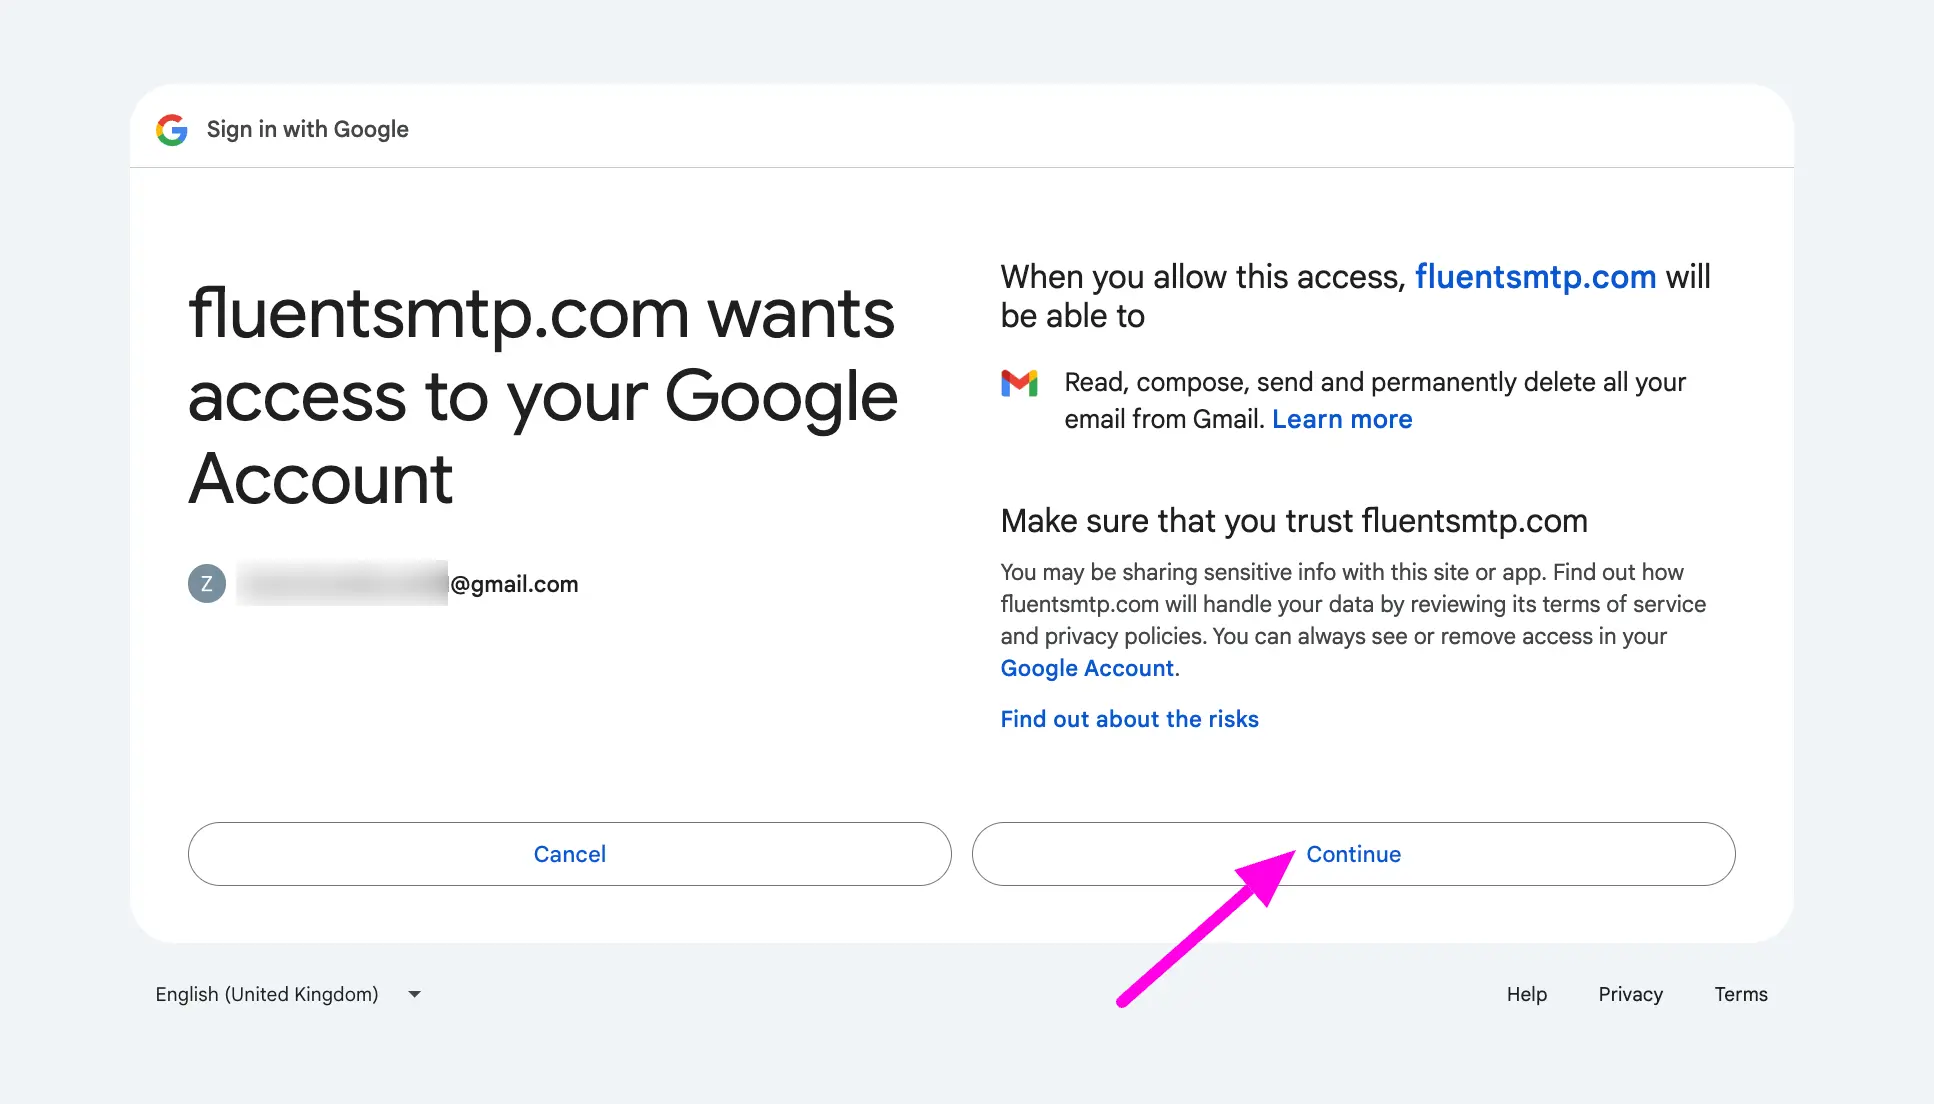
官方文件介面截圖:Continue button - 系統會產生 Access Token,點選
Copy按鈕複製此權杖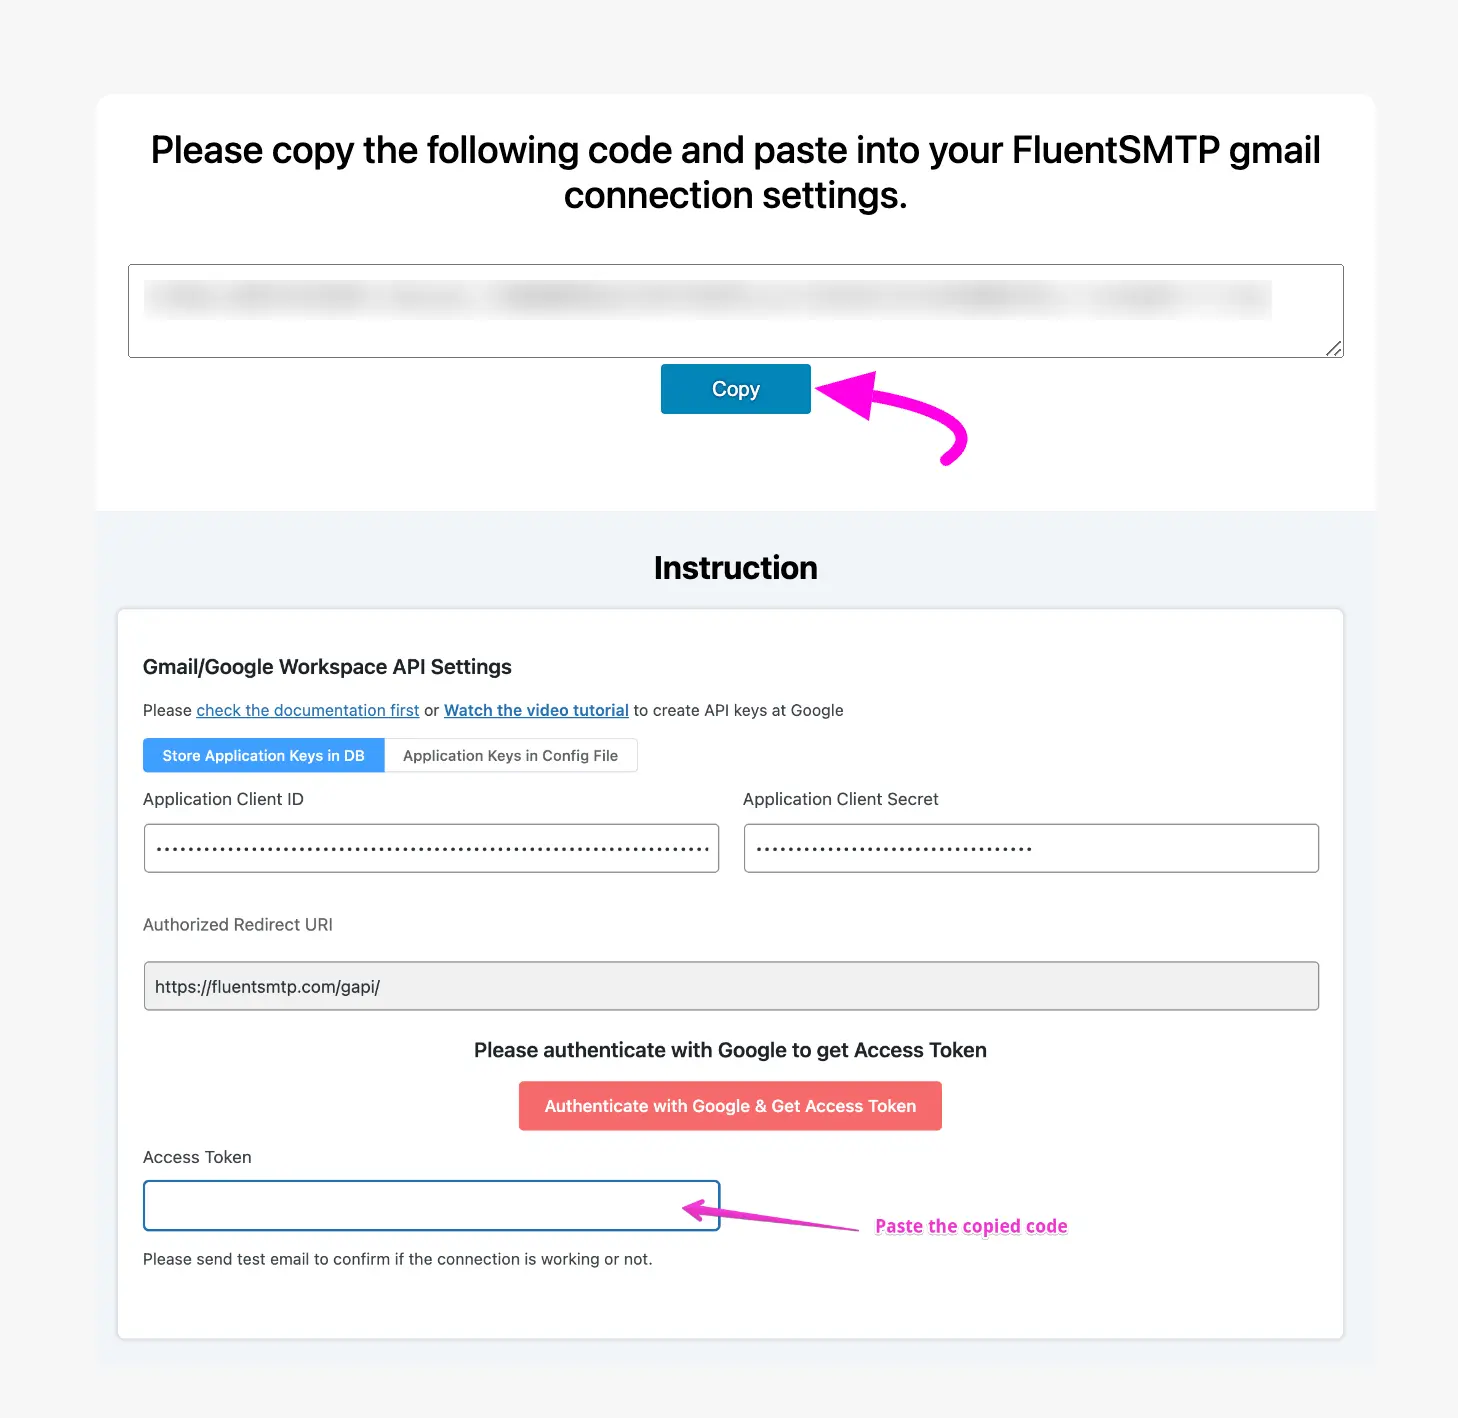
官方文件介面截圖:Copy the Access token - 將複製的 Access Token 貼回 FluentSMTP 連線設定,再點選
Save Connection Settings按鈕完成連接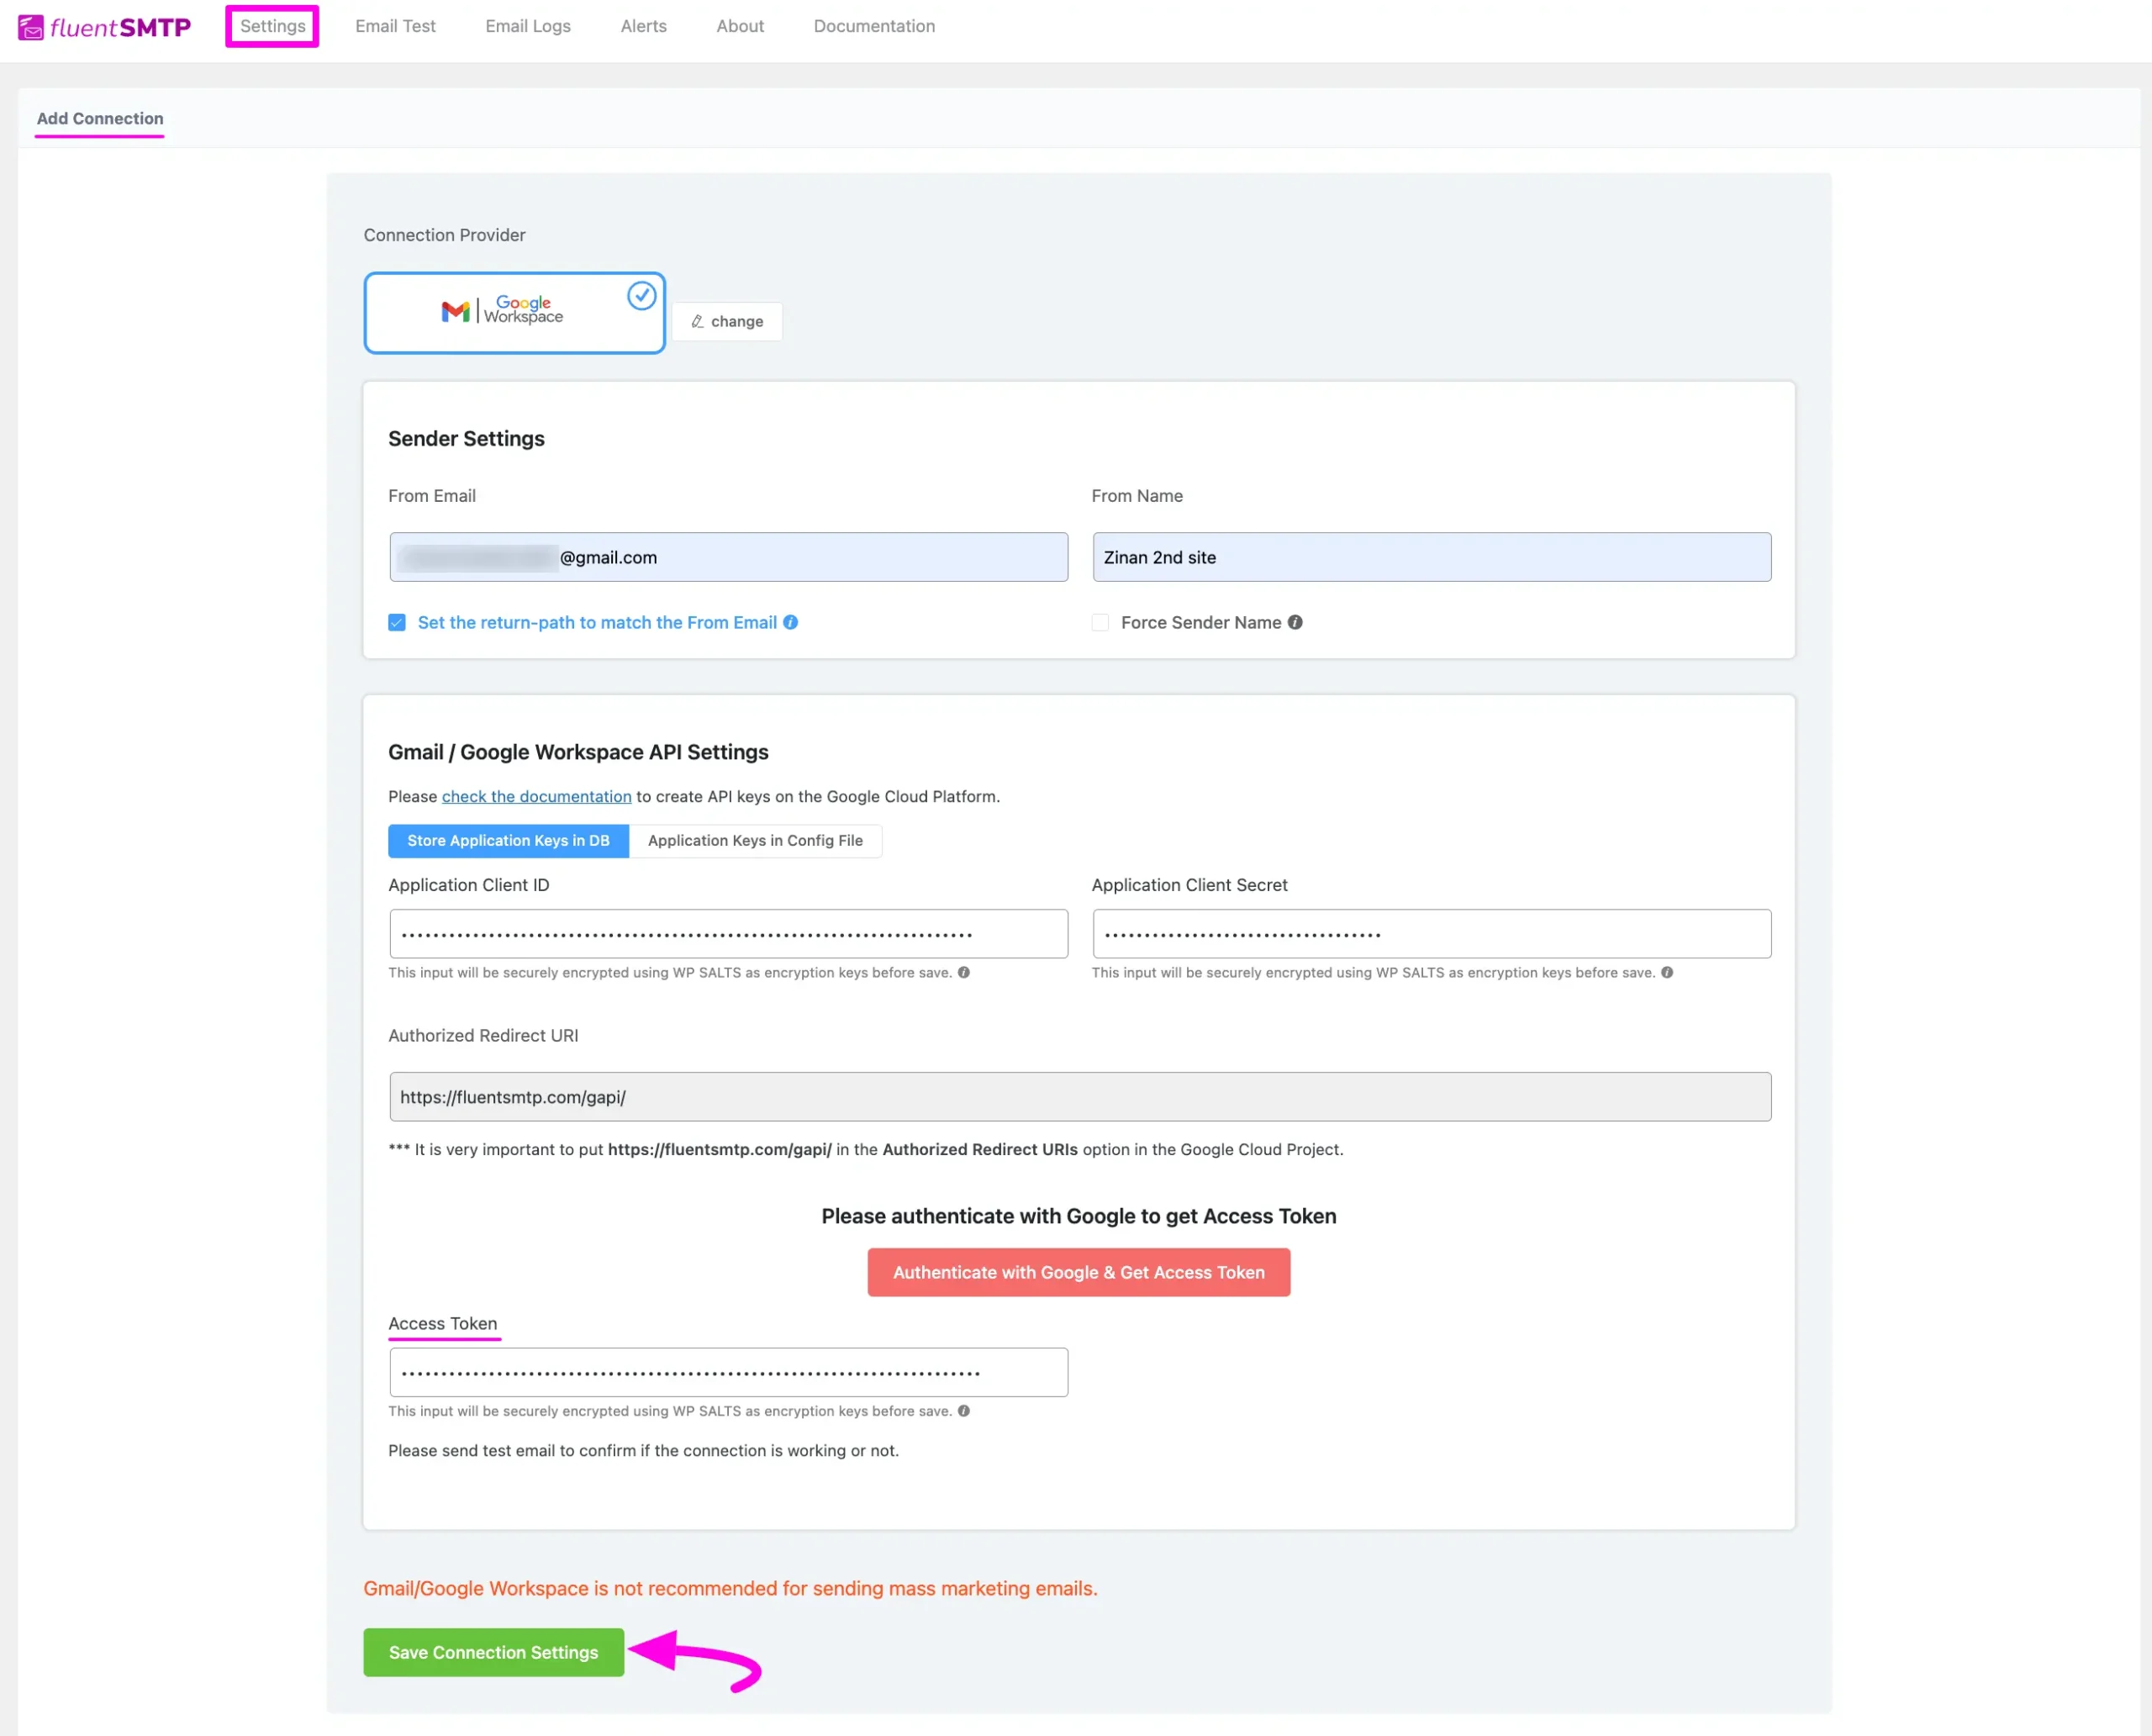
官方文件介面截圖:Finally save connection settings button
金鑰儲存方式與後續建議
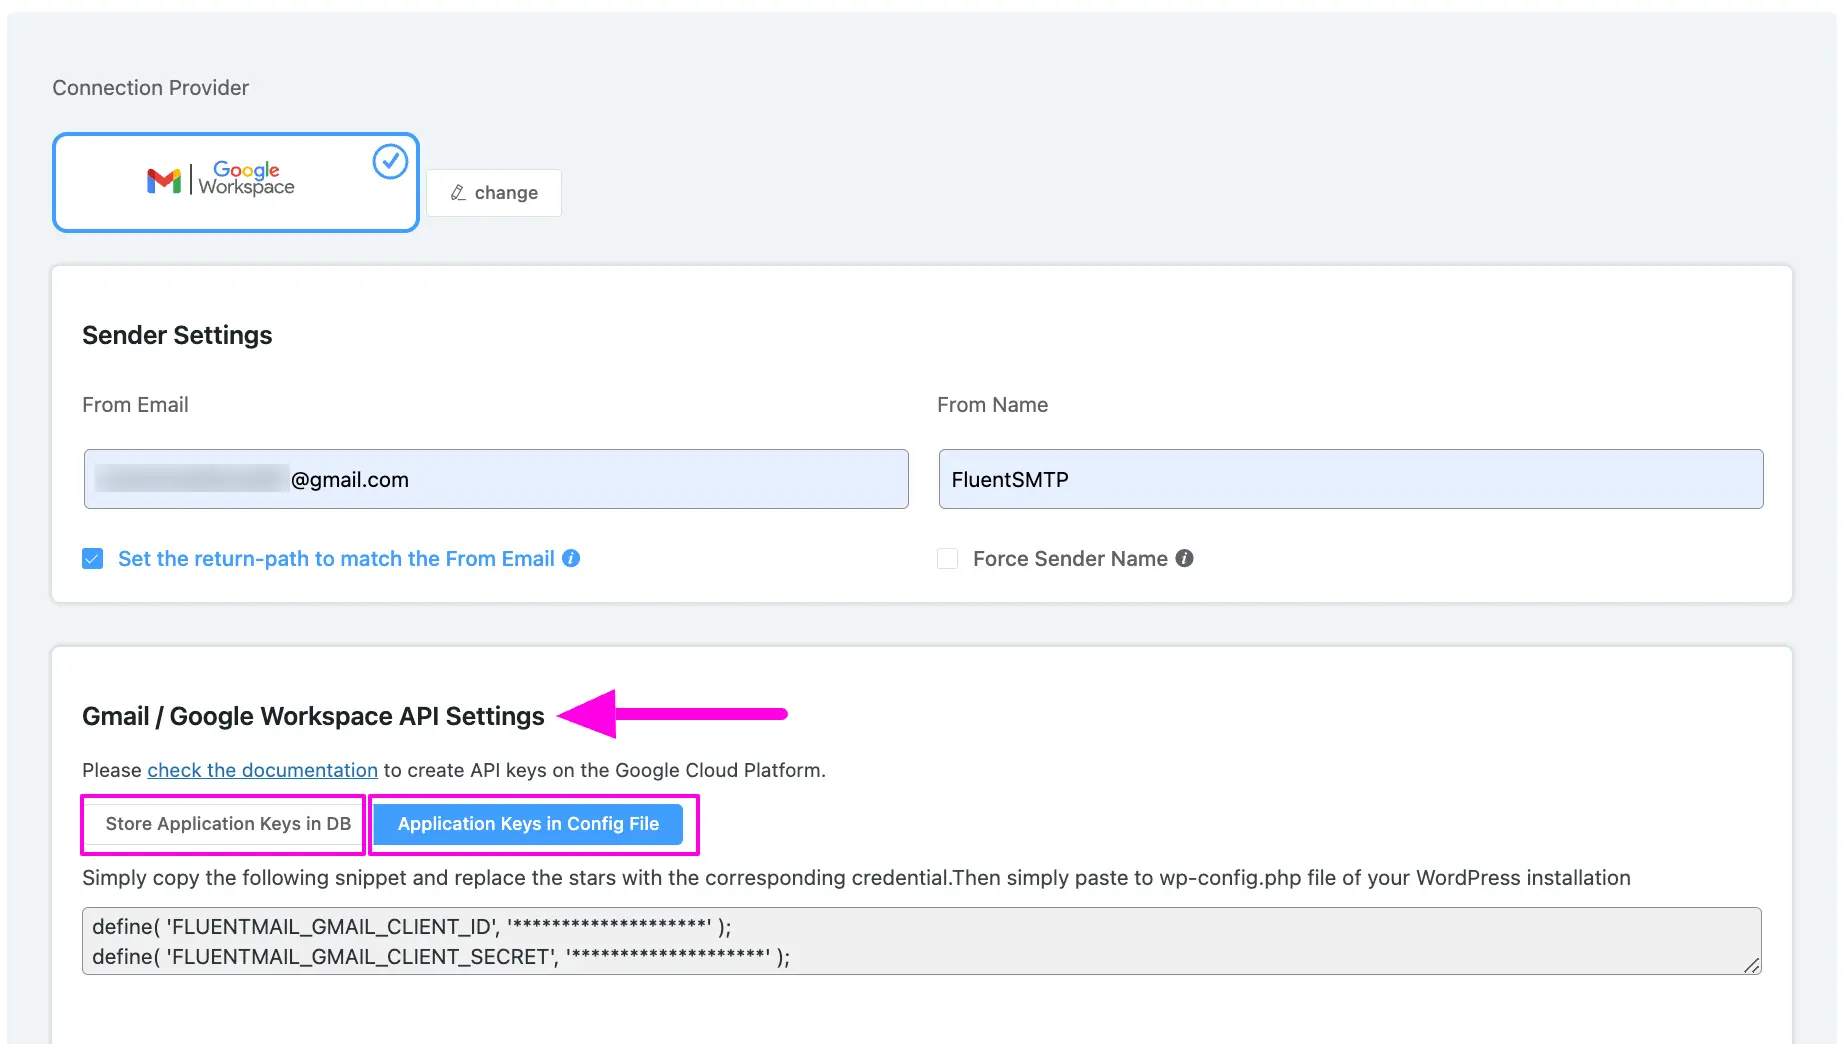
Store Application Keys in DB 預設為啟用,官方建議保留此設定,金鑰會以加密格式存於資料庫
也可選擇透過 Application Keys in Config File 方式,在 wp-config.php 中以 FLUENTMAIL_GMAIL_CLIENT_ID 與 FLUENTMAIL_GMAIL_CLIENT_SECRET 定義金鑰
建議設定完成後寄送測試郵件,以確認連線設定是否成功
介面名稱對照
Connection Providers:FluentSMTP 中可選擇的郵件服務供應商清單,例如 Gmail/Google WorkspaceAdd Connection:用來新增並設定郵件服務連線資訊的頁面Authorized Redirect URL:需複製並填入 Google Cloud 憑證設定中的授權轉址網址Access Token:完成 Google 授權後產生的驗證權杖,需貼回 FluentSMTP 連線設定OAuth consent screen:Google Cloud 中設定應用程式名稱與聯絡資訊的畫面Store Application Keys in DB:預設啟用的設定,將金鑰加密儲存於資料庫