
適合誰使用
使用 FluentBooking 外掛管理預約系統,需要將預約事件同步到 Google Calendar 或使用 Google Meet 的 WordPress 網站管理者
開始前準備
- 需要有可登入的 Google 帳號(host 帳號),才能連接 Remote Calendar
- 若選擇自建 App 方式,需要能存取 Google Cloud Console 並建立專案
教學內容
方式一:使用預設已驗證的 App(Default Verified App)
FluentBooking 提供官方已驗證的 App,是與其他 WordPress 預約外掛不同的內建功能
官方建議的快取時間為 5 分鐘,但可自行設定其他時長
- 到後台
Settings切換至Google Calendar/Meet分頁 - 選擇
Default Verified App並設定快取時間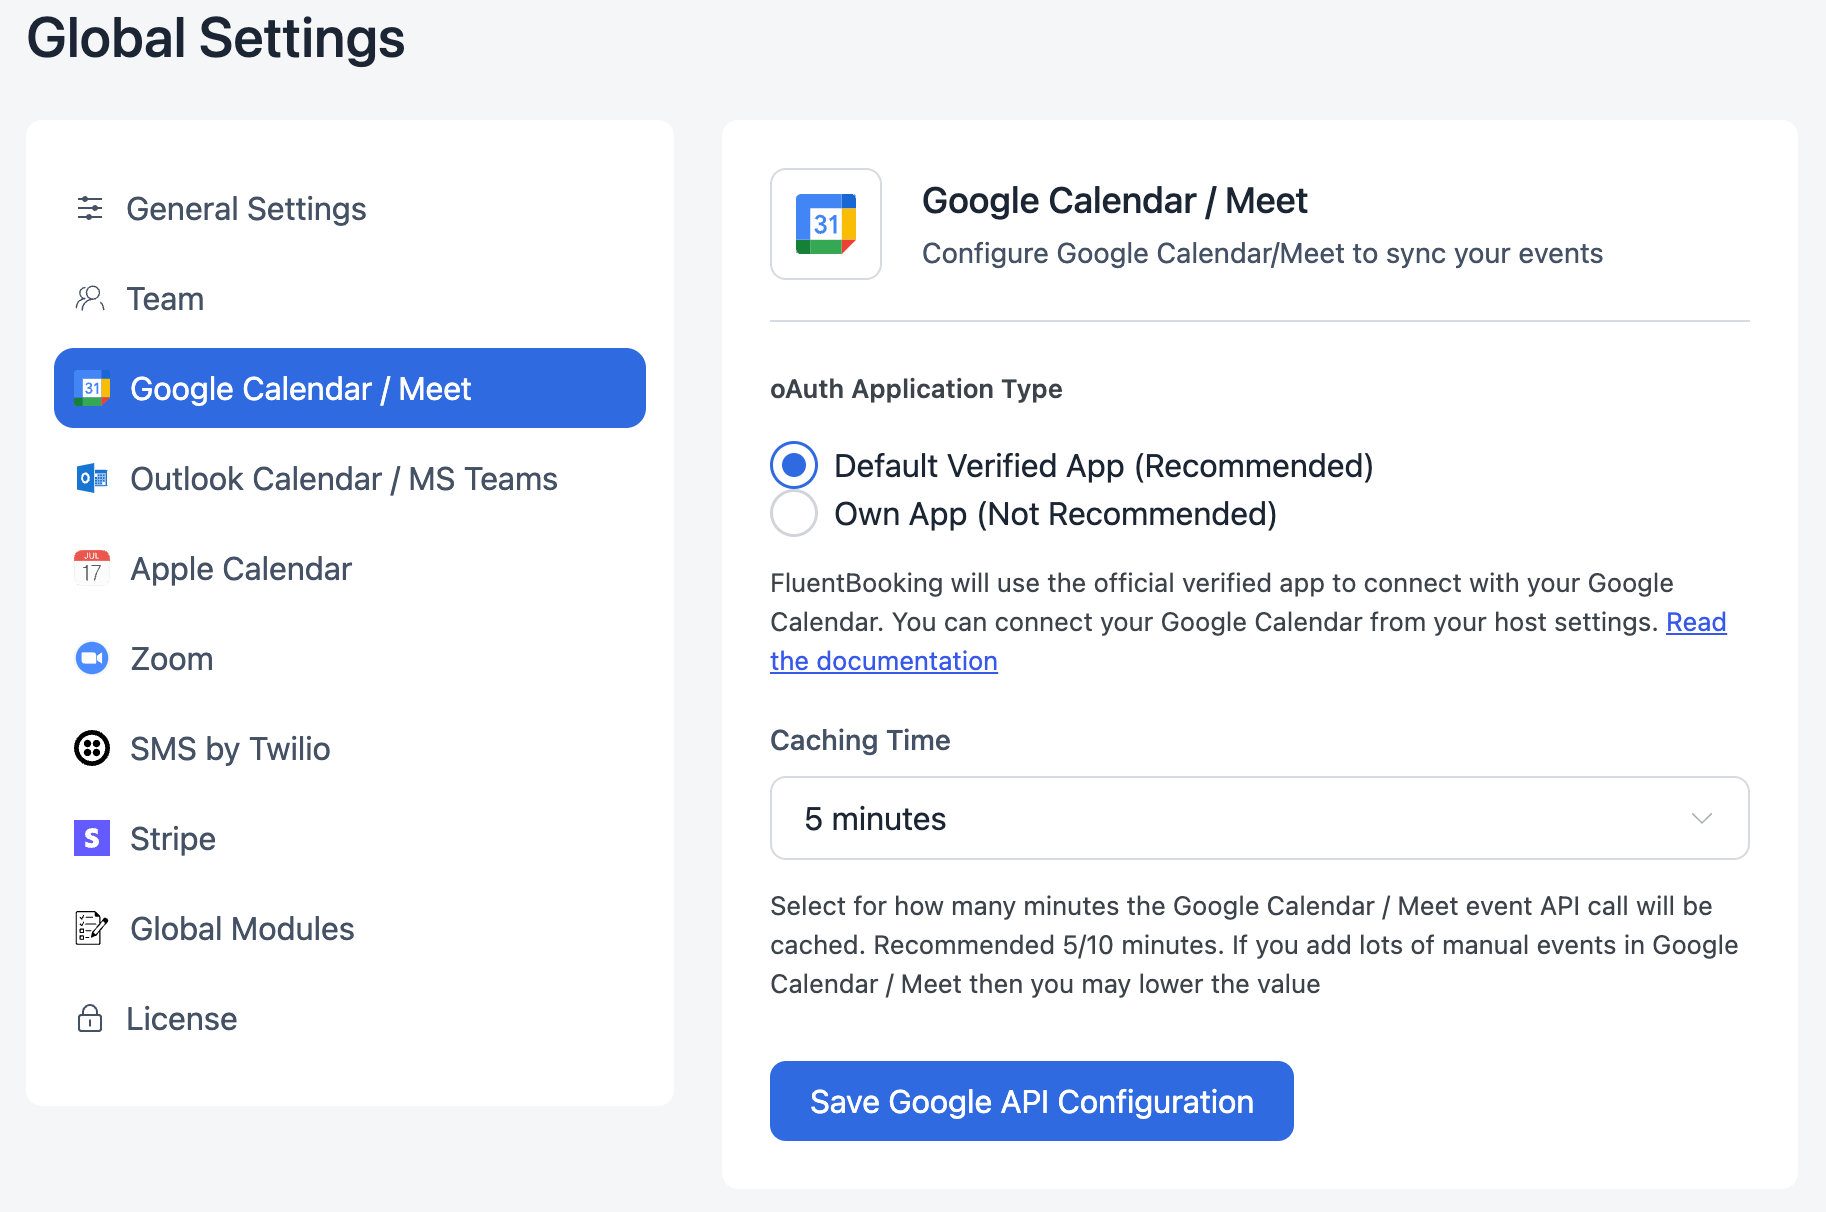
官方文件介面截圖:fluentbooking google calendar integration - 在
Calendars區塊選擇要同步預約事件的 host - 進入該 host 的
Host Settings > Remote Calendar,點選Connect with Google Calendar/Meet - 加入該 host 的 Google 帳號以同步 FluentBooking 事件
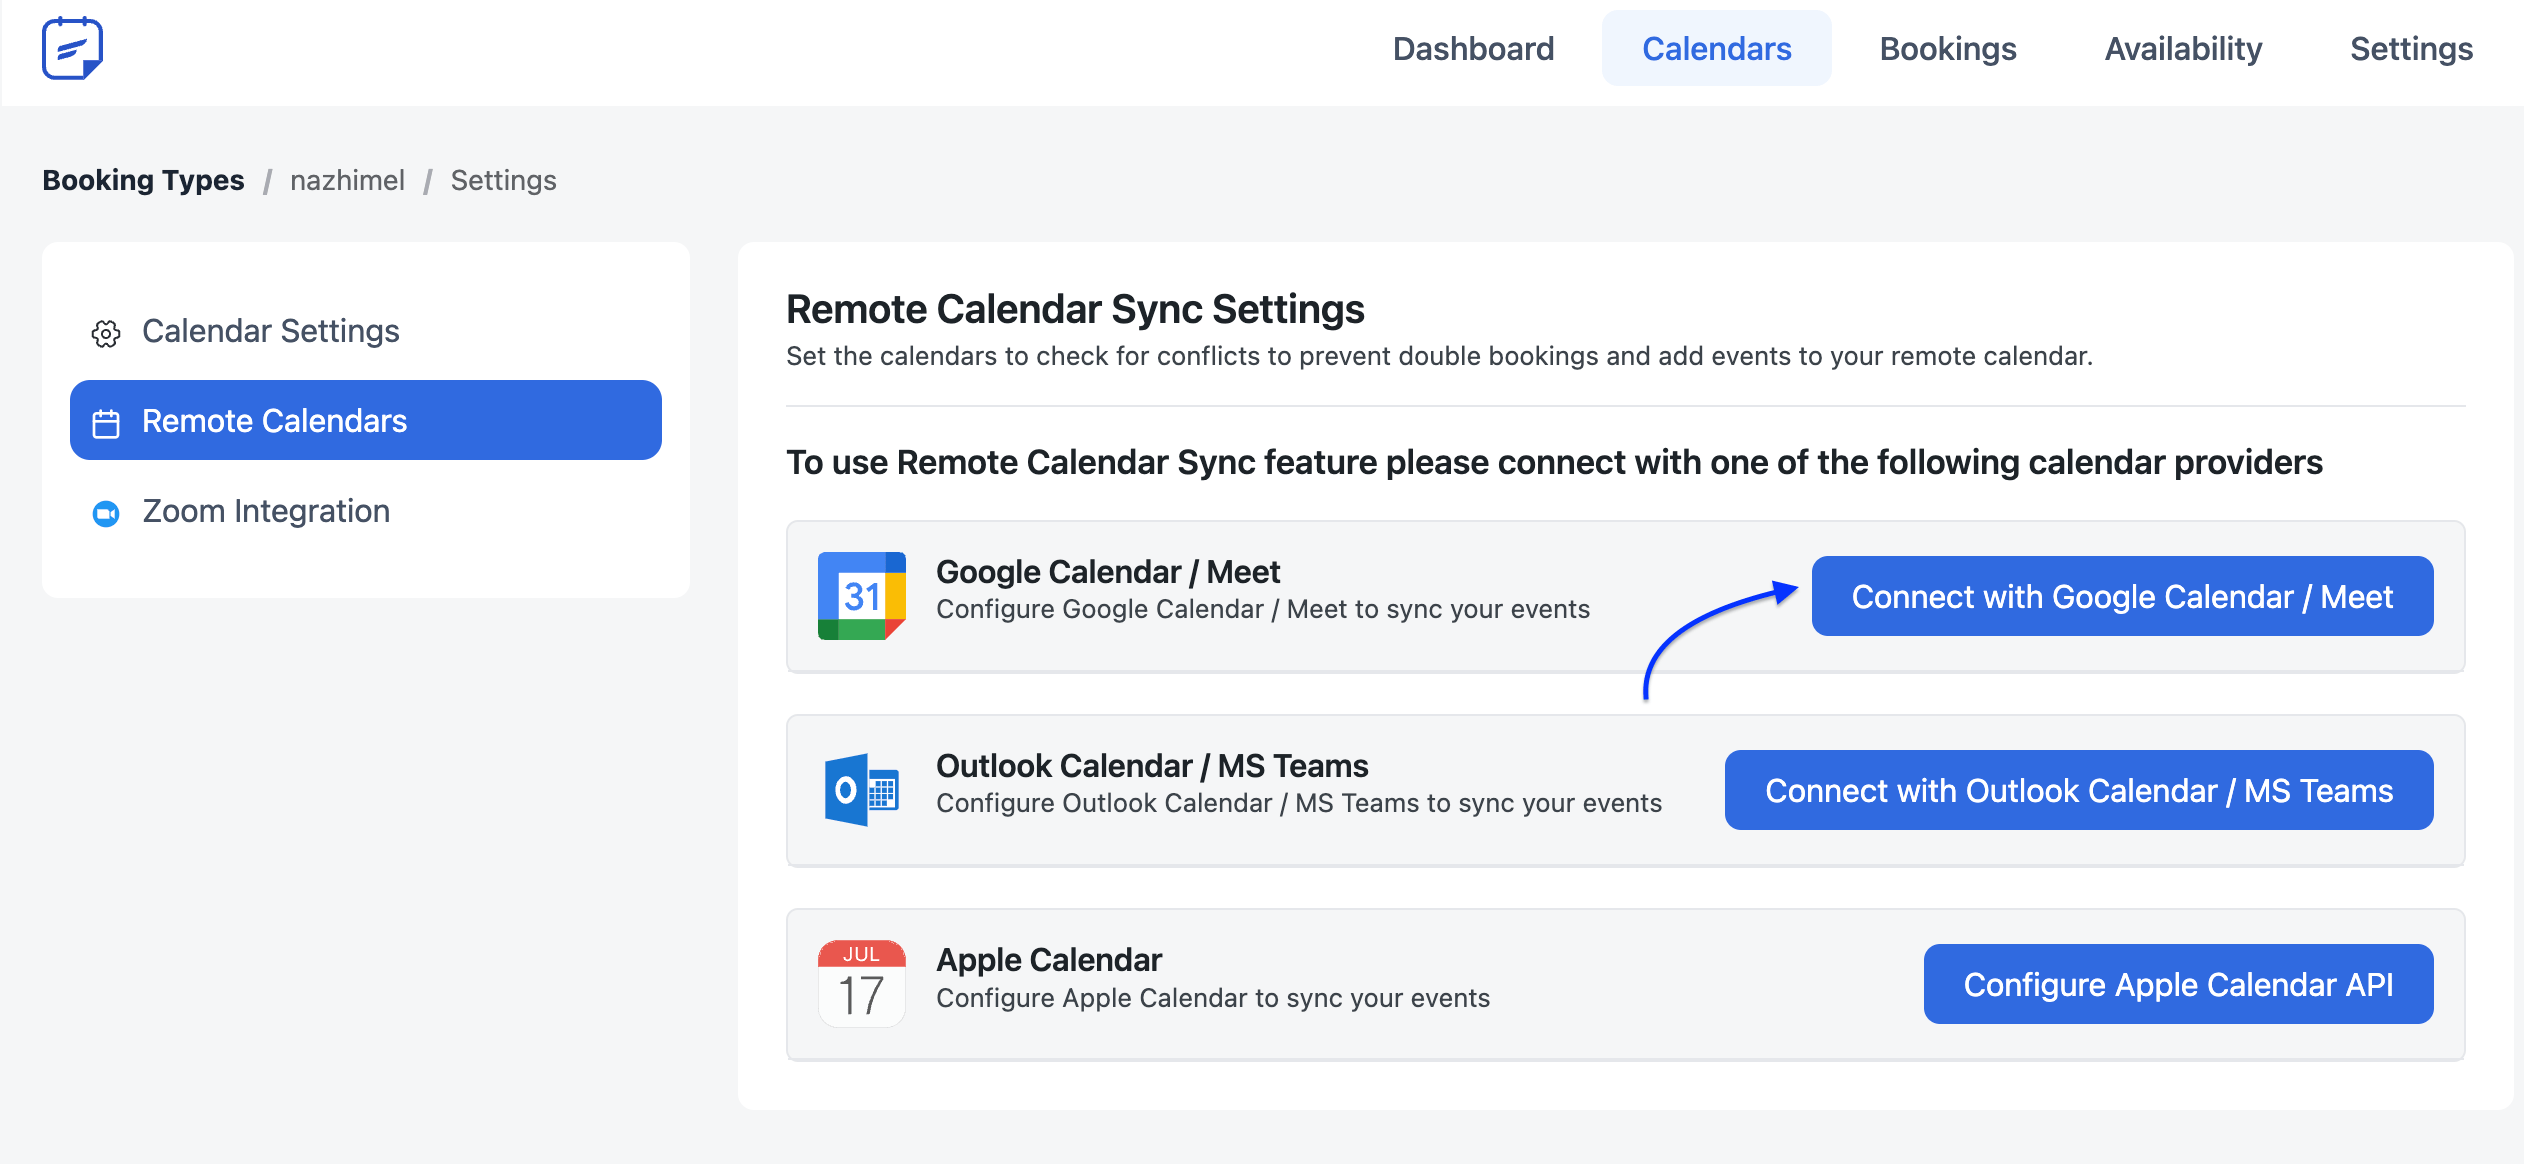
官方文件介面截圖:fluentbooking google calendar integration - 授權 FluentBooking 所需權限後點選
Continue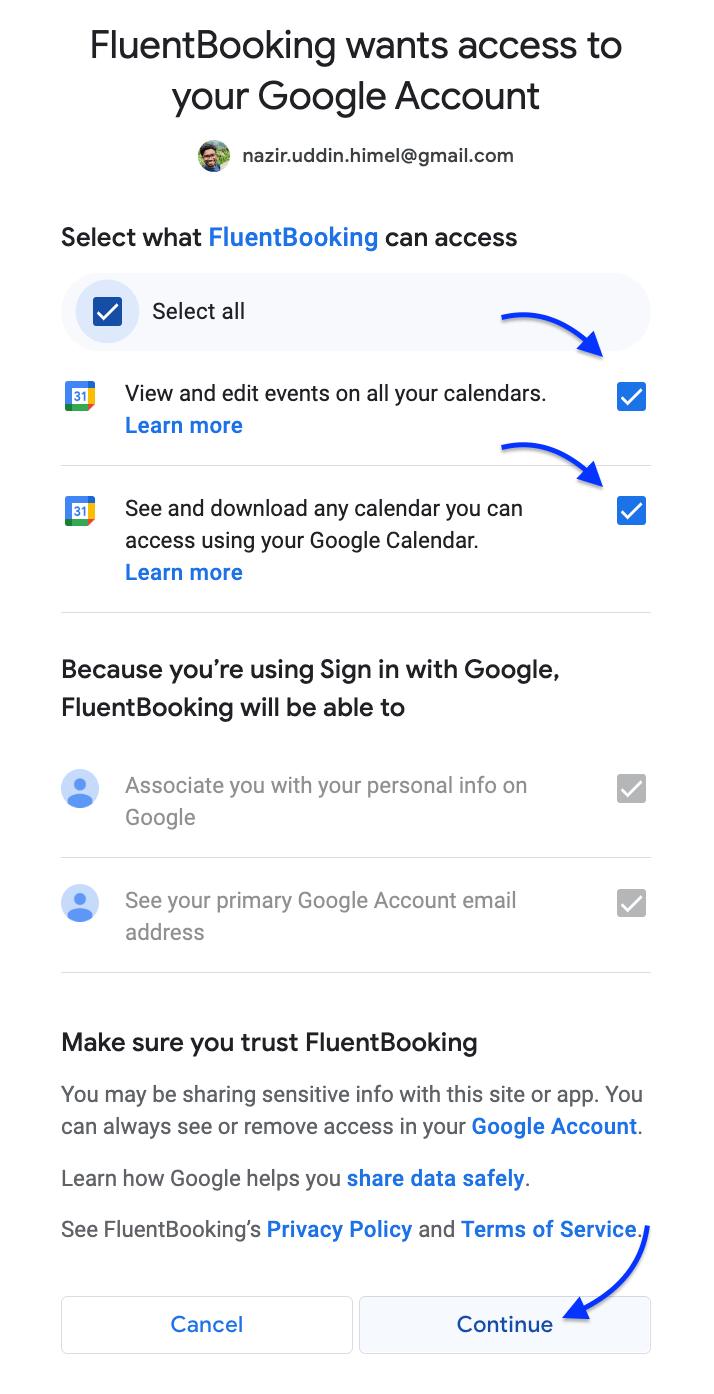
官方文件介面截圖:fluentbooking google calendar permissions 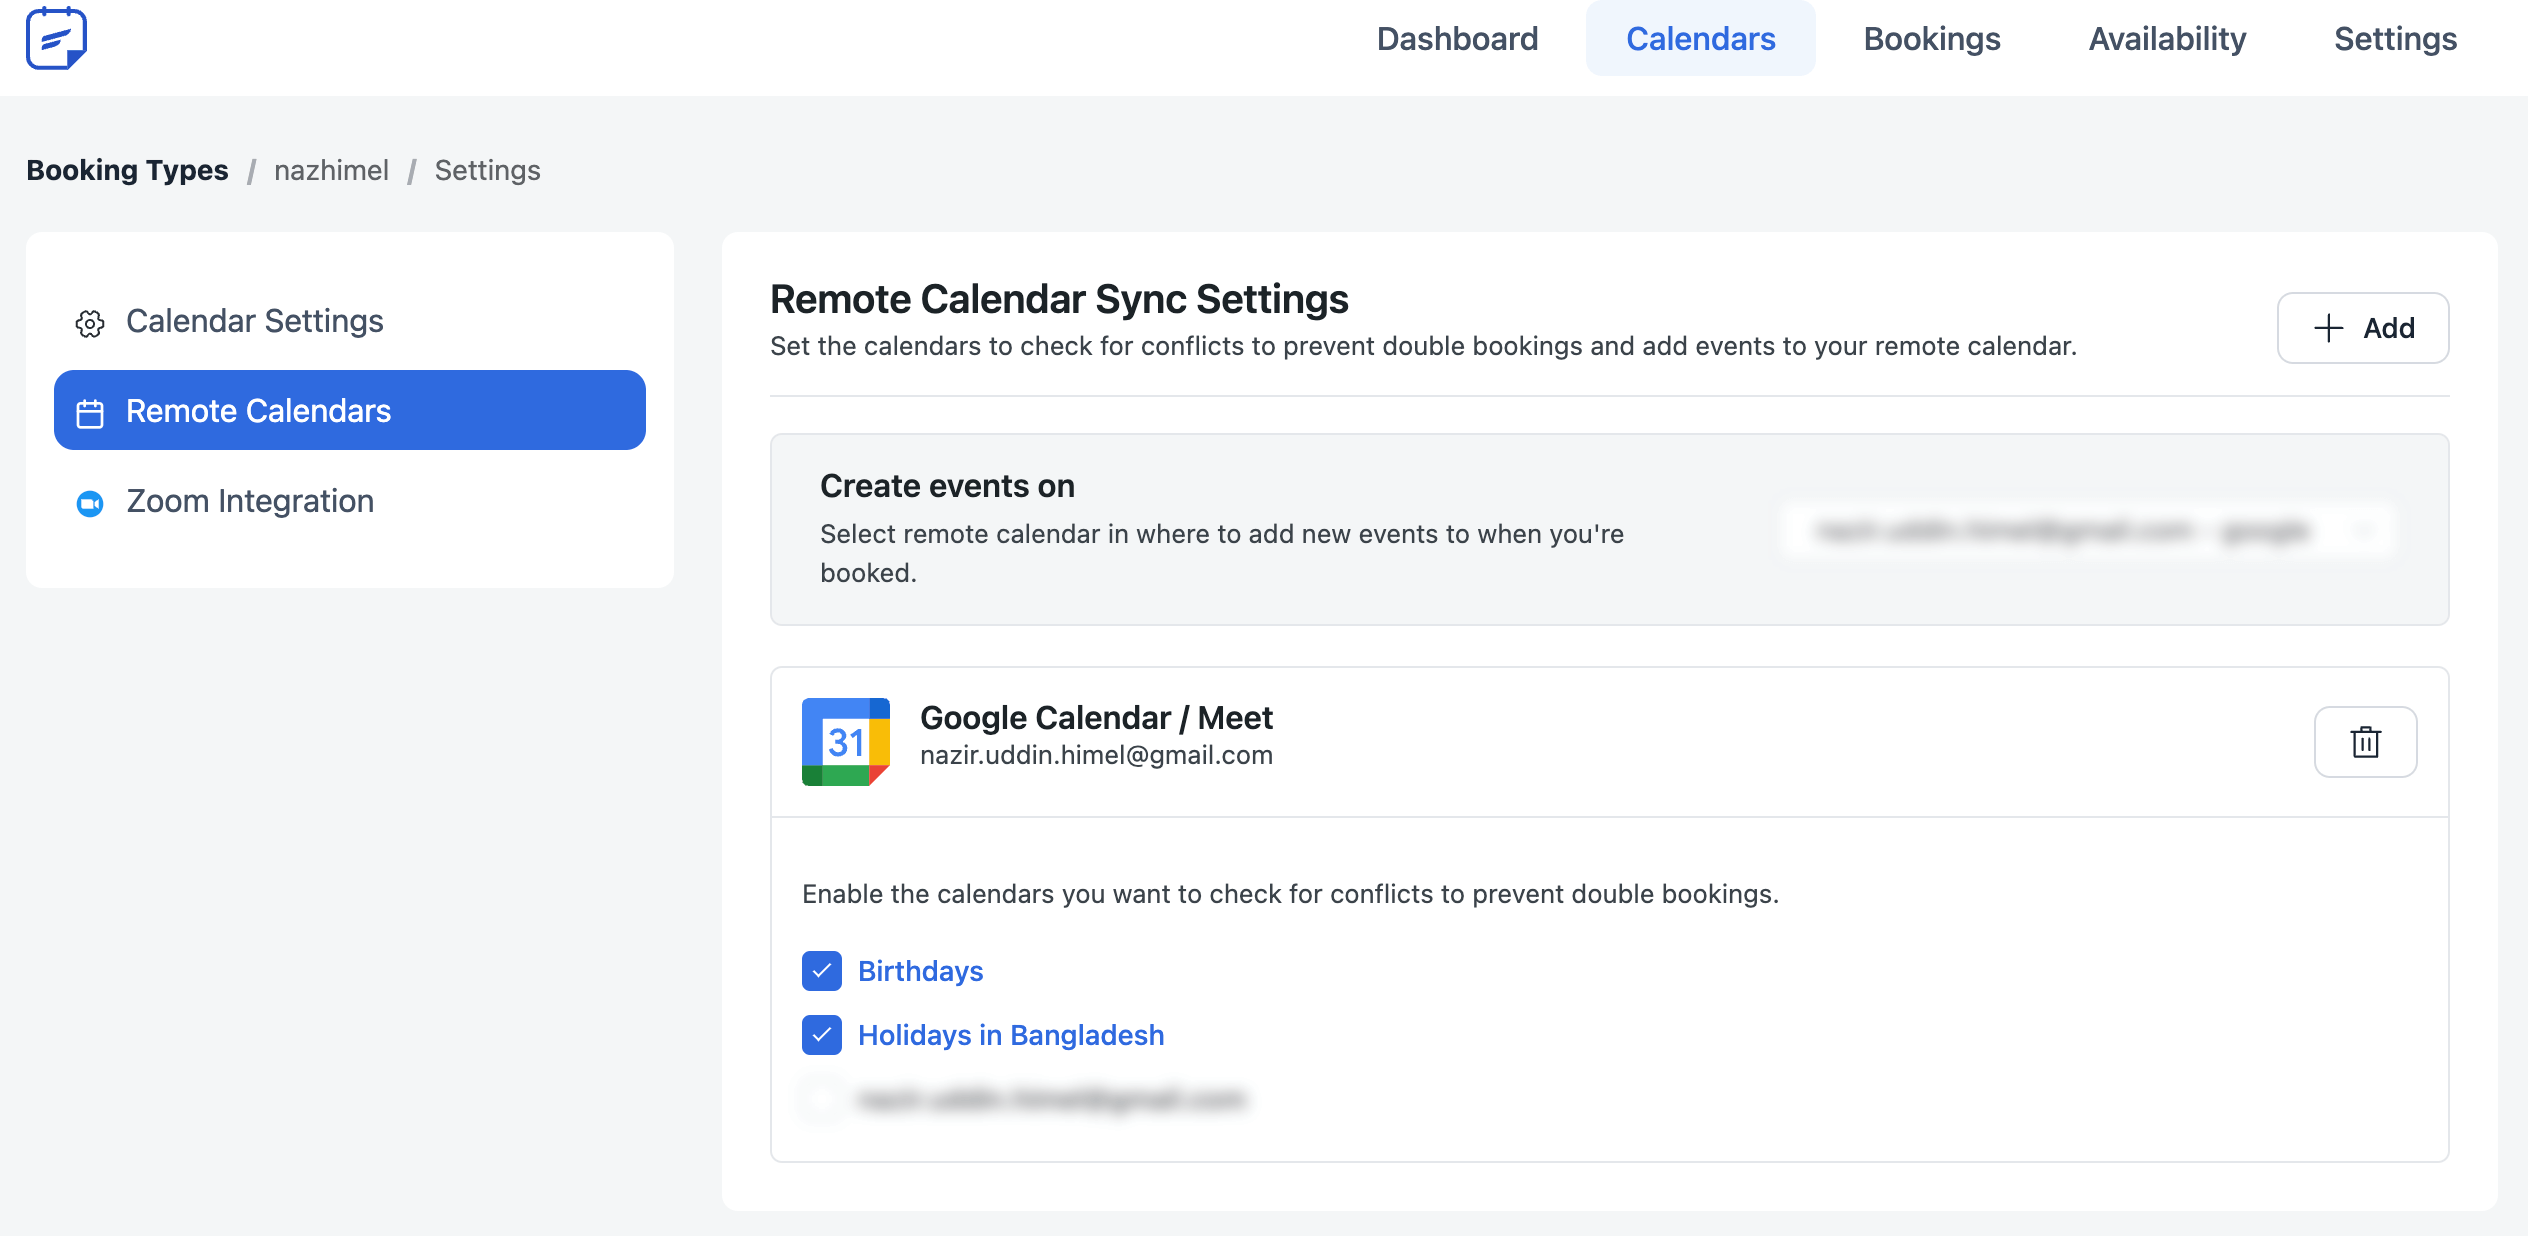
官方文件介面截圖:conflict checking
方式二:使用自建 App(Own App,官方不建議)
若不使用 Google Workspace 而選擇 External 使用者類型,App 可能在一到兩週內導致與 FluentBooking 的整合失效
- 前往 Google Cloud Console 建立新專案或選擇既有專案
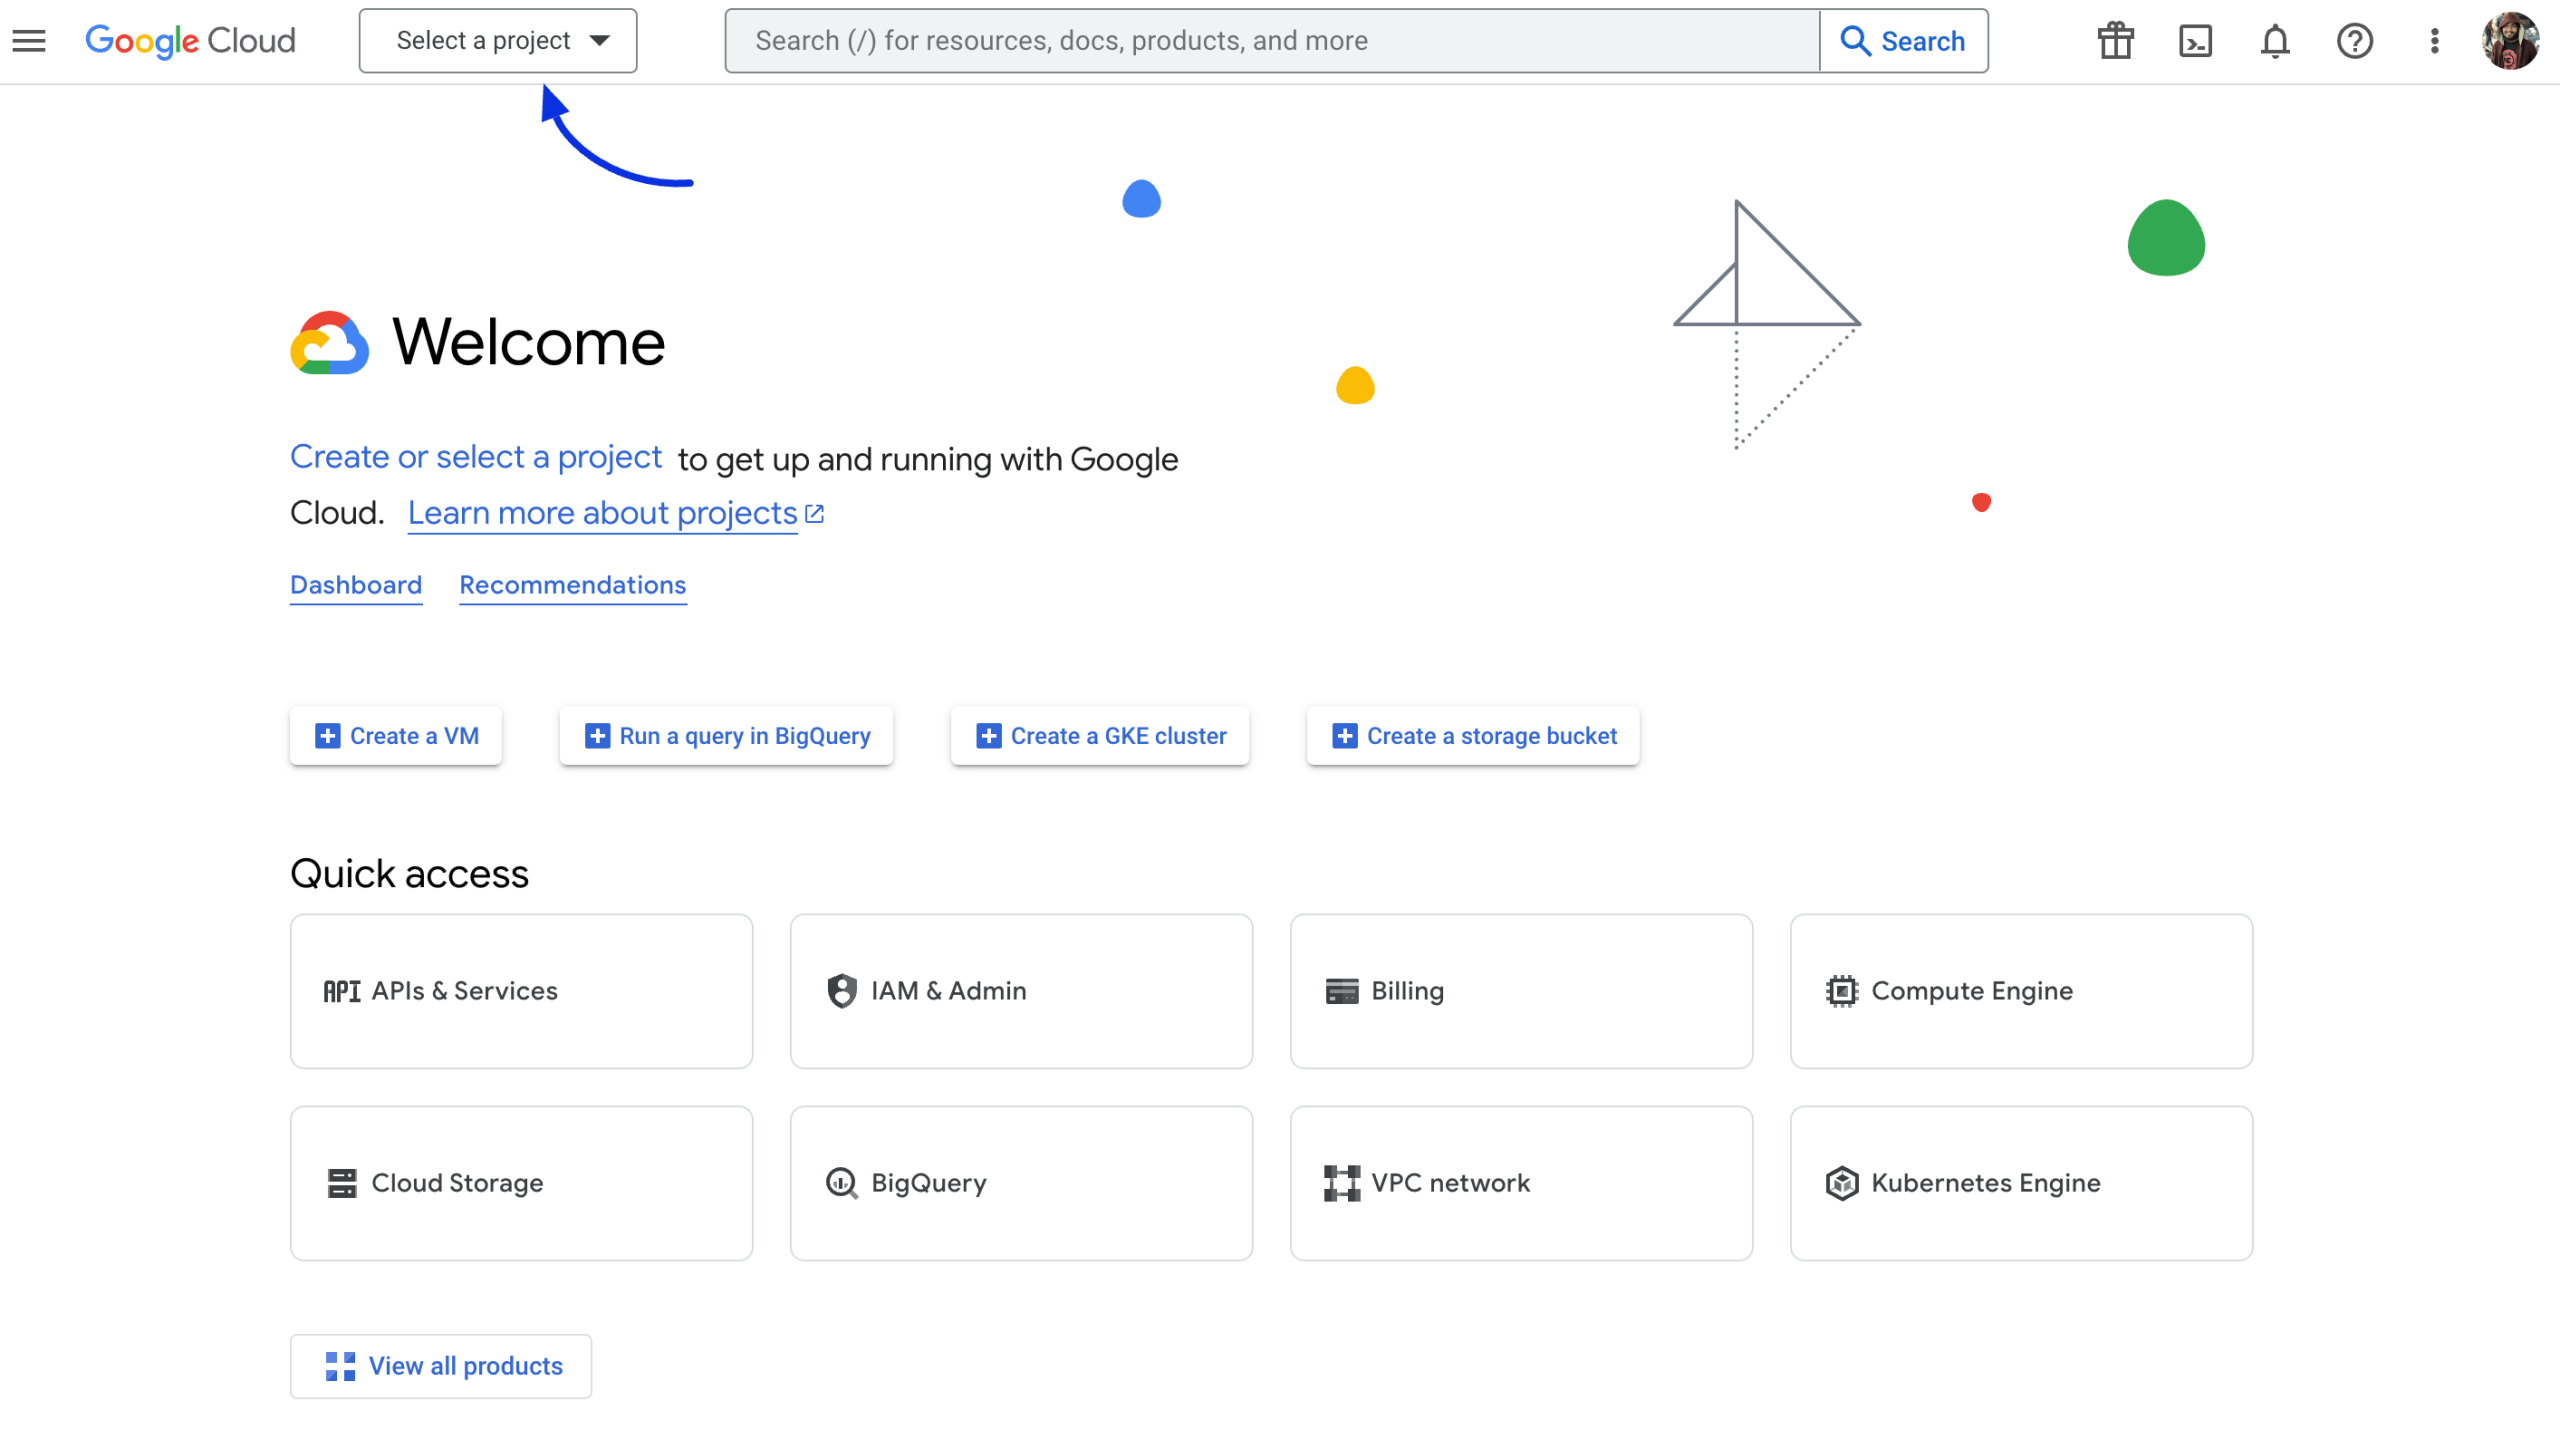
官方文件介面截圖:Create or Select Project 官方介面截圖 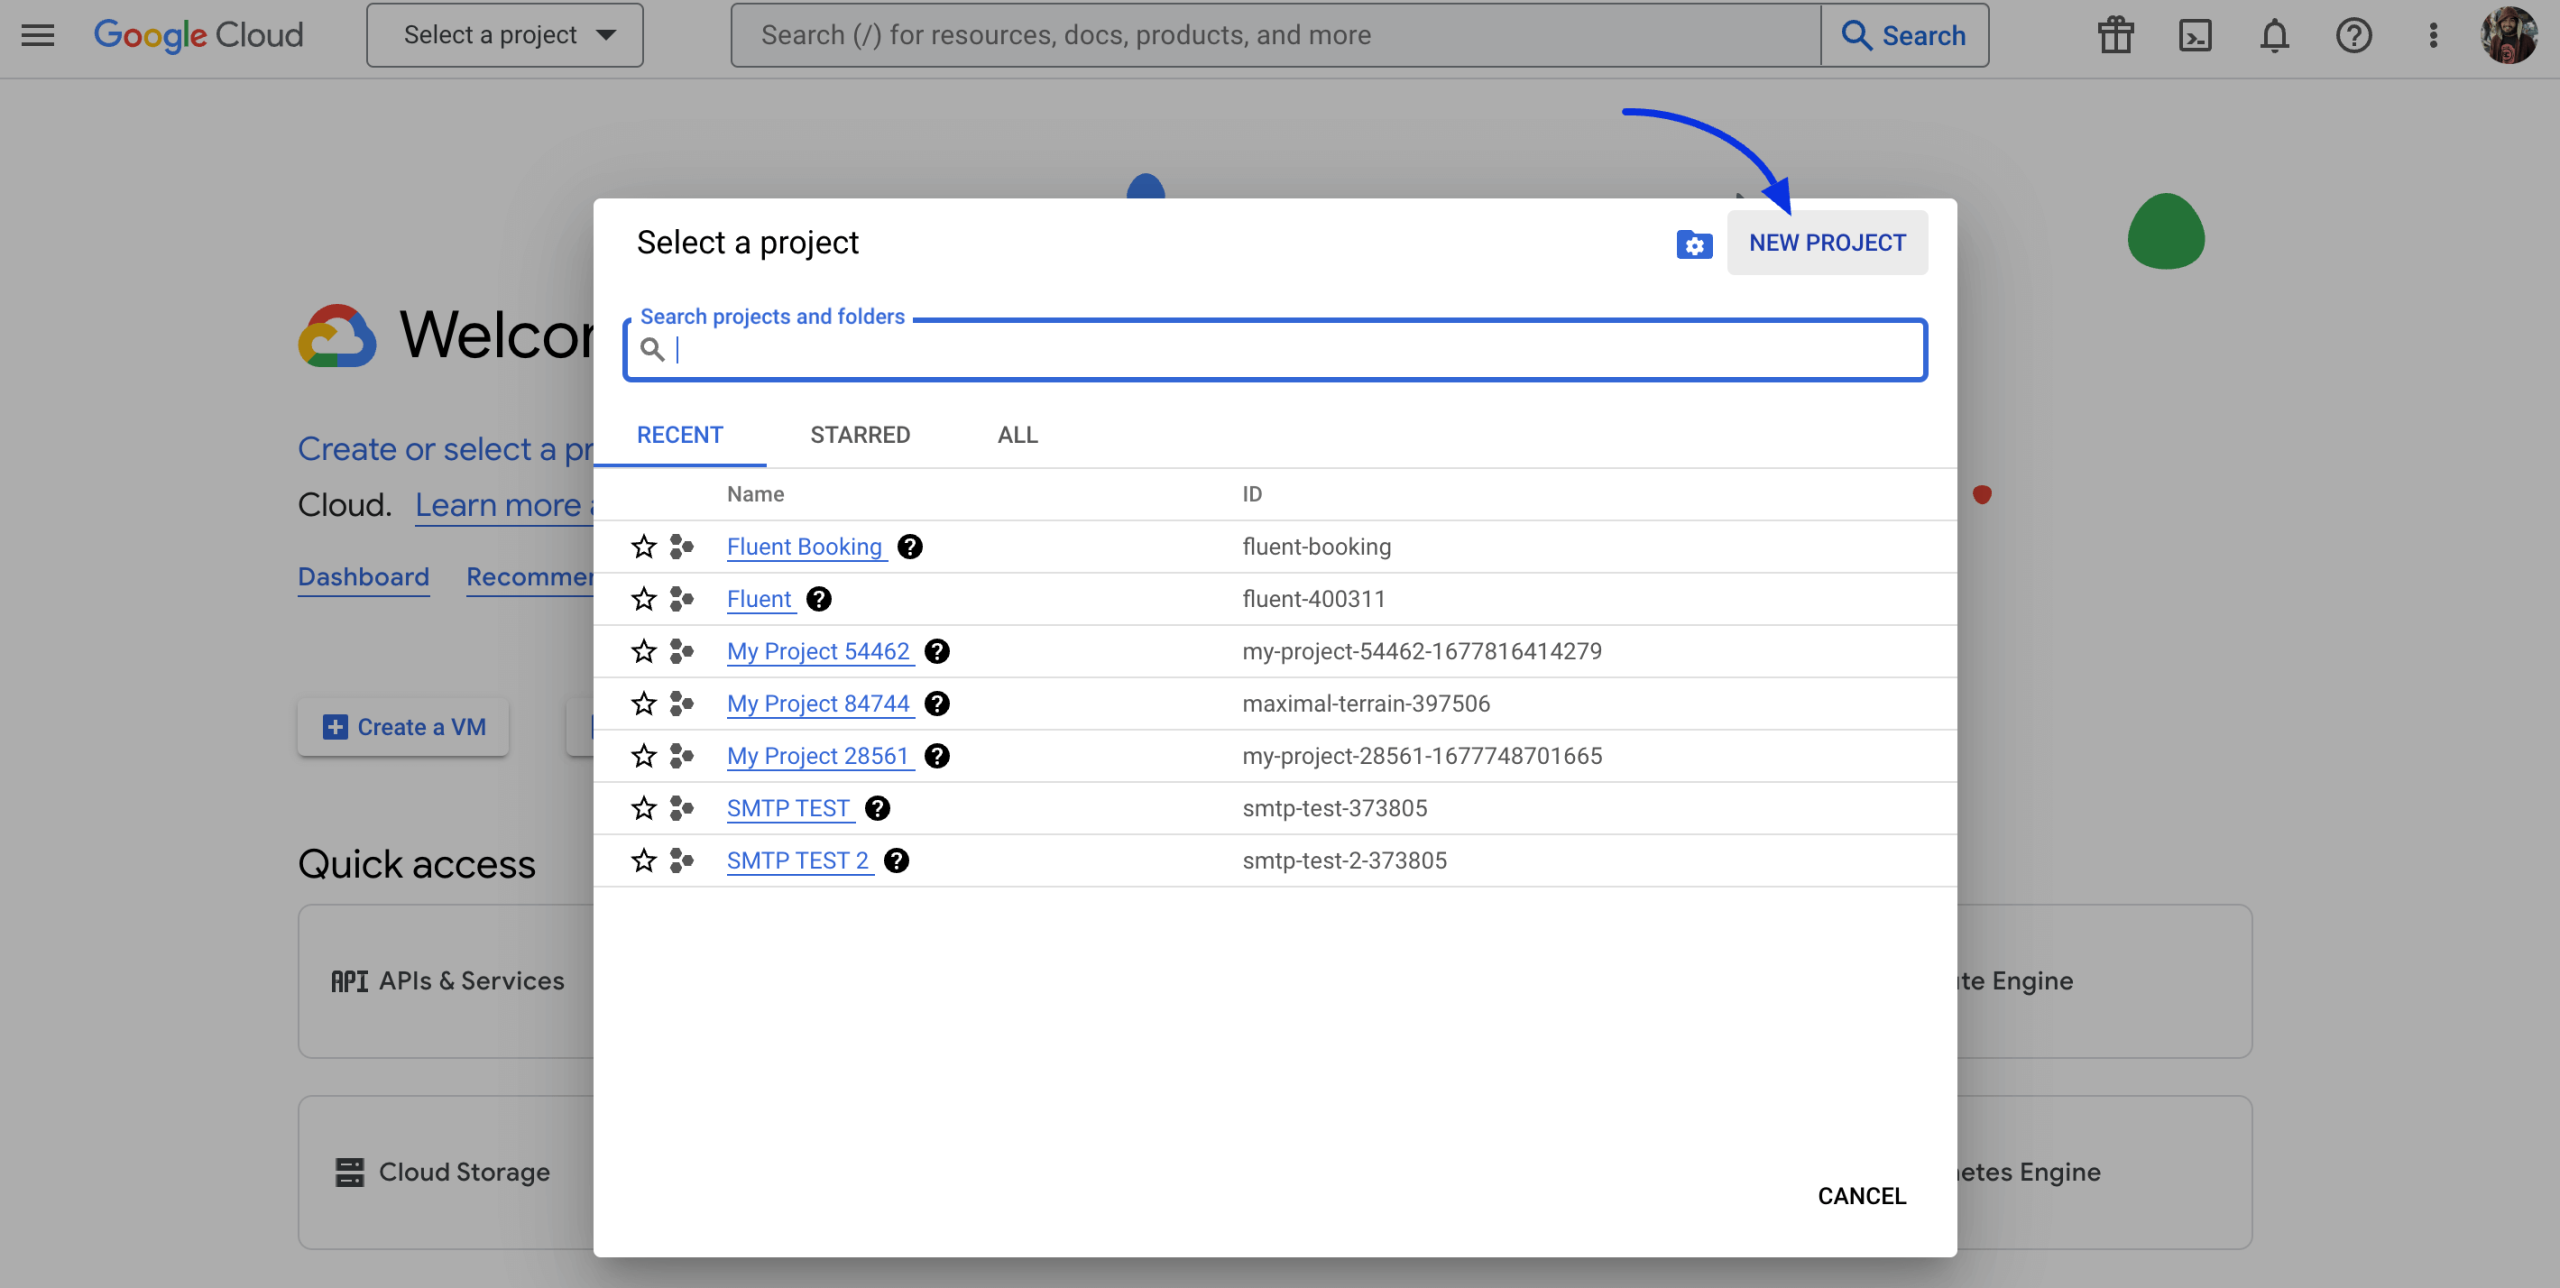
官方文件介面截圖:Create or Select Project 官方介面截圖 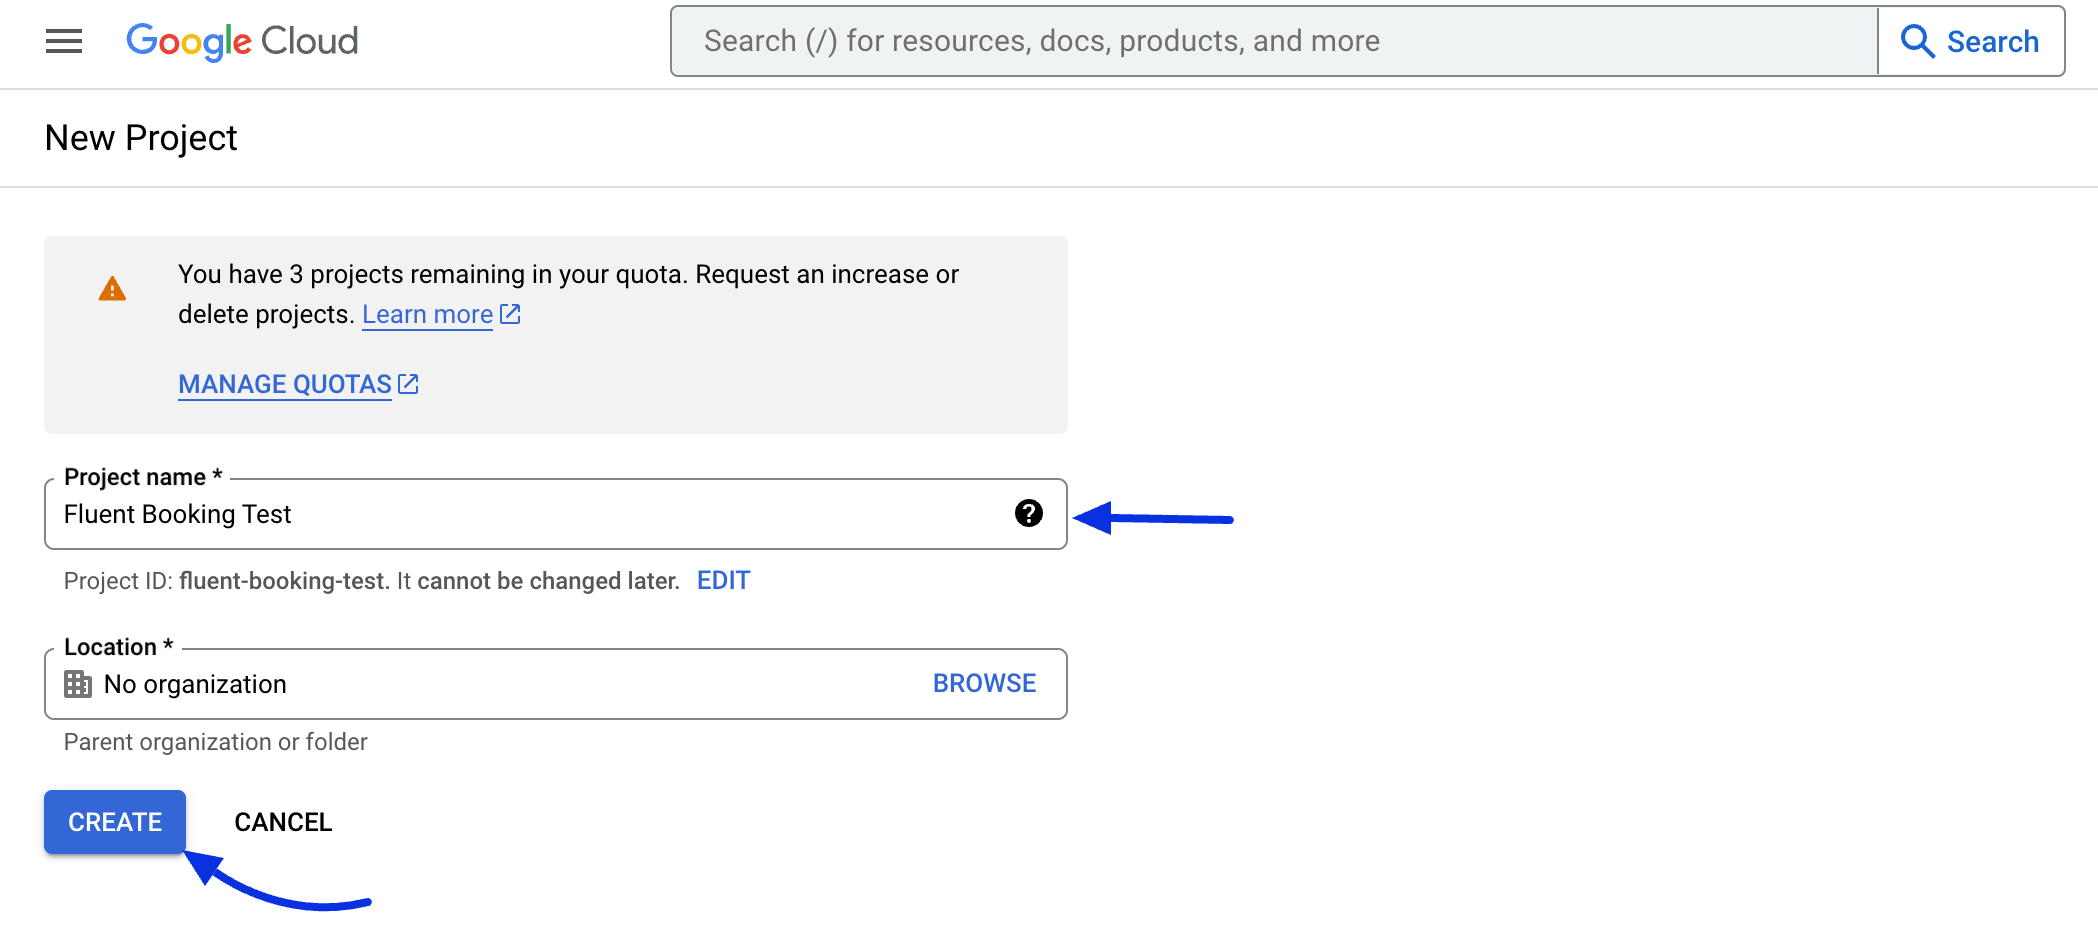
官方文件介面截圖:Create or Select Project 官方介面截圖 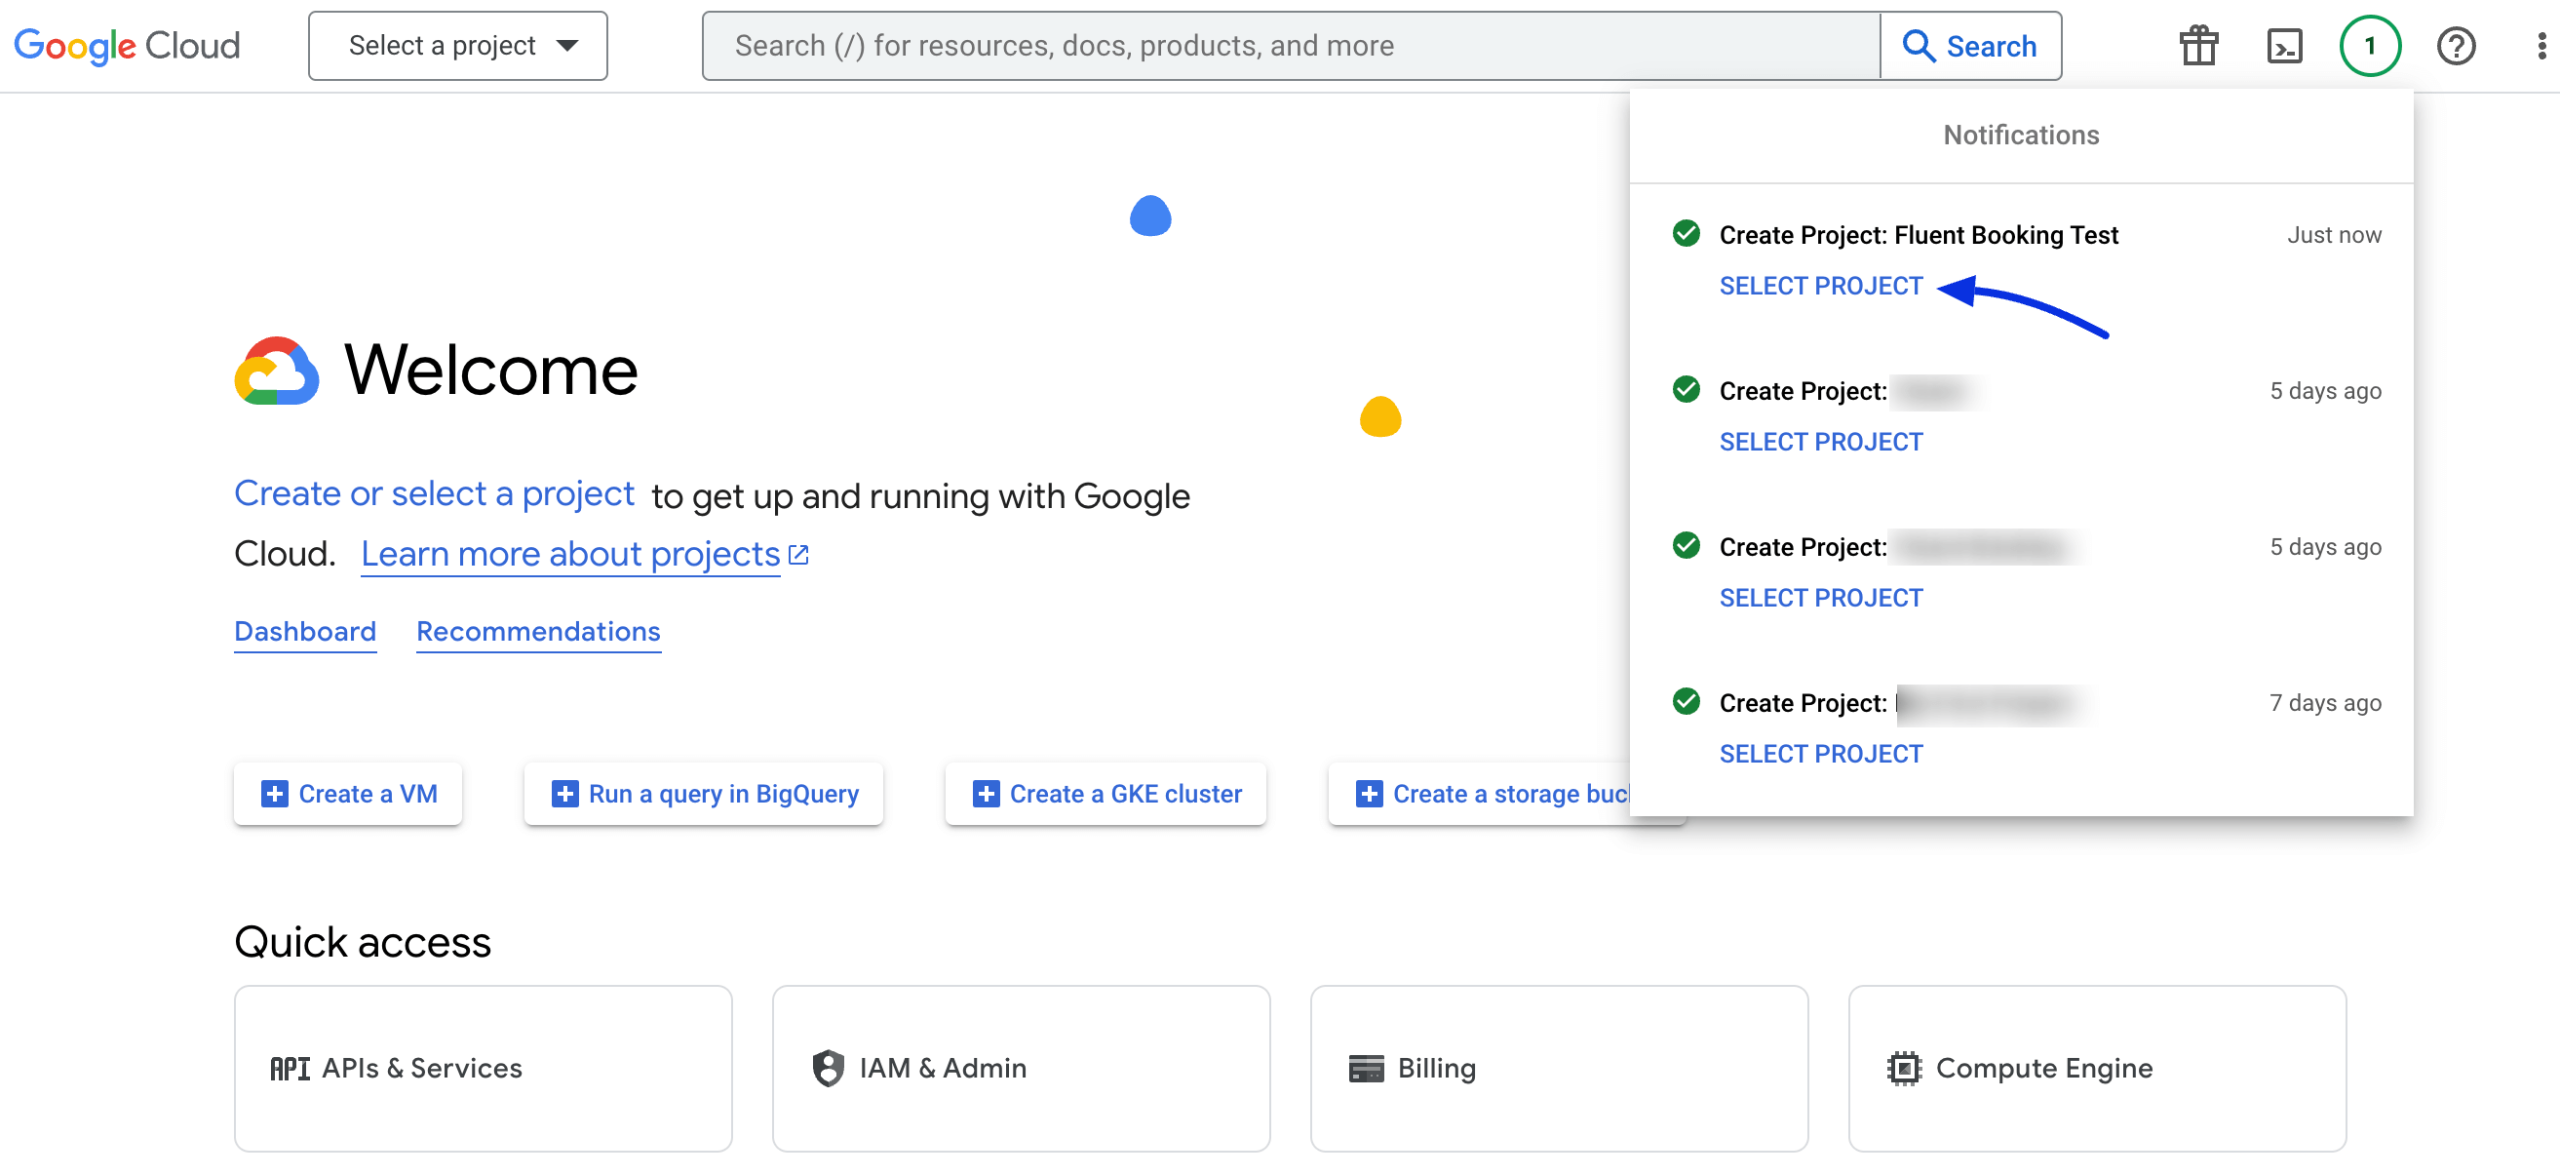
官方文件介面截圖:Create or Select Project 官方介面截圖 - 進入
APIs & Services,選擇OAuth consent screen
官方文件介面截圖:Configuring 0Auth Consent 官方介面截圖 - 選擇
Internal使用者類型並點選Create(若非 Google Workspace 則選External)
官方文件介面截圖:Configuring 0Auth Consent 官方介面截圖 - 填寫 App name、User Support Email、Authorized domain、Developer Contact,之後三步驟可直接
Save and Continue
官方文件介面截圖:Configuring 0Auth Consent 官方介面截圖 - 完成後點選
Publish App發布應用程式
官方文件介面截圖:Configuring 0Auth Consent 官方介面截圖 - 到
Library搜尋並啟用Google Calendar API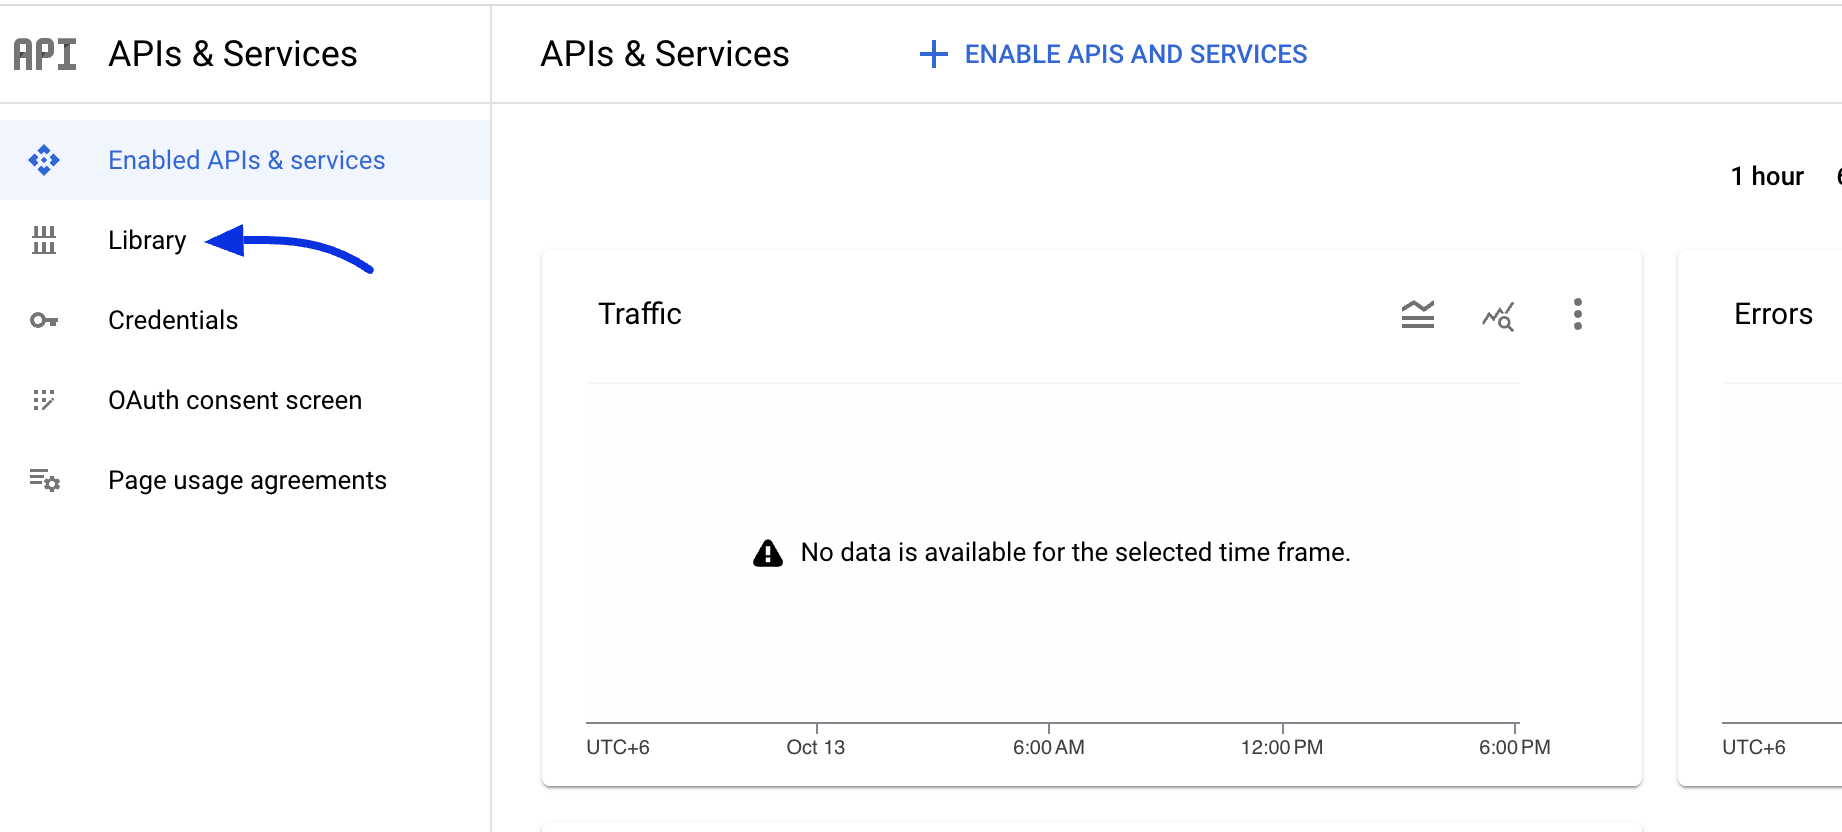
官方文件介面截圖:Enabling Google Calendar API 官方介面截圖 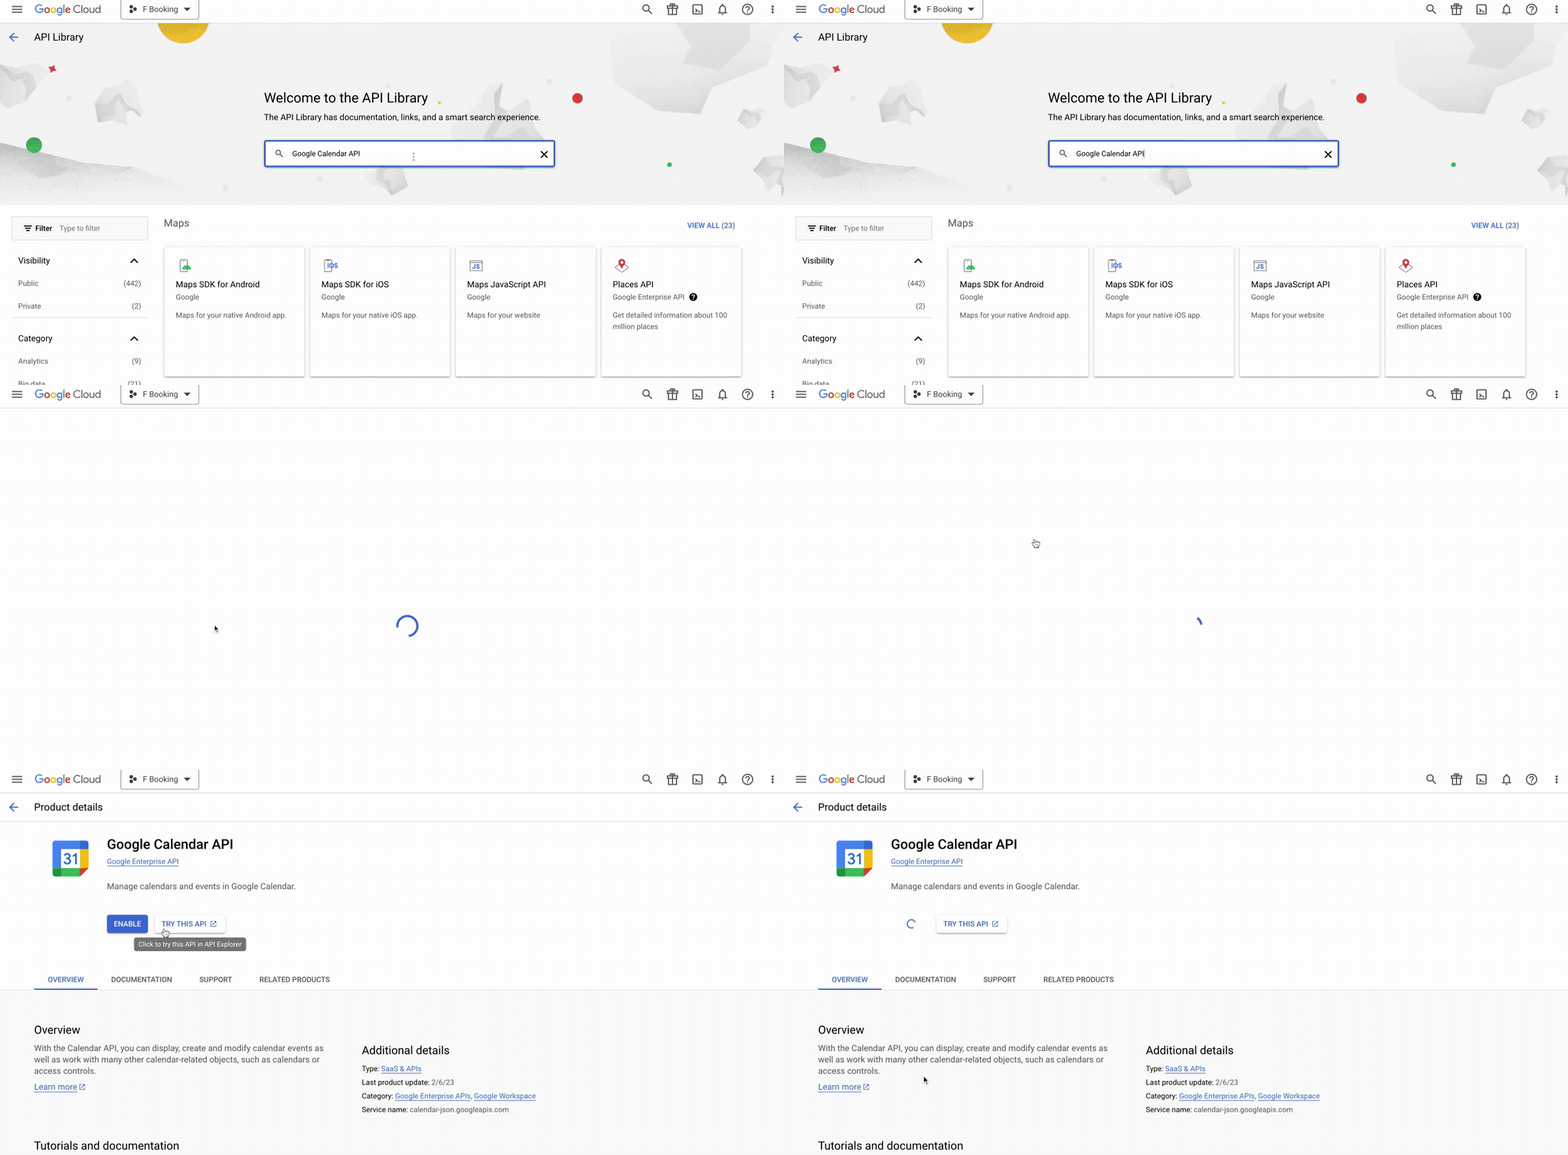
官方文件介面截圖:Enabling Google Calendar API 官方介面截圖 - 到專案中選擇
Create Credentials > OAuth client ID,並建立 Web application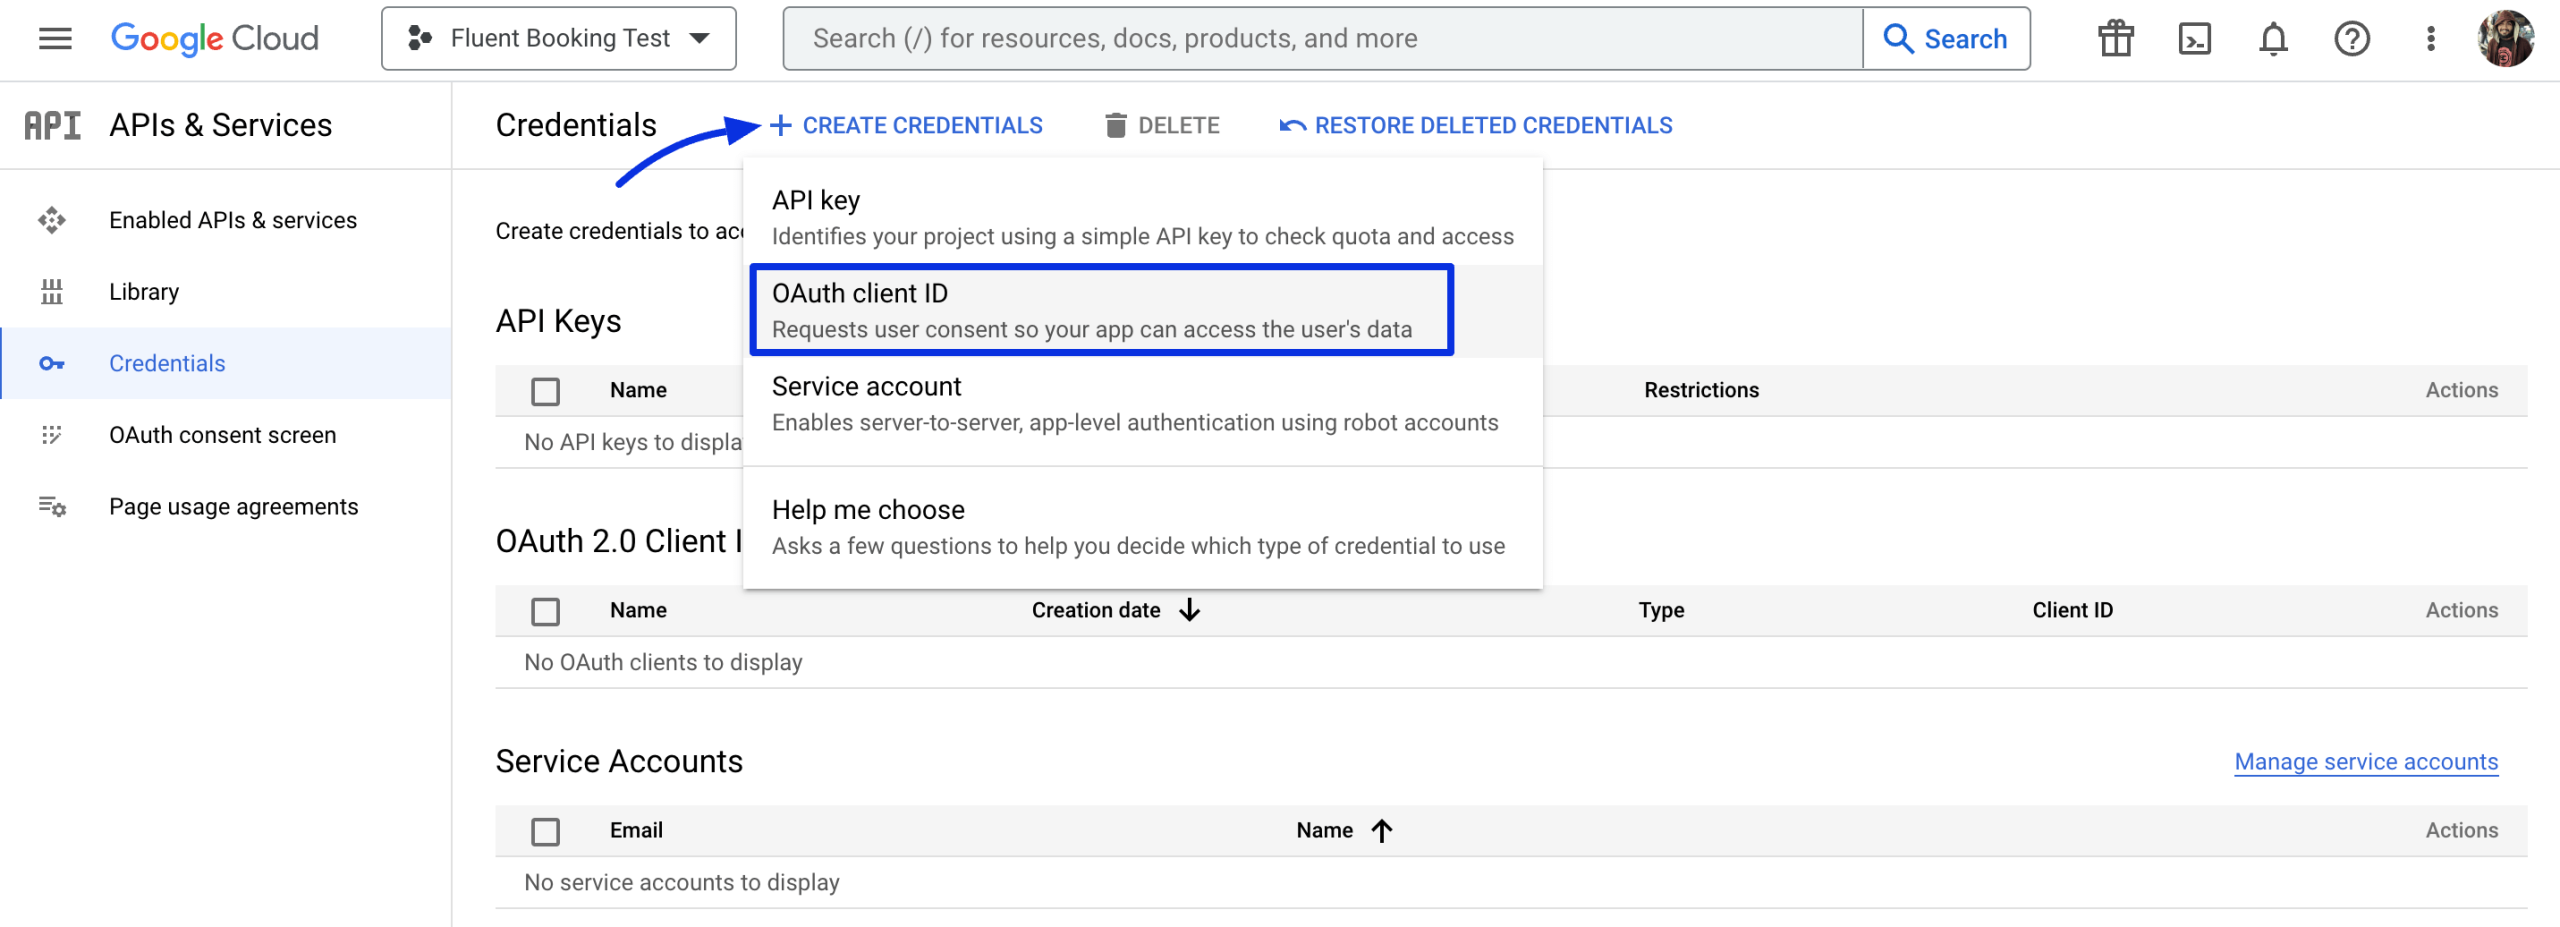
官方文件介面截圖:Create Credentials 官方介面截圖 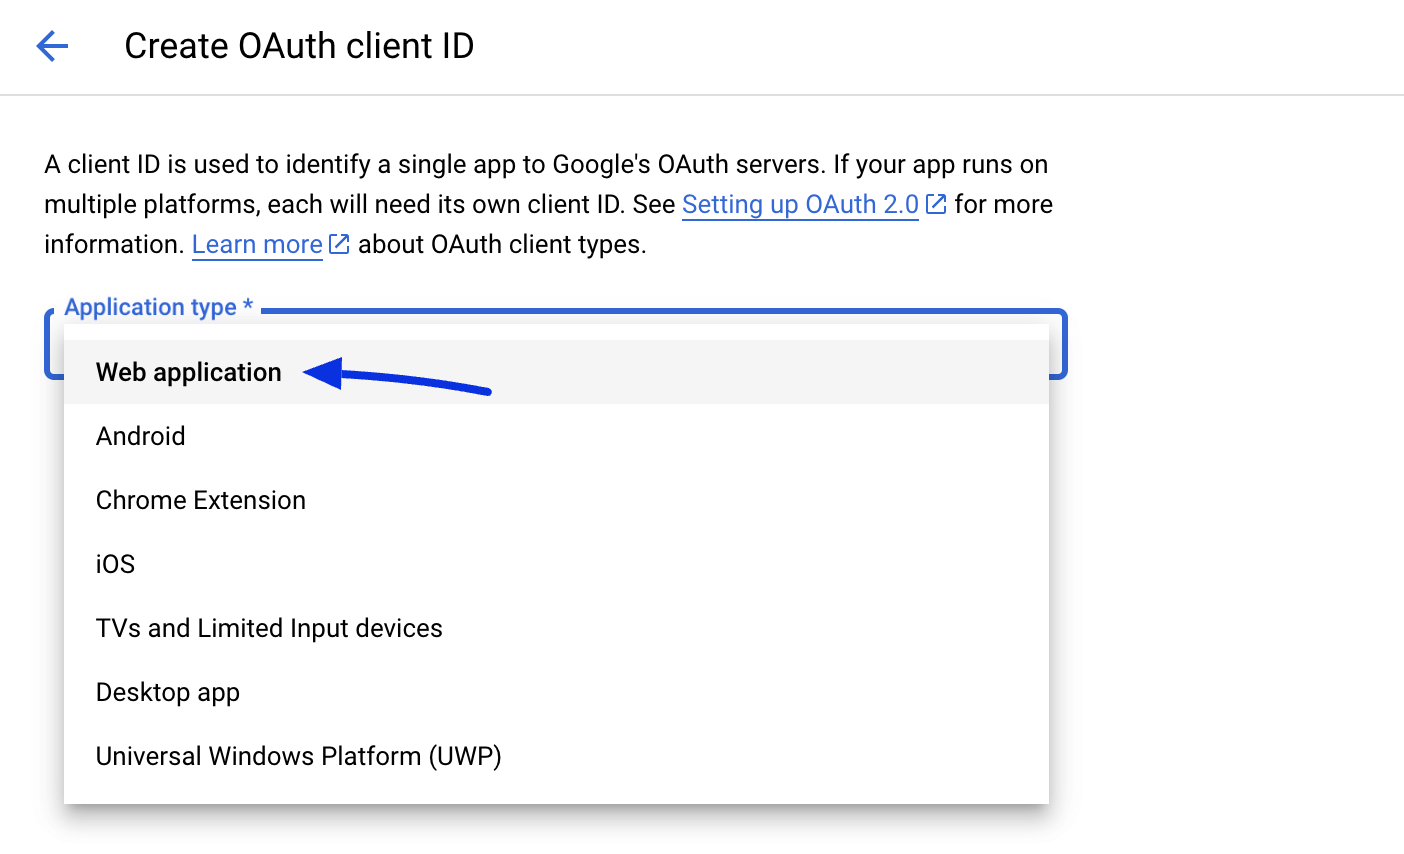
官方文件介面截圖:Create Credentials 官方介面截圖 - 到 FluentBooking 的
Settings > Google Calendar複製 Authorized redirect URL,貼到 Google Cloud Console 的對應欄位後點Create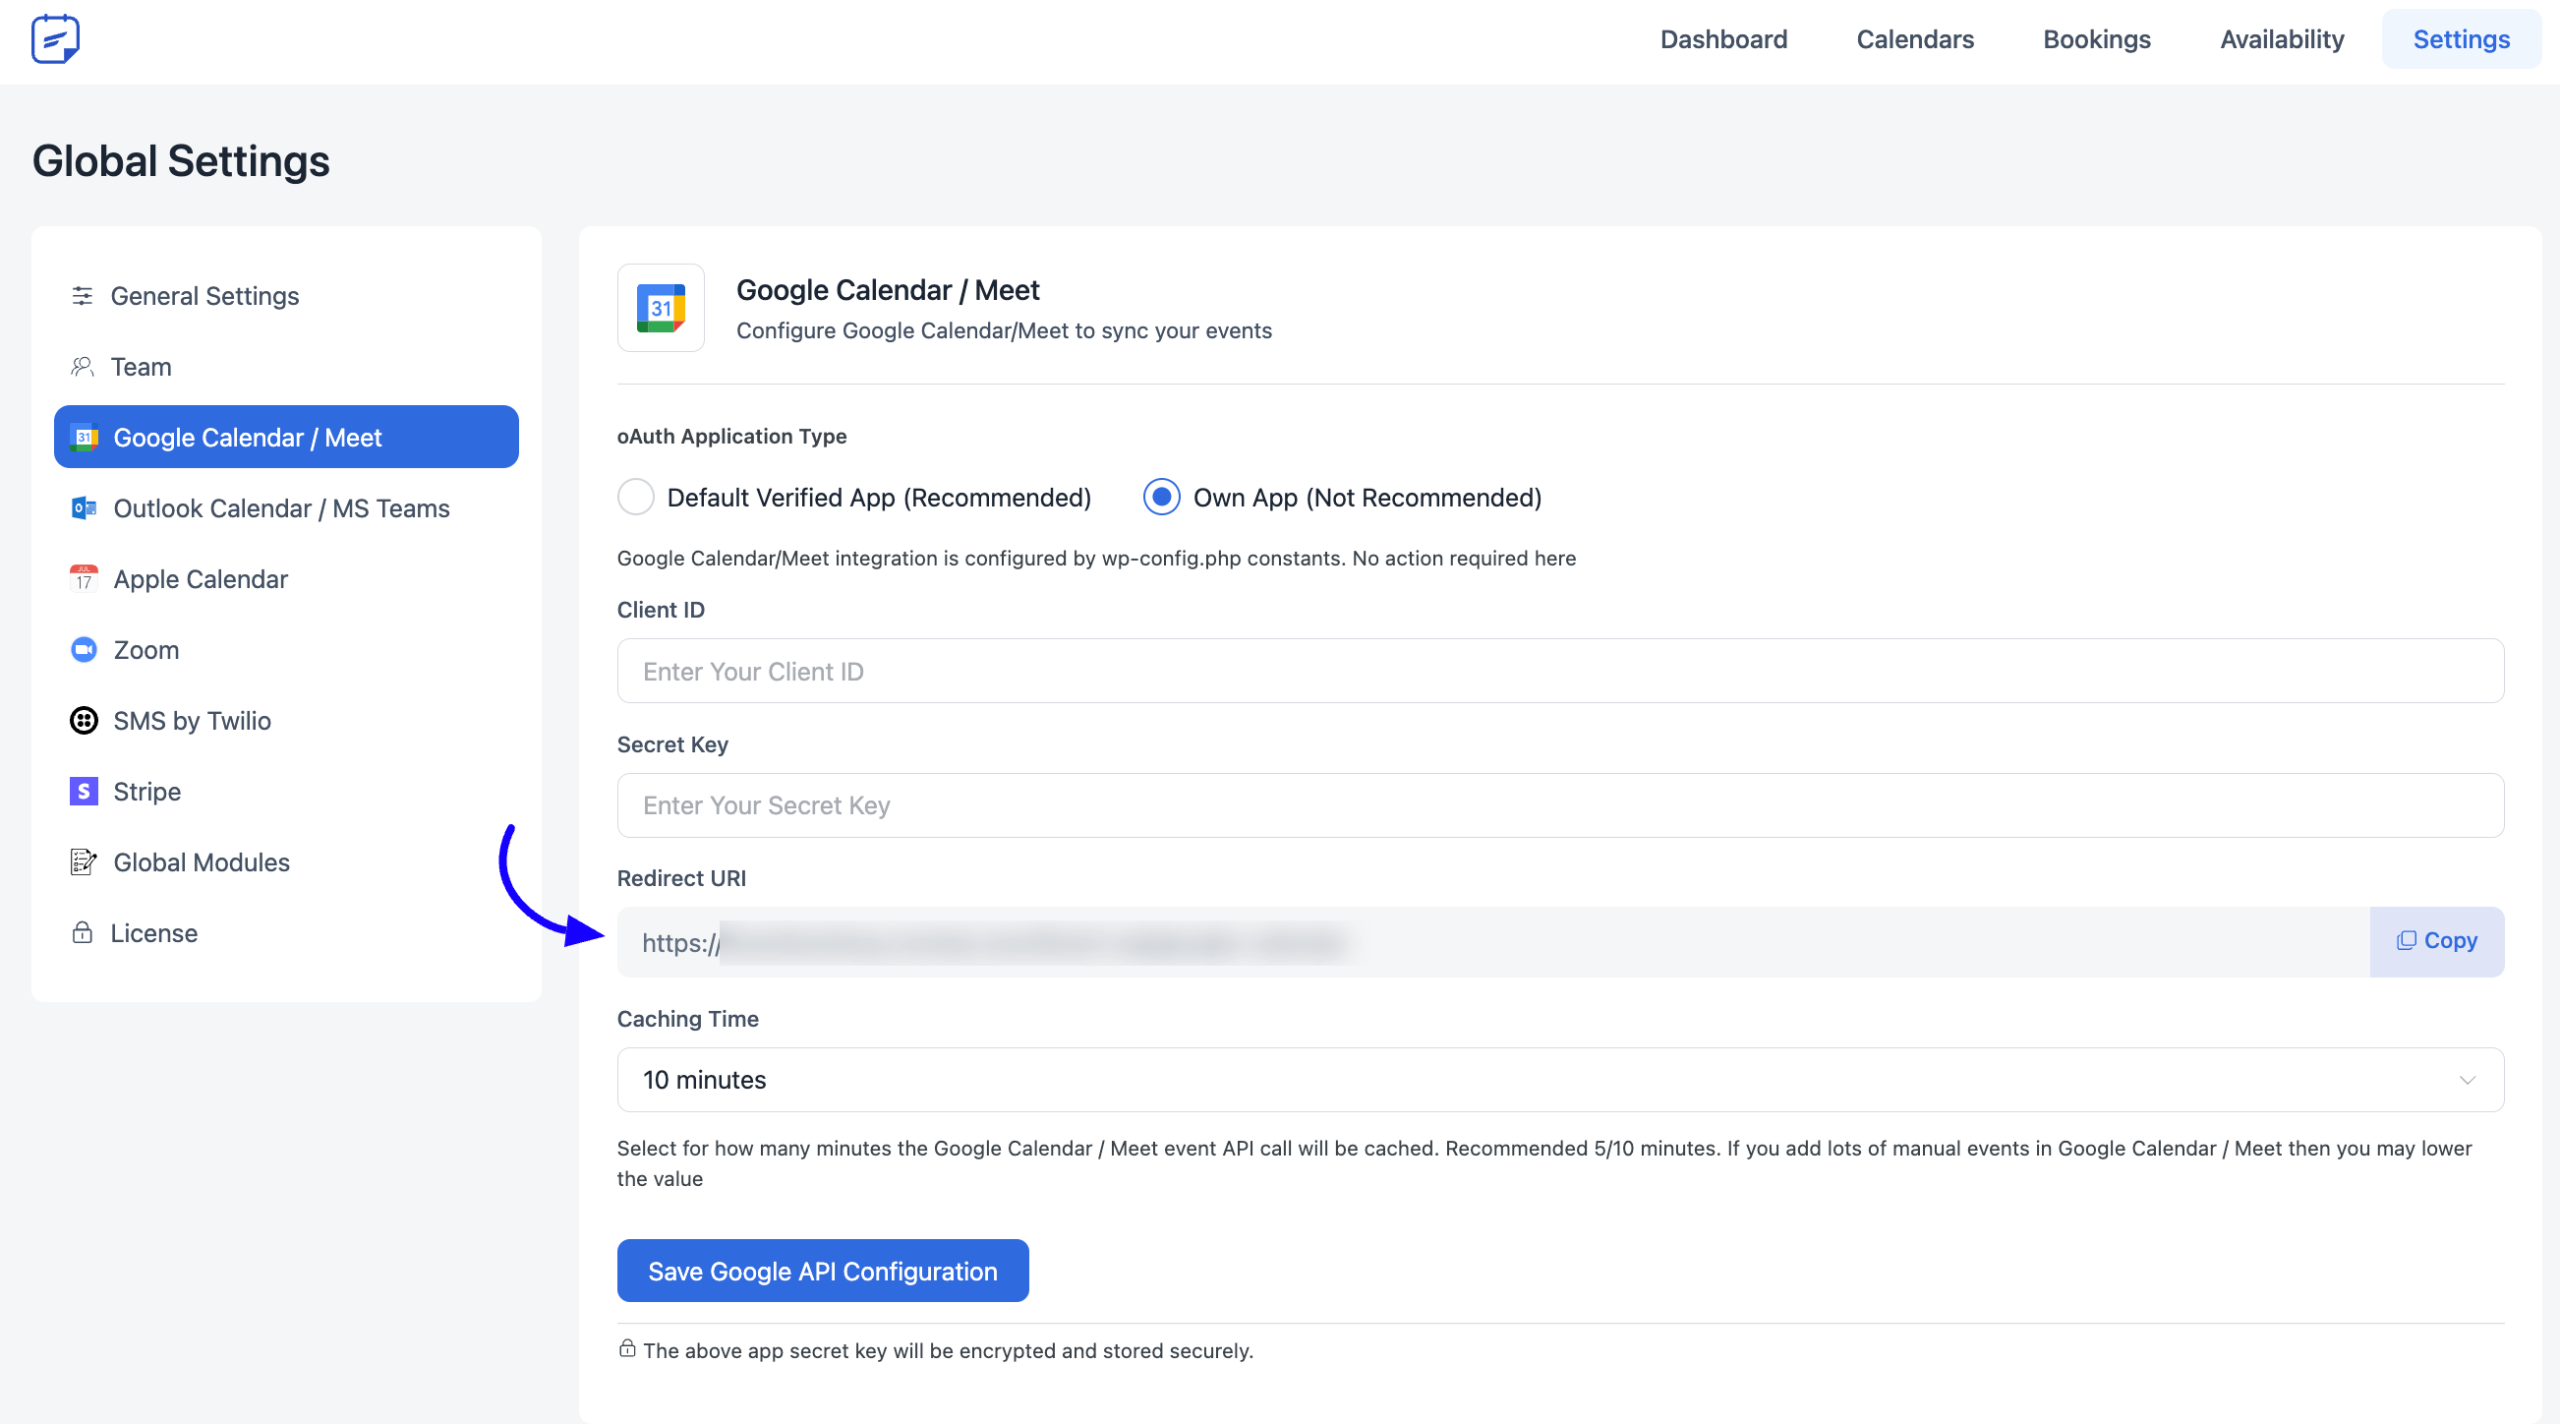
官方文件介面截圖:Create Credentials 官方介面截圖 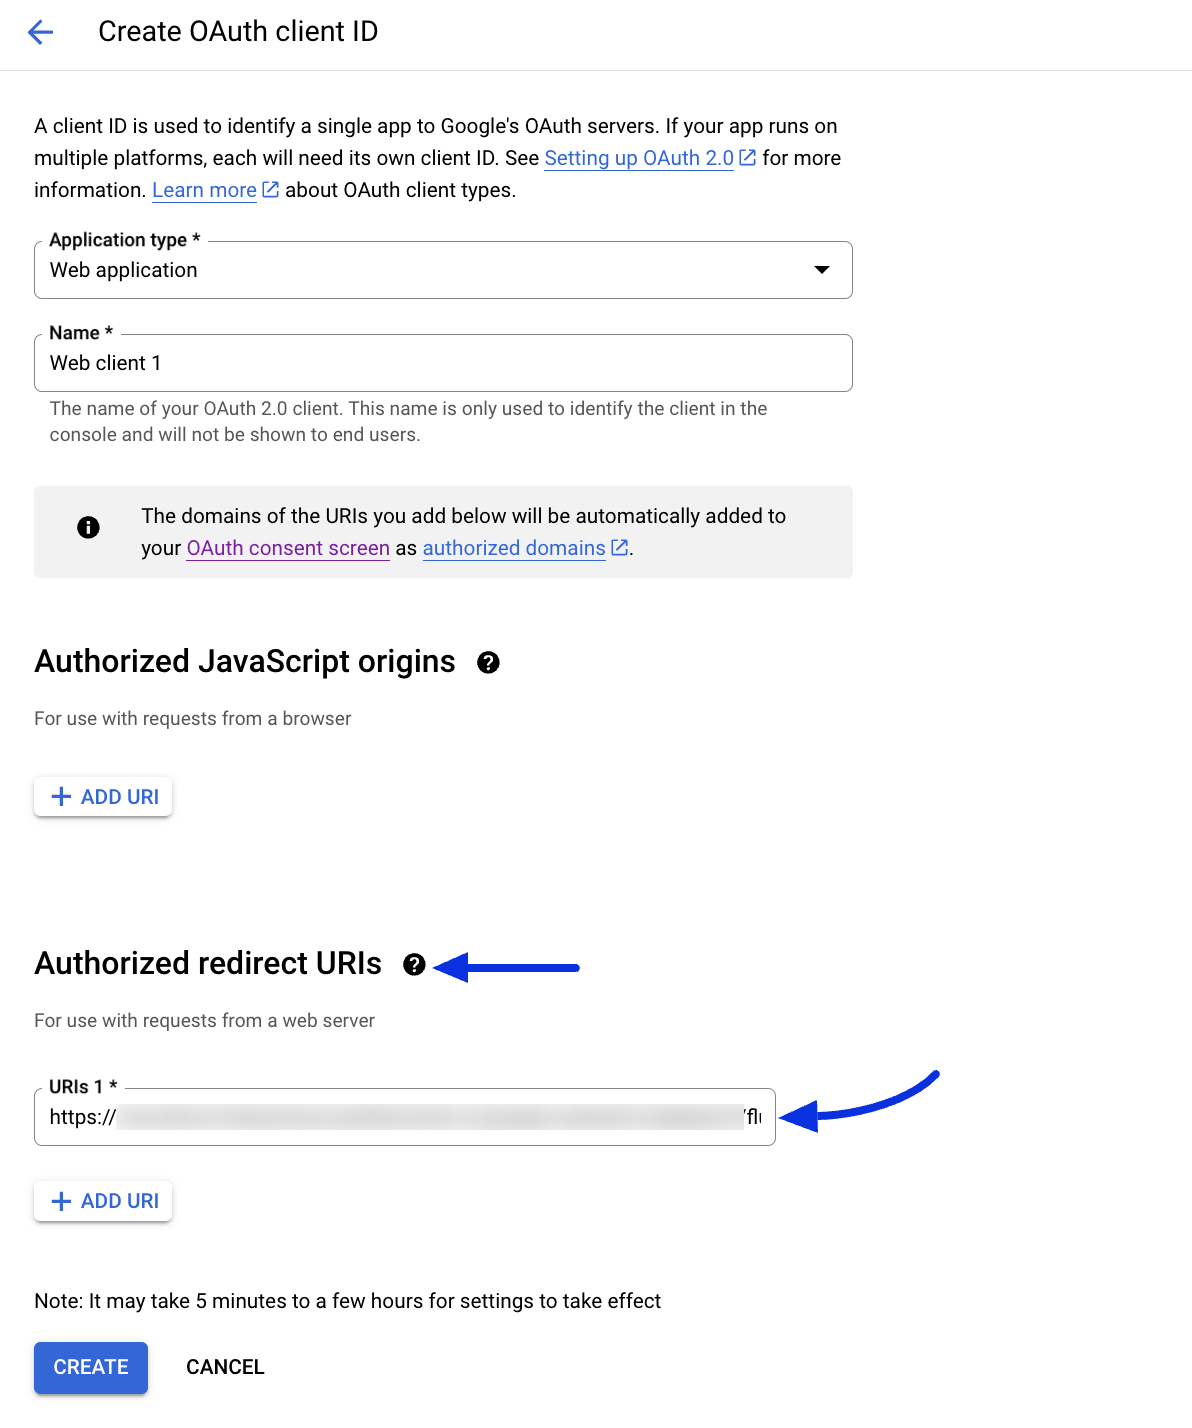
官方文件介面截圖:Create Credentials 官方介面截圖 - 從彈出視窗複製
Client ID與Client Secret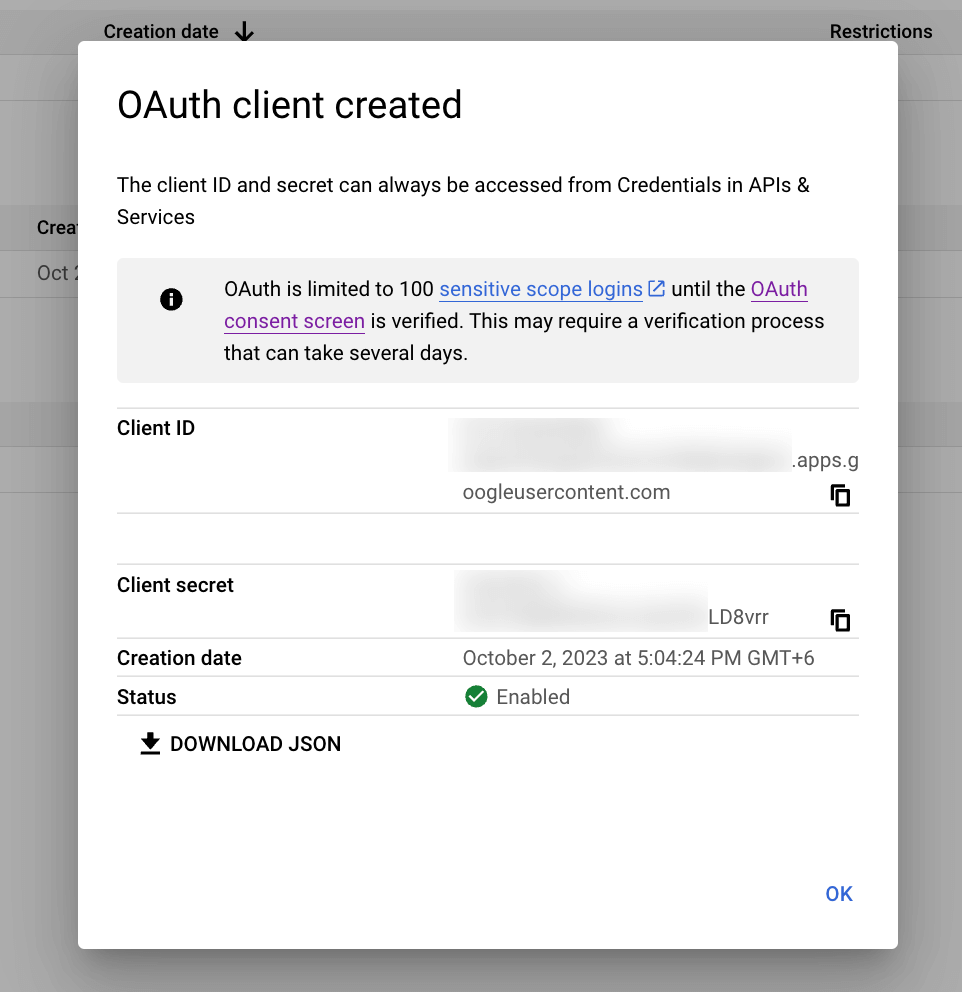
官方文件介面截圖:Create Credentials 官方介面截圖
設定管理員與 Host 的 Google Calendar
必須先在 FluentBooking 新增管理員的 Google Calendar/Meet 帳號才能使用整合功能
每個 host 新增 Google 帳號時不需重新設定 OAuth Credentials,且 host 可新增多個 Google 帳號
- 到
Settings > Google Calendar貼上 Client ID 與 Client Secret,點選Save Google API Configuration按鈕
官方文件介面截圖:Configuring Admin Google Calendar 官方介面截圖 - 到
Calenders > Host Settings > Remote Calendars點選Connect with Google Calendar/Meet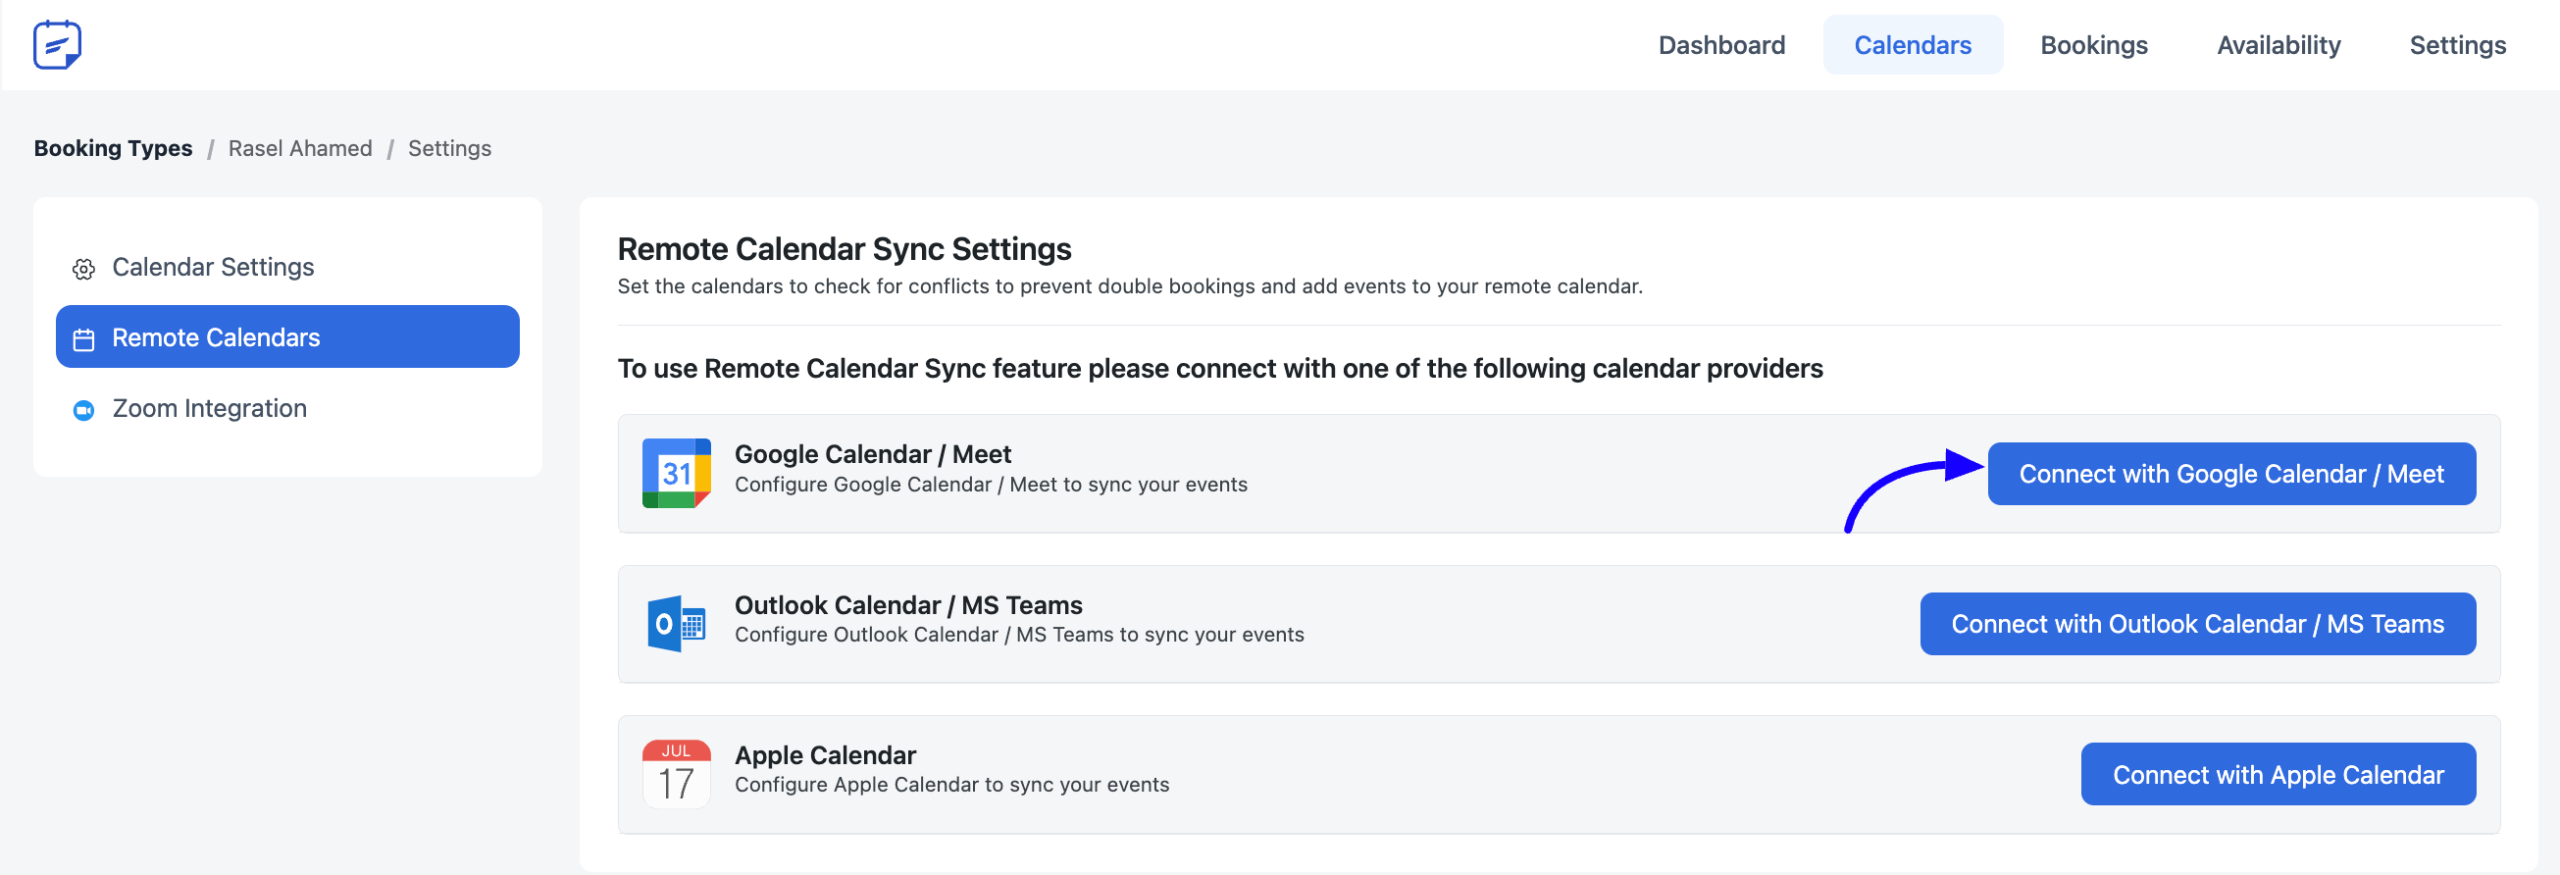
官方文件介面截圖:Configuring Host Google Calendar 官方介面截圖 - 登入或選擇要同步的 Google 帳號

官方文件介面截圖:Configuring Host Google Calendar 官方介面截圖 - 若出現「Google hasn’t verified this app」警告,點選
Advanced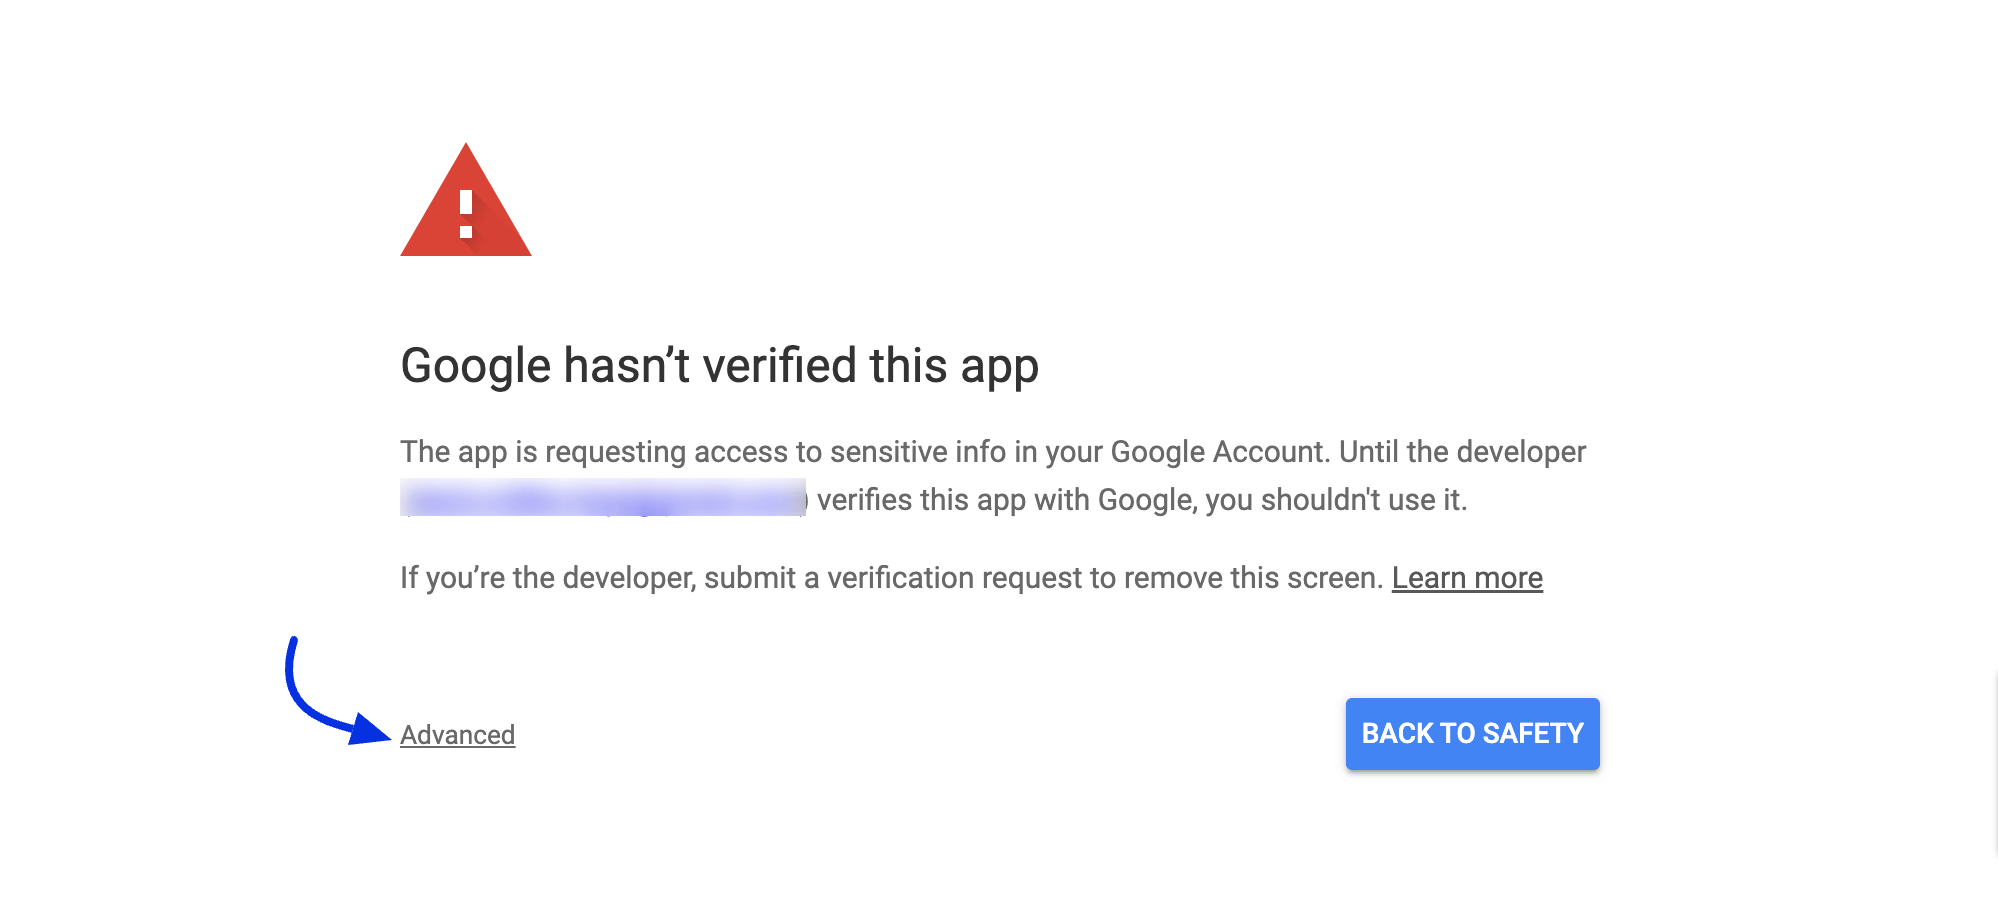
官方文件介面截圖:Configuring Host Google Calendar 官方介面截圖 - 點選「Go to {yourWebsite.com}」繼續下一步
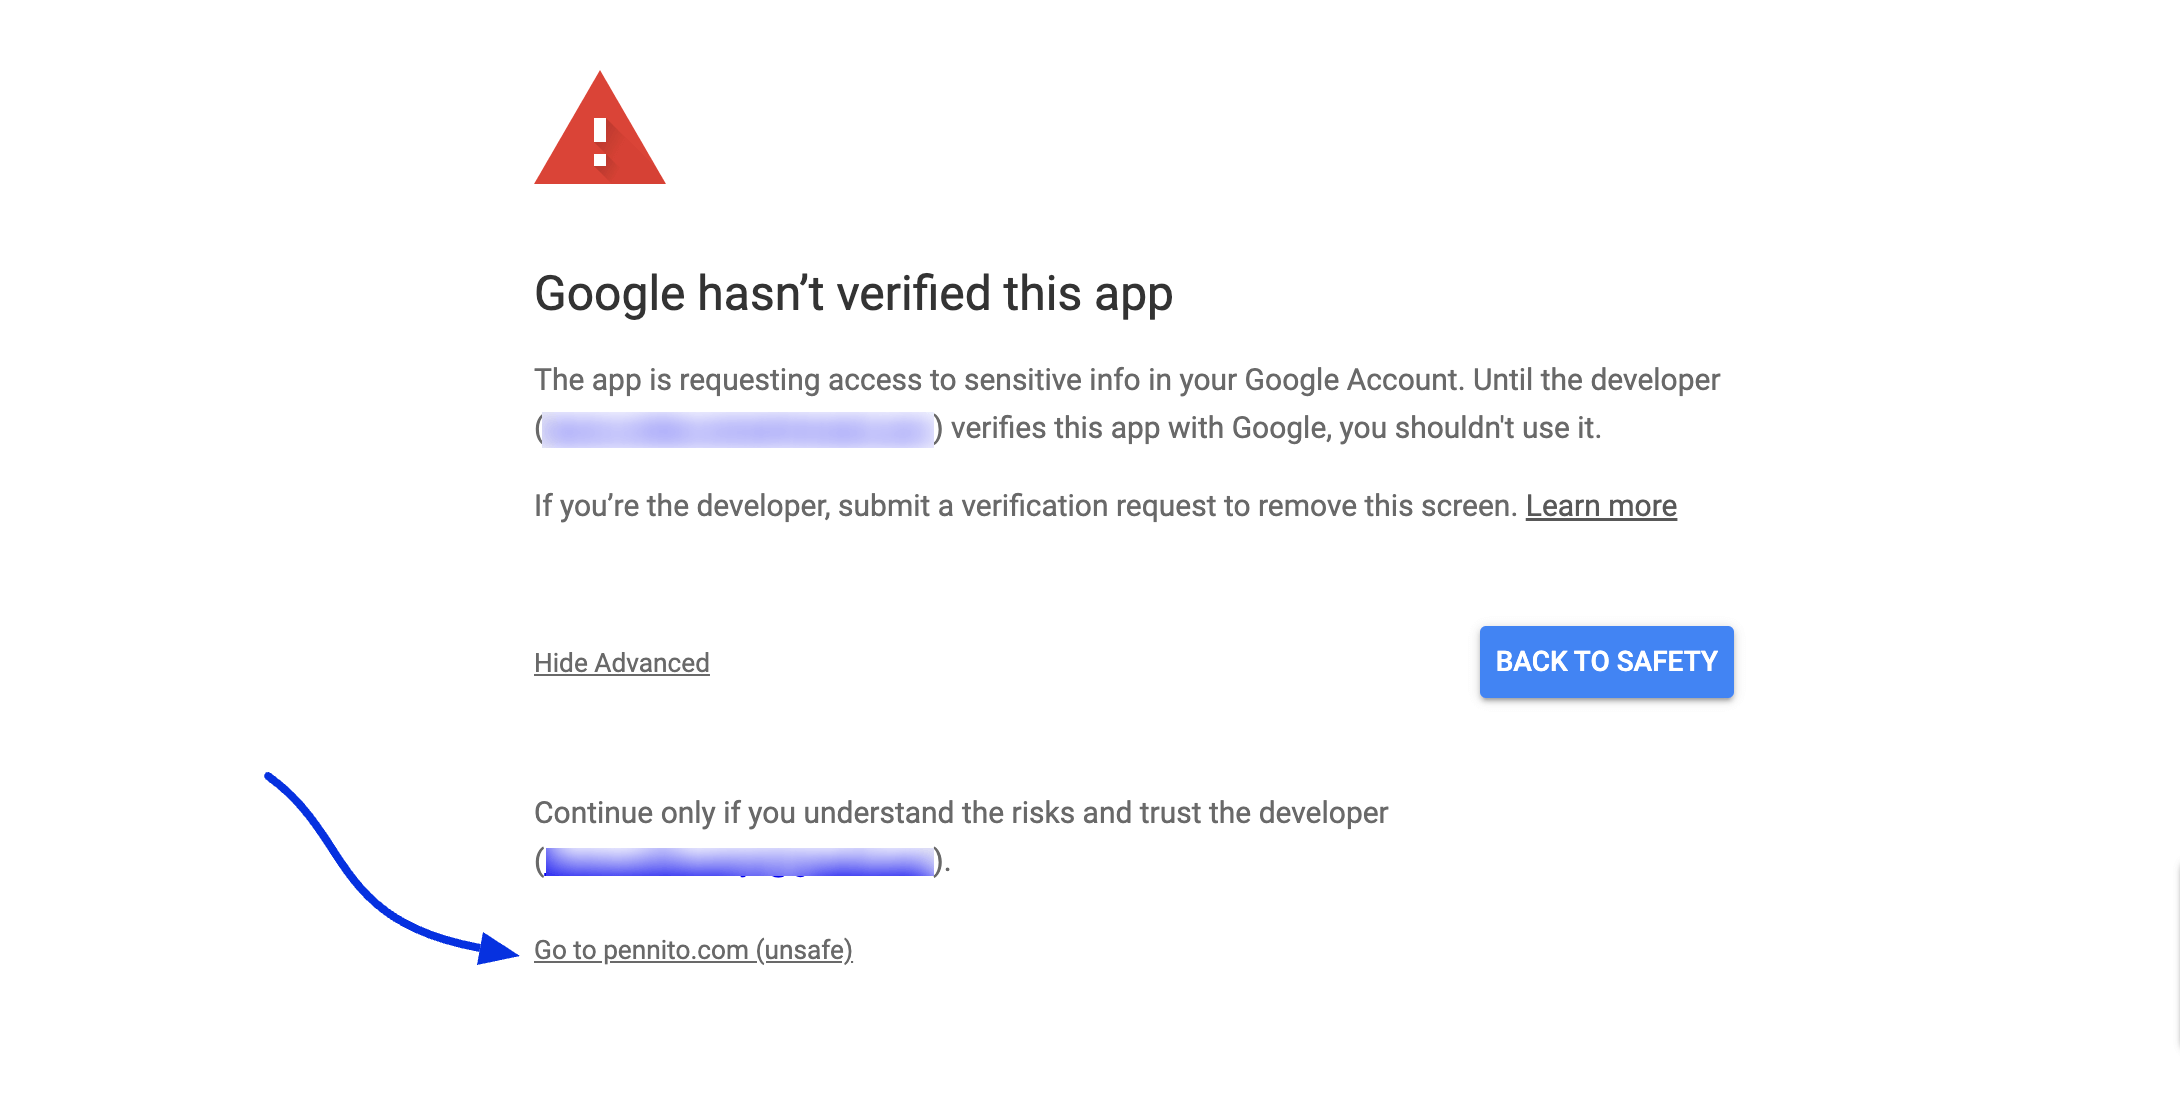
官方文件介面截圖:Configuring Host Google Calendar 官方介面截圖 - 勾選所有核取方塊後點選
Continue完成授權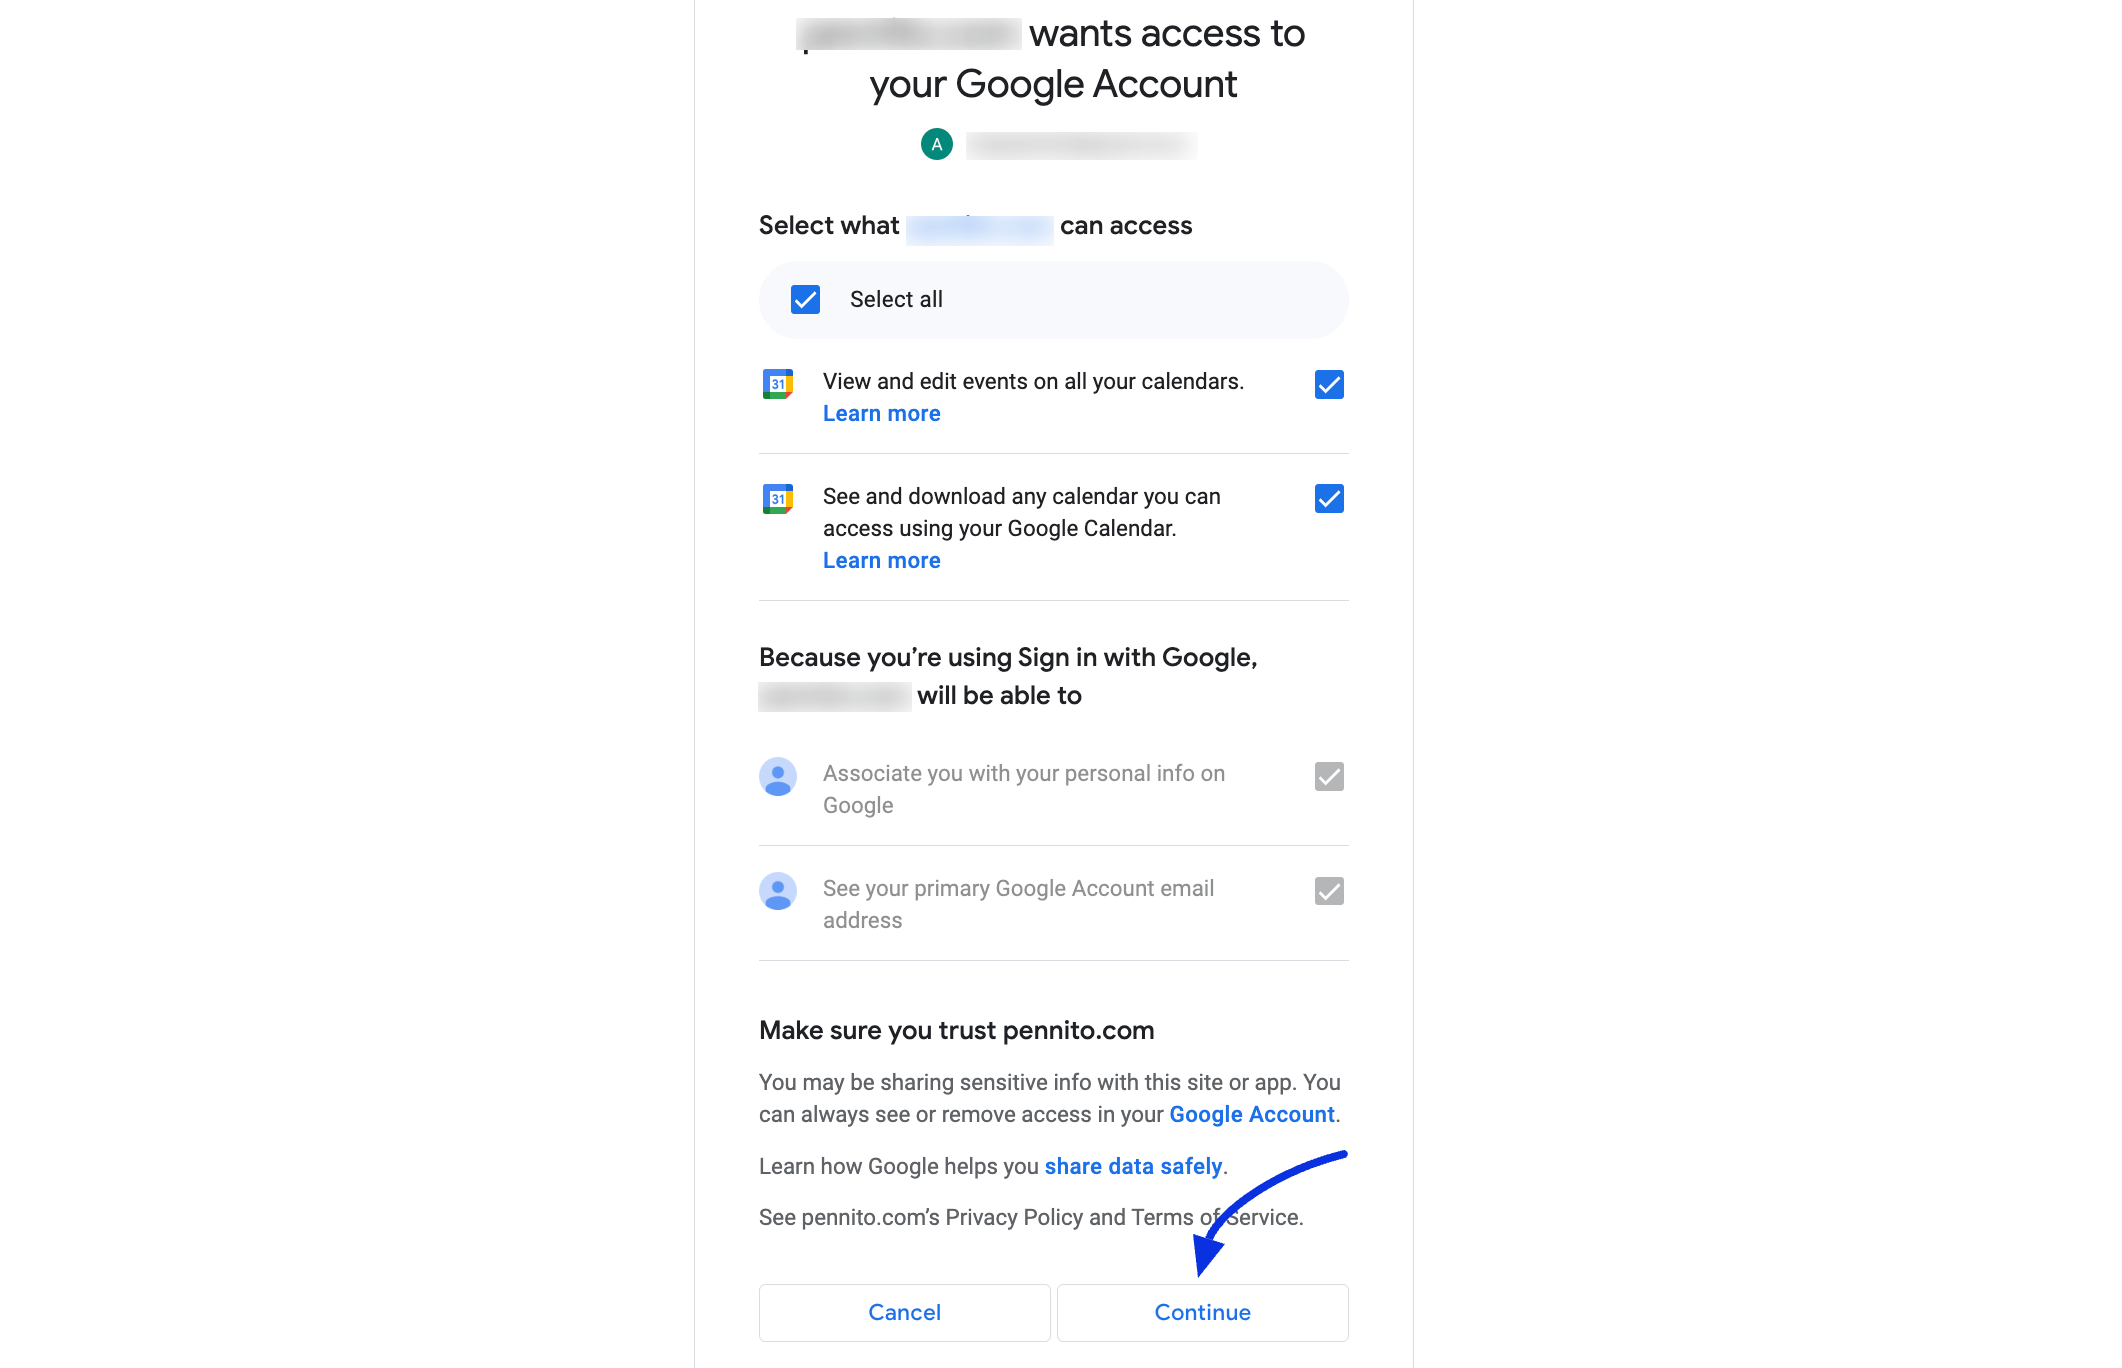
官方文件介面截圖:Configuring Host Google Calendar 官方介面截圖 - 選取
Remote Calendar並啟用它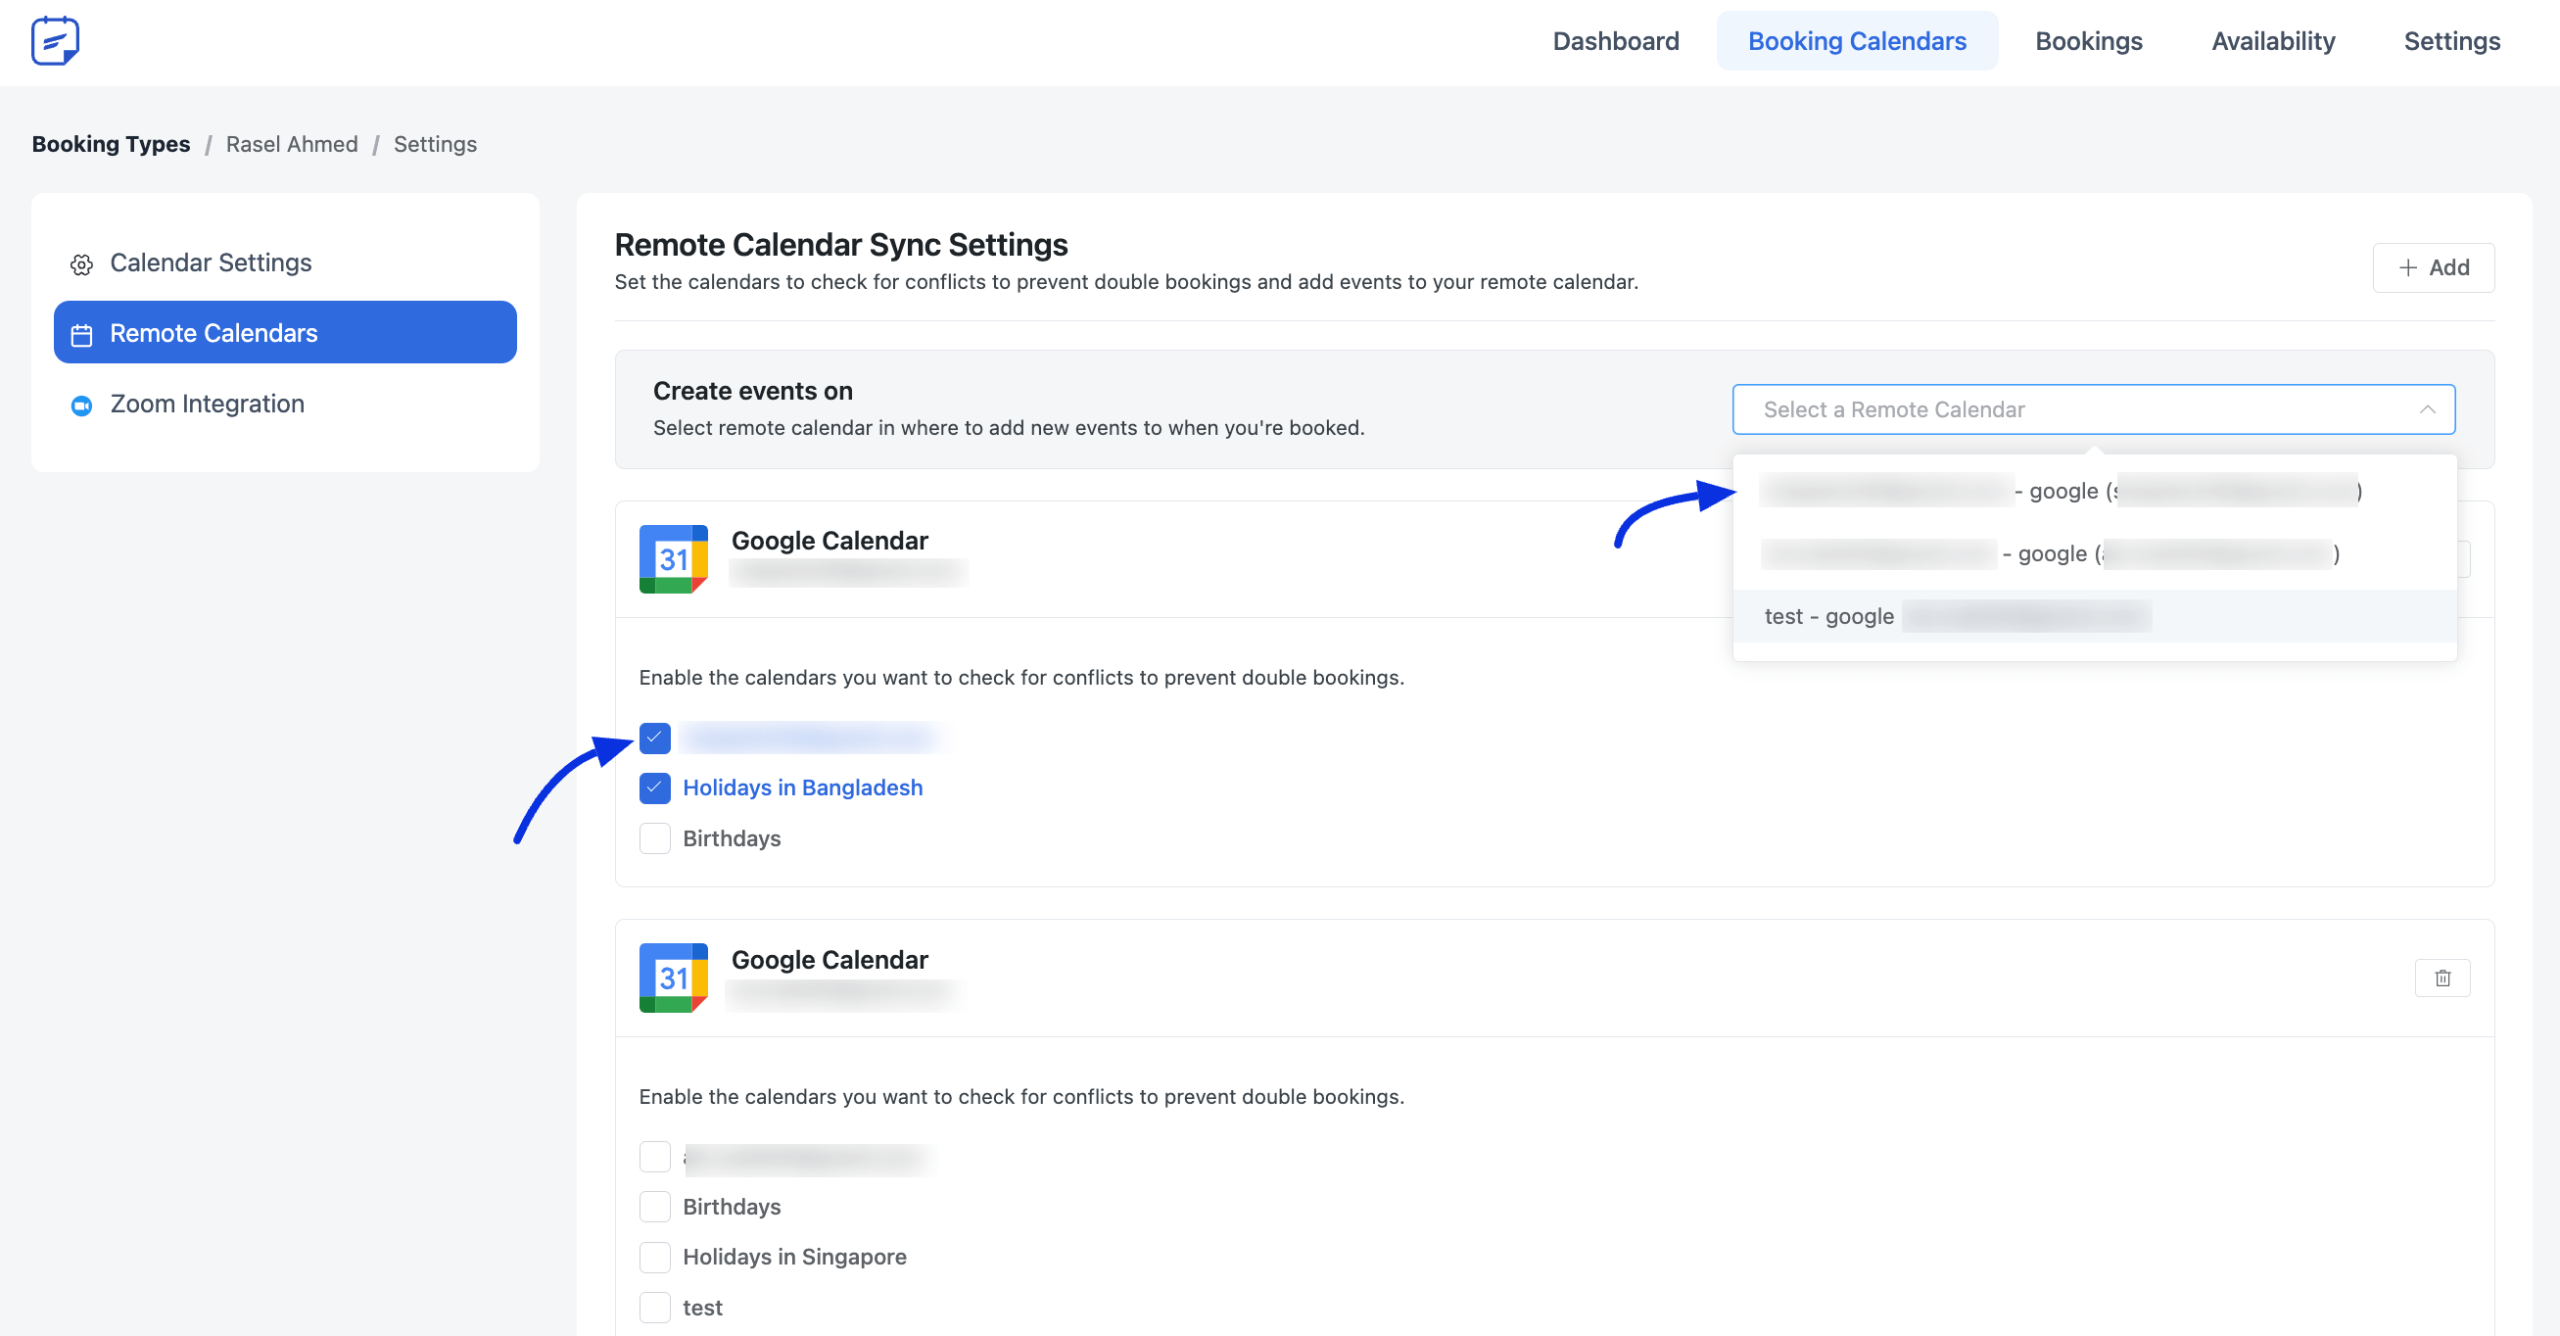
官方文件介面截圖:Configuring Host Google Calendar 官方介面截圖 - 完成後開啟 Google Calendar,確認 FluentBooking 的預約已同步為日曆事件,並核對活動時間與受邀者資料
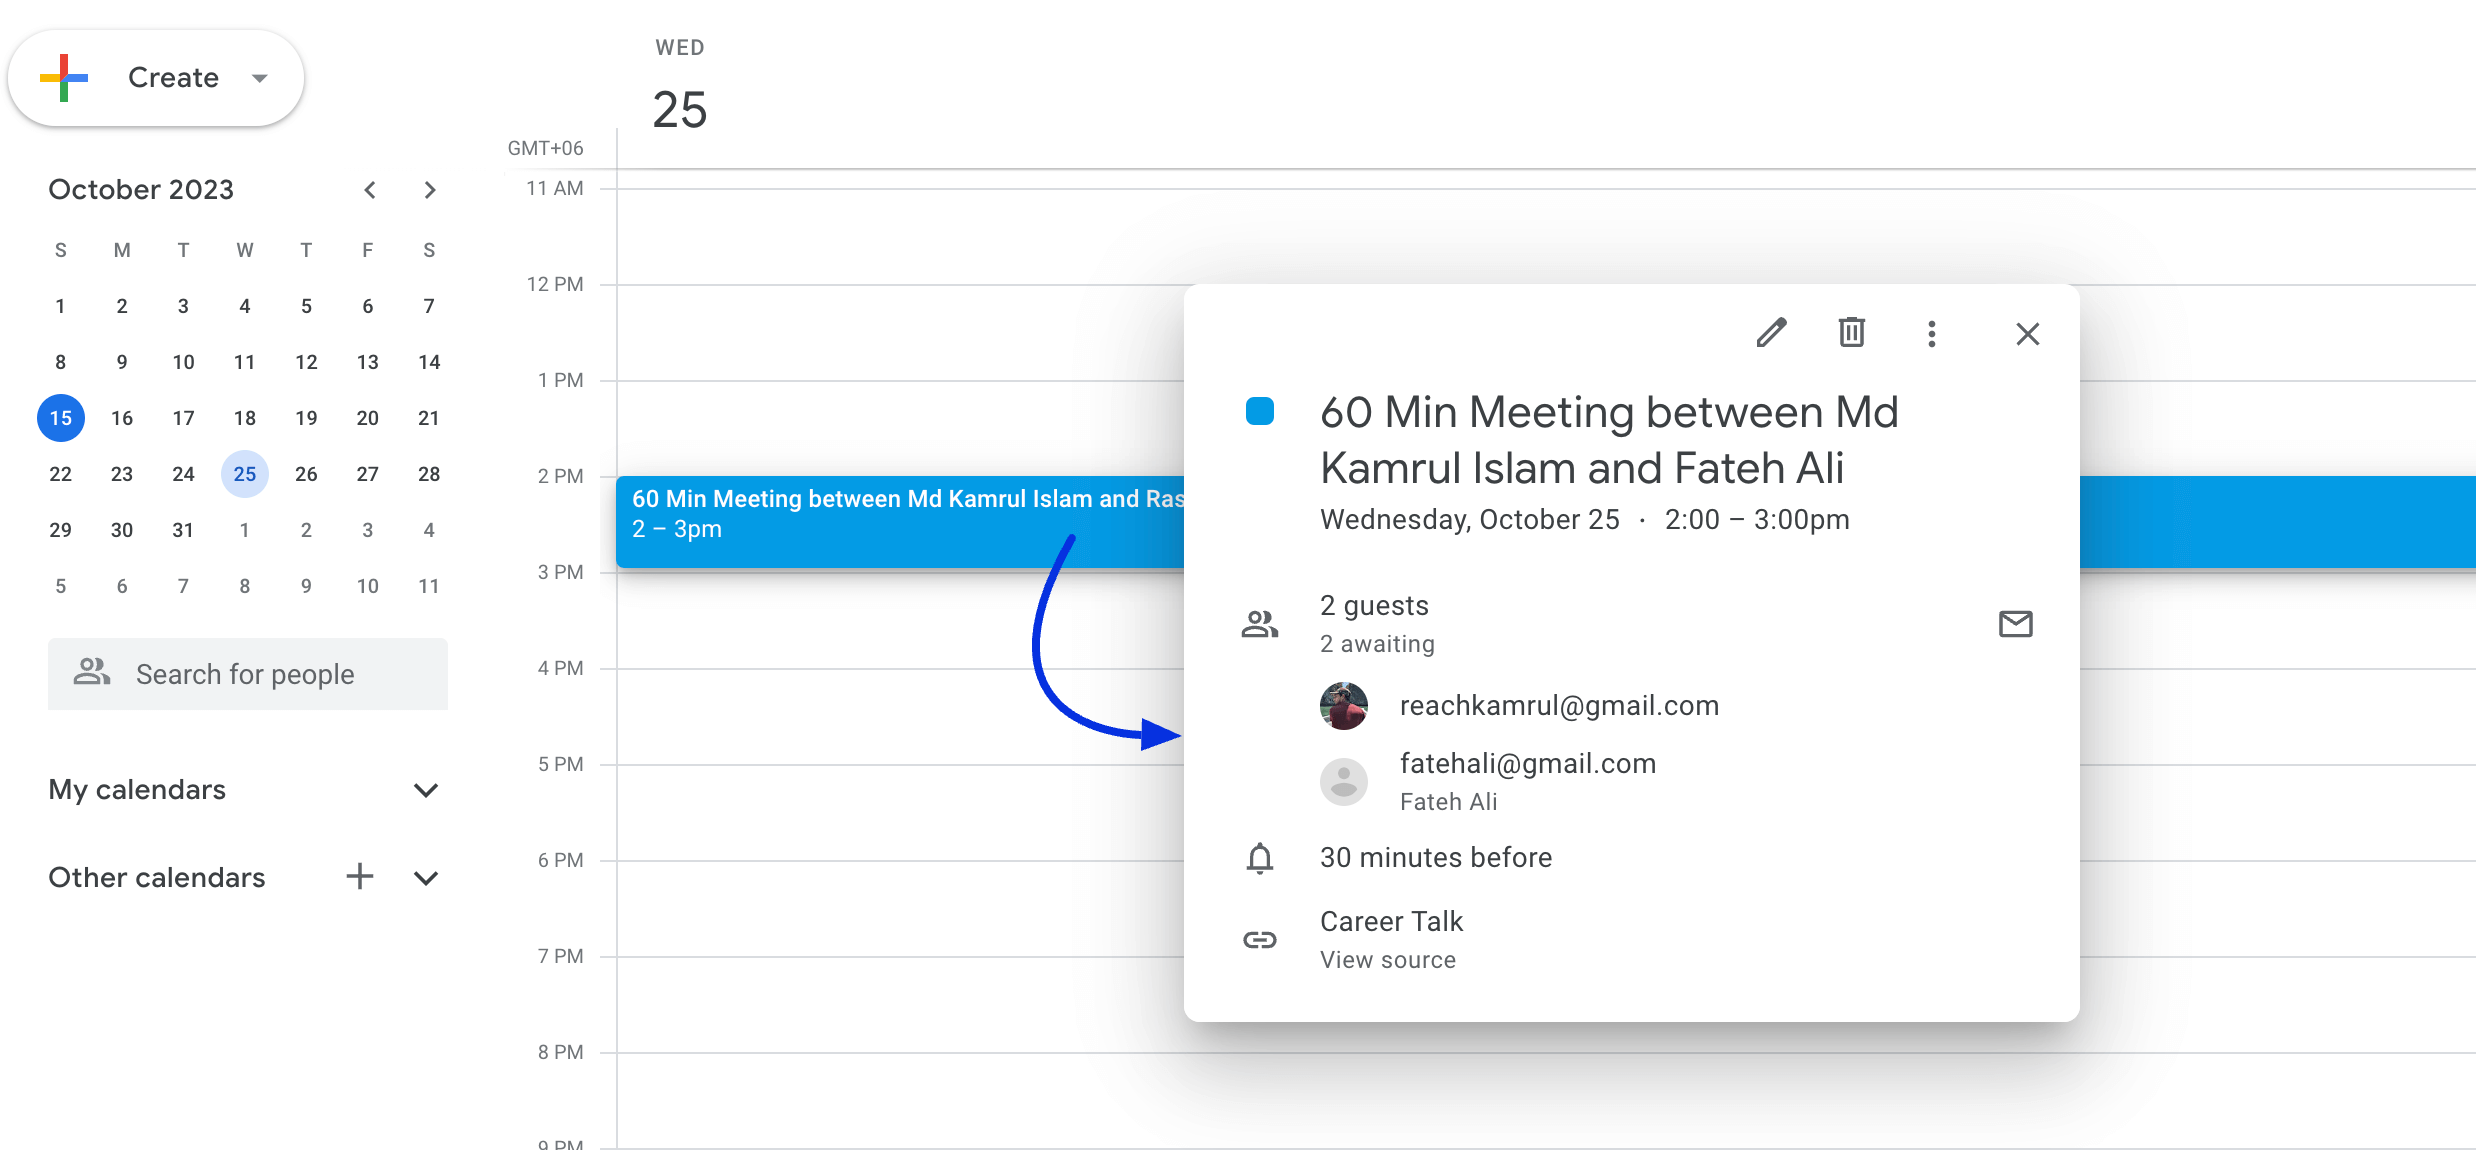
官方文件介面截圖:Configuring Host Google Calendar 官方介面截圖
介面名稱對照
Default Verified App:FluentBooking 官方提供的預先驗證應用程式,可直接用來串接 Google Calendar,無需自行申請憑證Remote Calendar:host 設定中用來連接與管理外部 Google 日曆同步的區塊OAuth consent screen:在 Google Cloud Console 中設定應用程式對外授權畫面的頁面Client ID / Client Secret:自建 Google App 後取得的驗證憑證,需貼入 FluentBooking 設定中完成串接